How to install Shutters
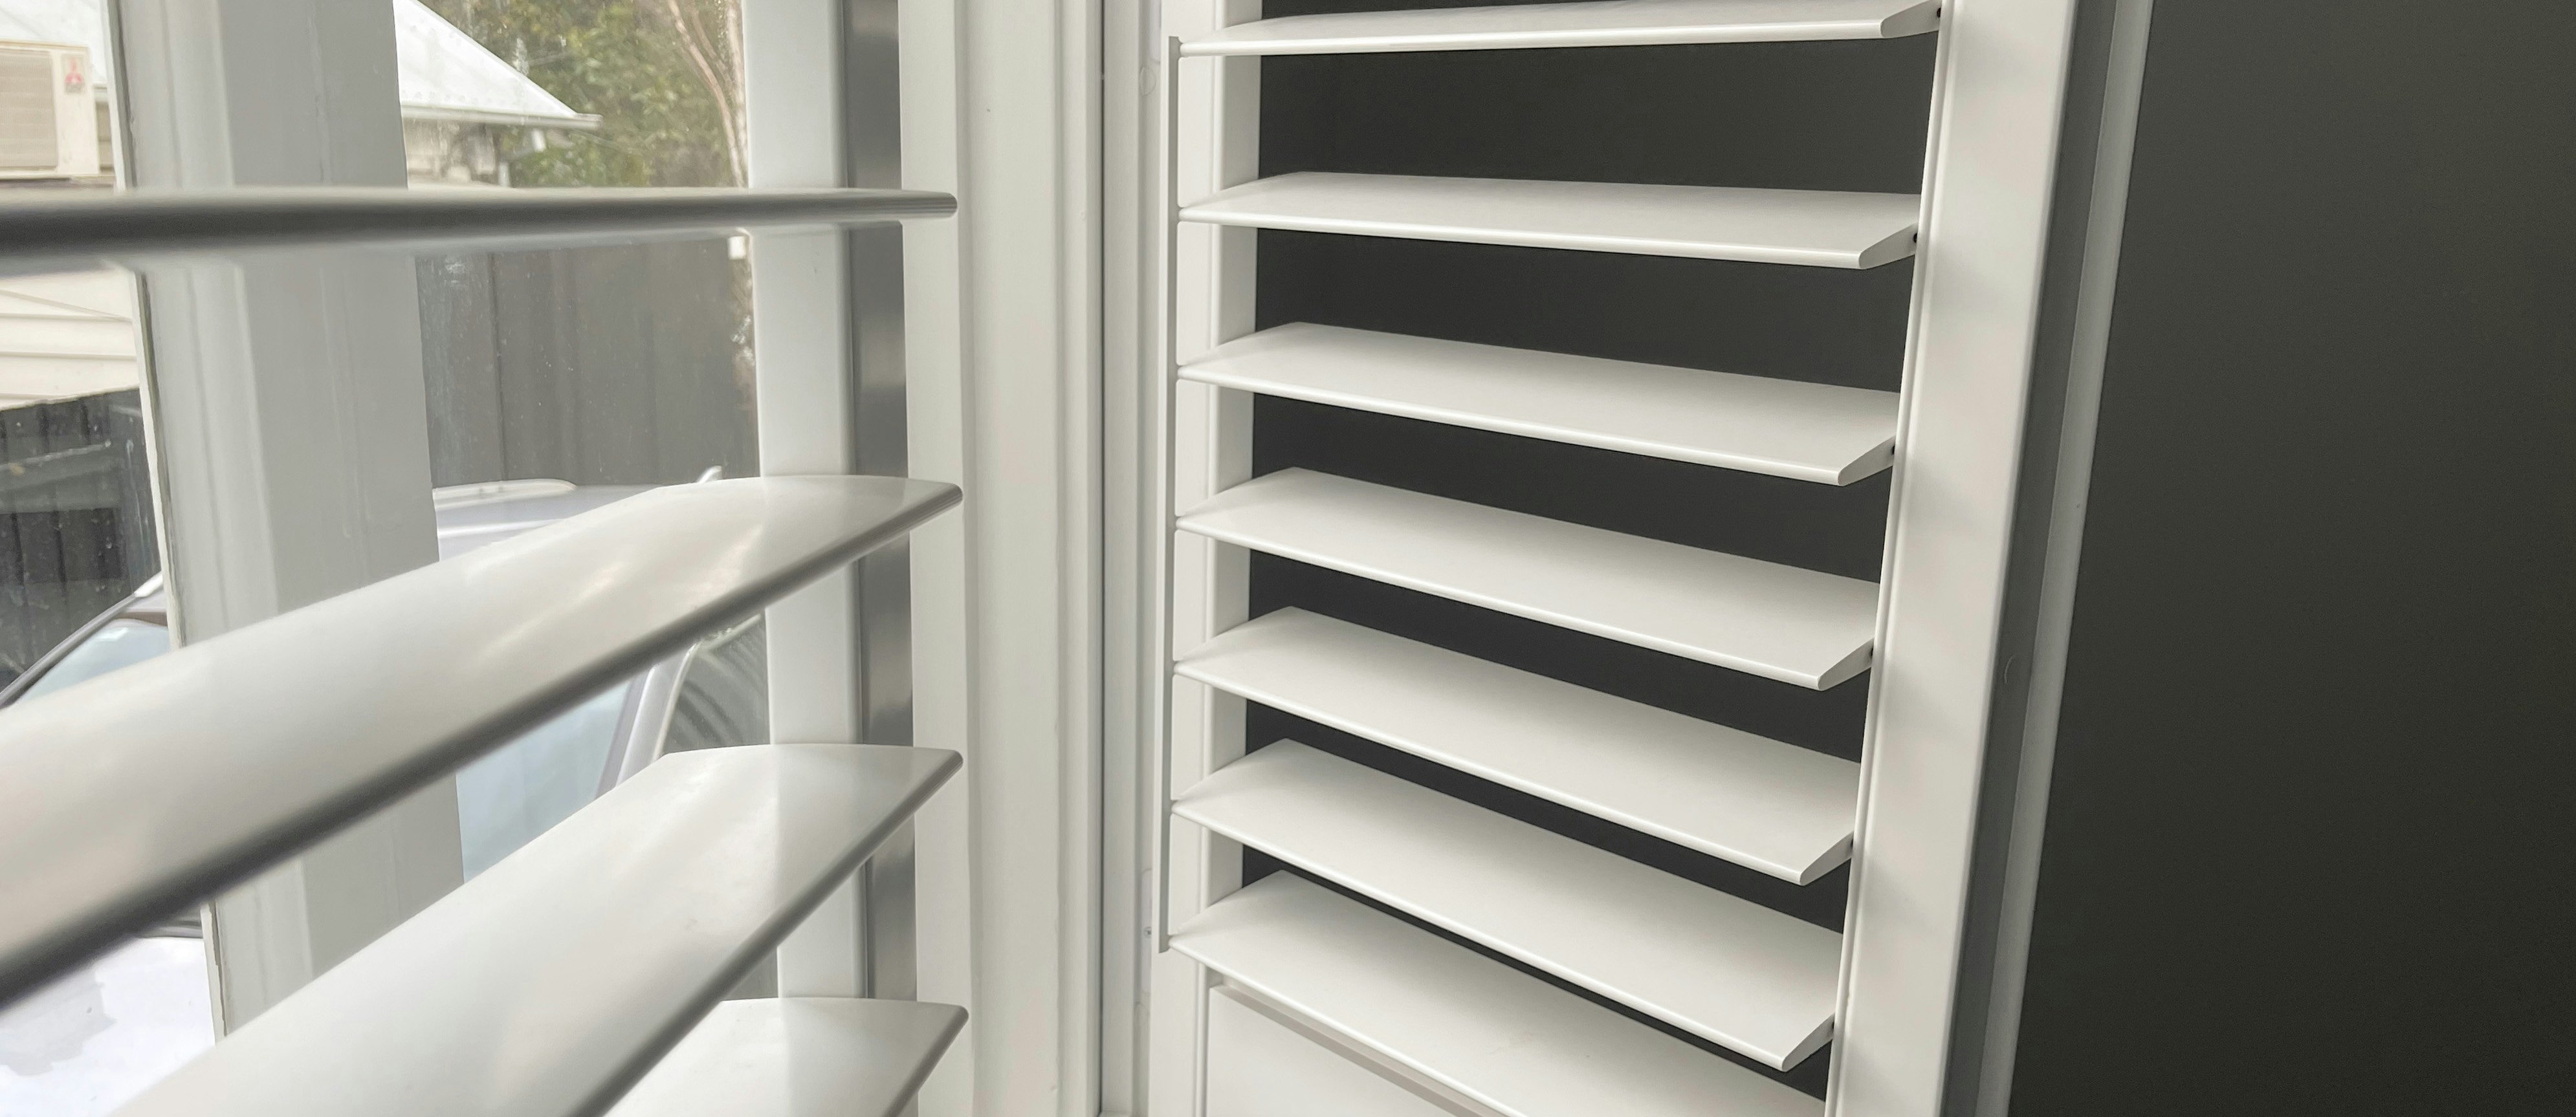
1 - Getting Started
Shutters are a sturdy and versatile product with wide range of light control. Not only that, but a breeze to install.
Unpack your boxes, remove the outer plastic wrapping. Get all your parts organised into panels & frames (is applicable) and be sure to keep the soft foam wrapping attached to your pieces to prevent any pre-intallation marks and scratches.
- 1 to 2 people
- A metal tape measure
- A pencil
- Step Ladder
- Drill with phillips head drill bit
- 3mm drill bit for pilot holes
10-15 mins
2 - Your fitting
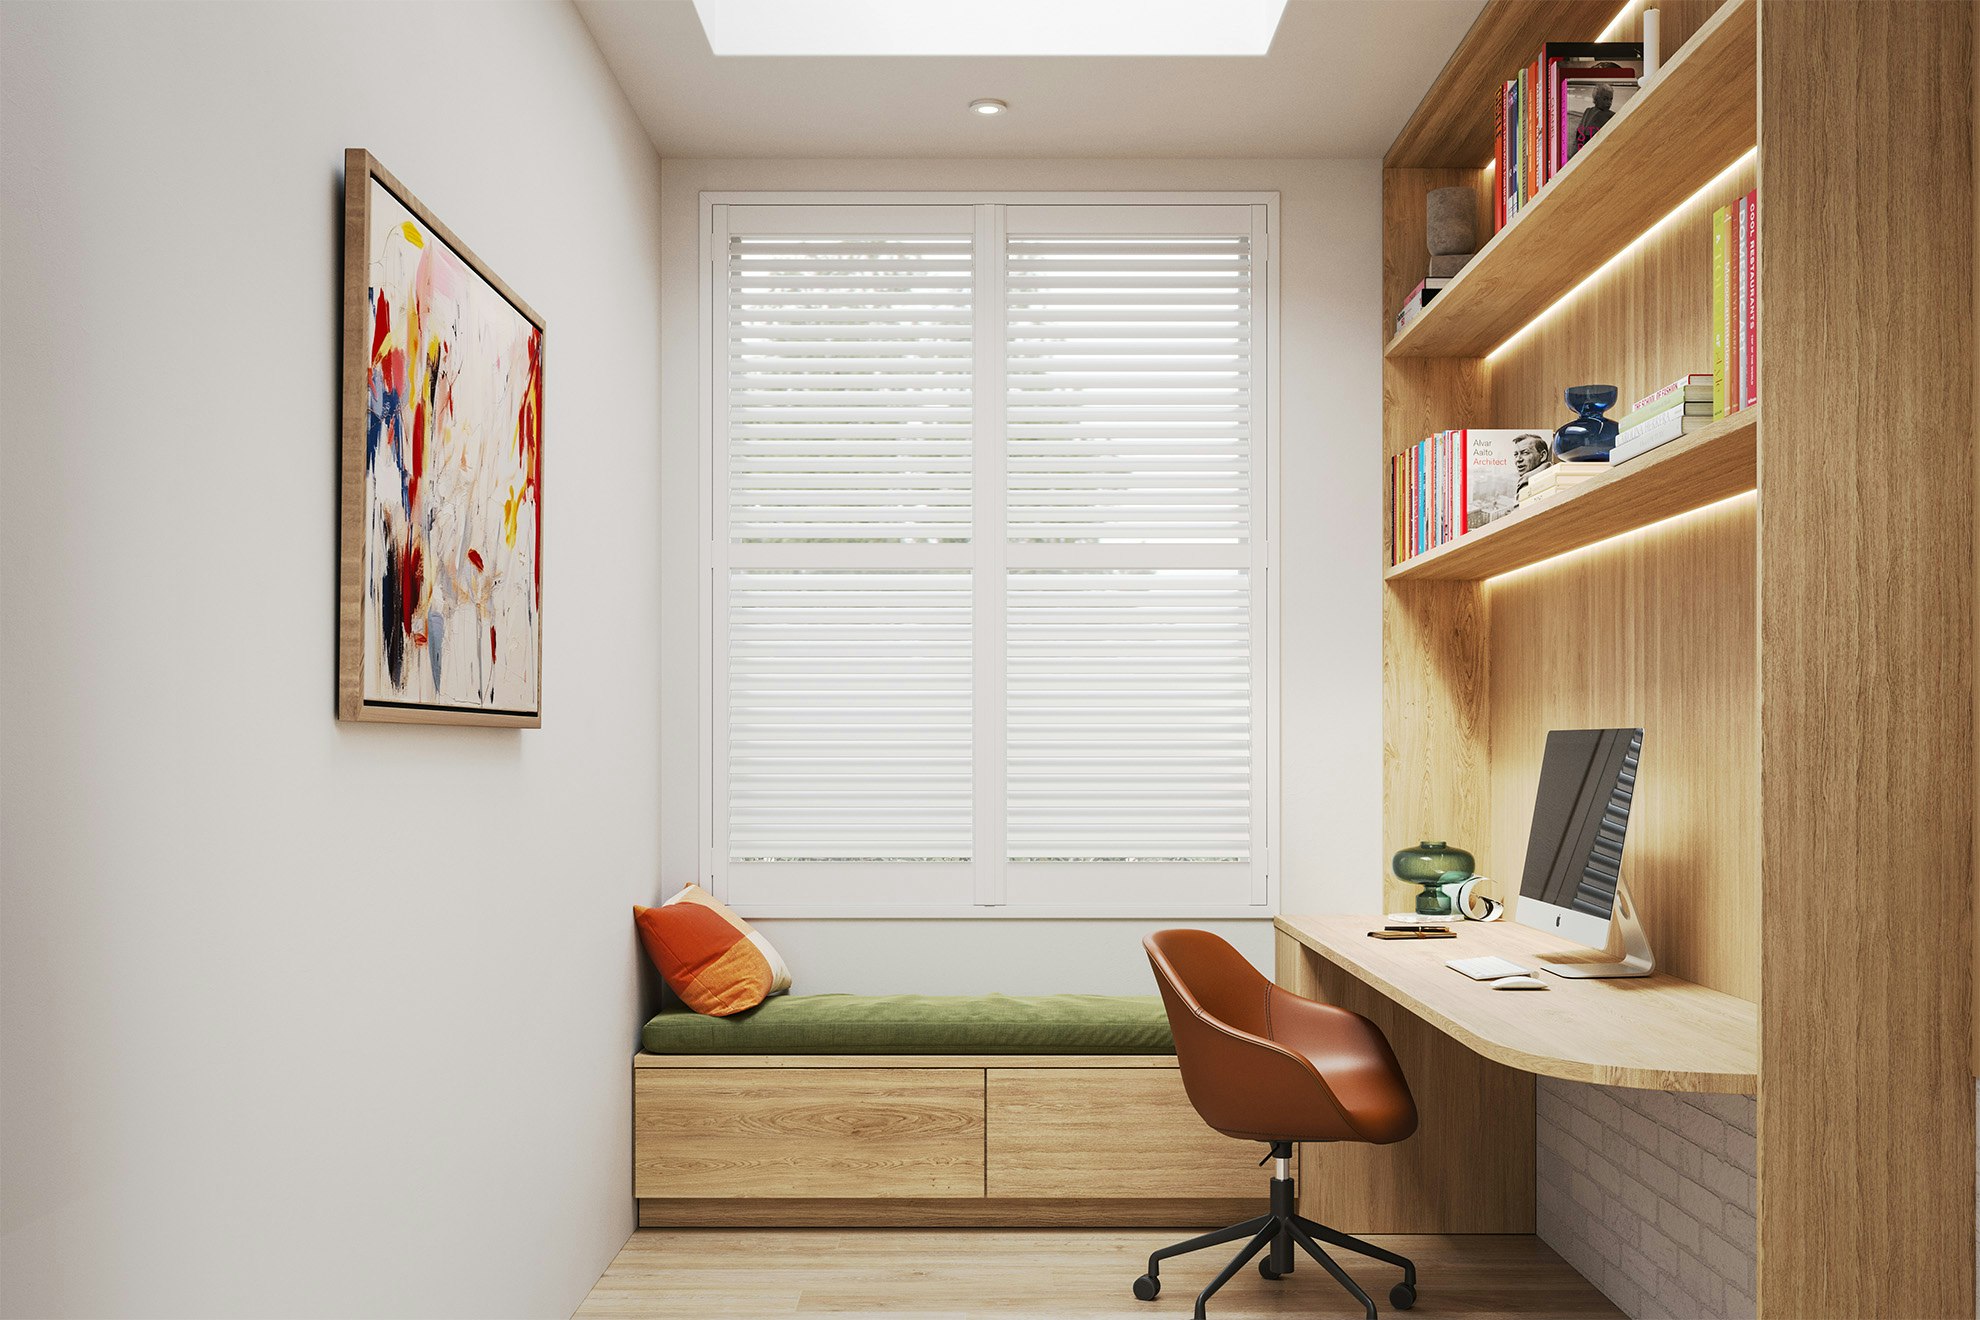
You’ll be installing the shutters inside the recess of your window frame. The shutter frames have multiple fixing points, however to achieve maximum coverage ensure to install the screws through the sides of the frame and into the recess.
It only takes a few minutes to install your new shutters, so let’s get started.
3 - What's in the box?
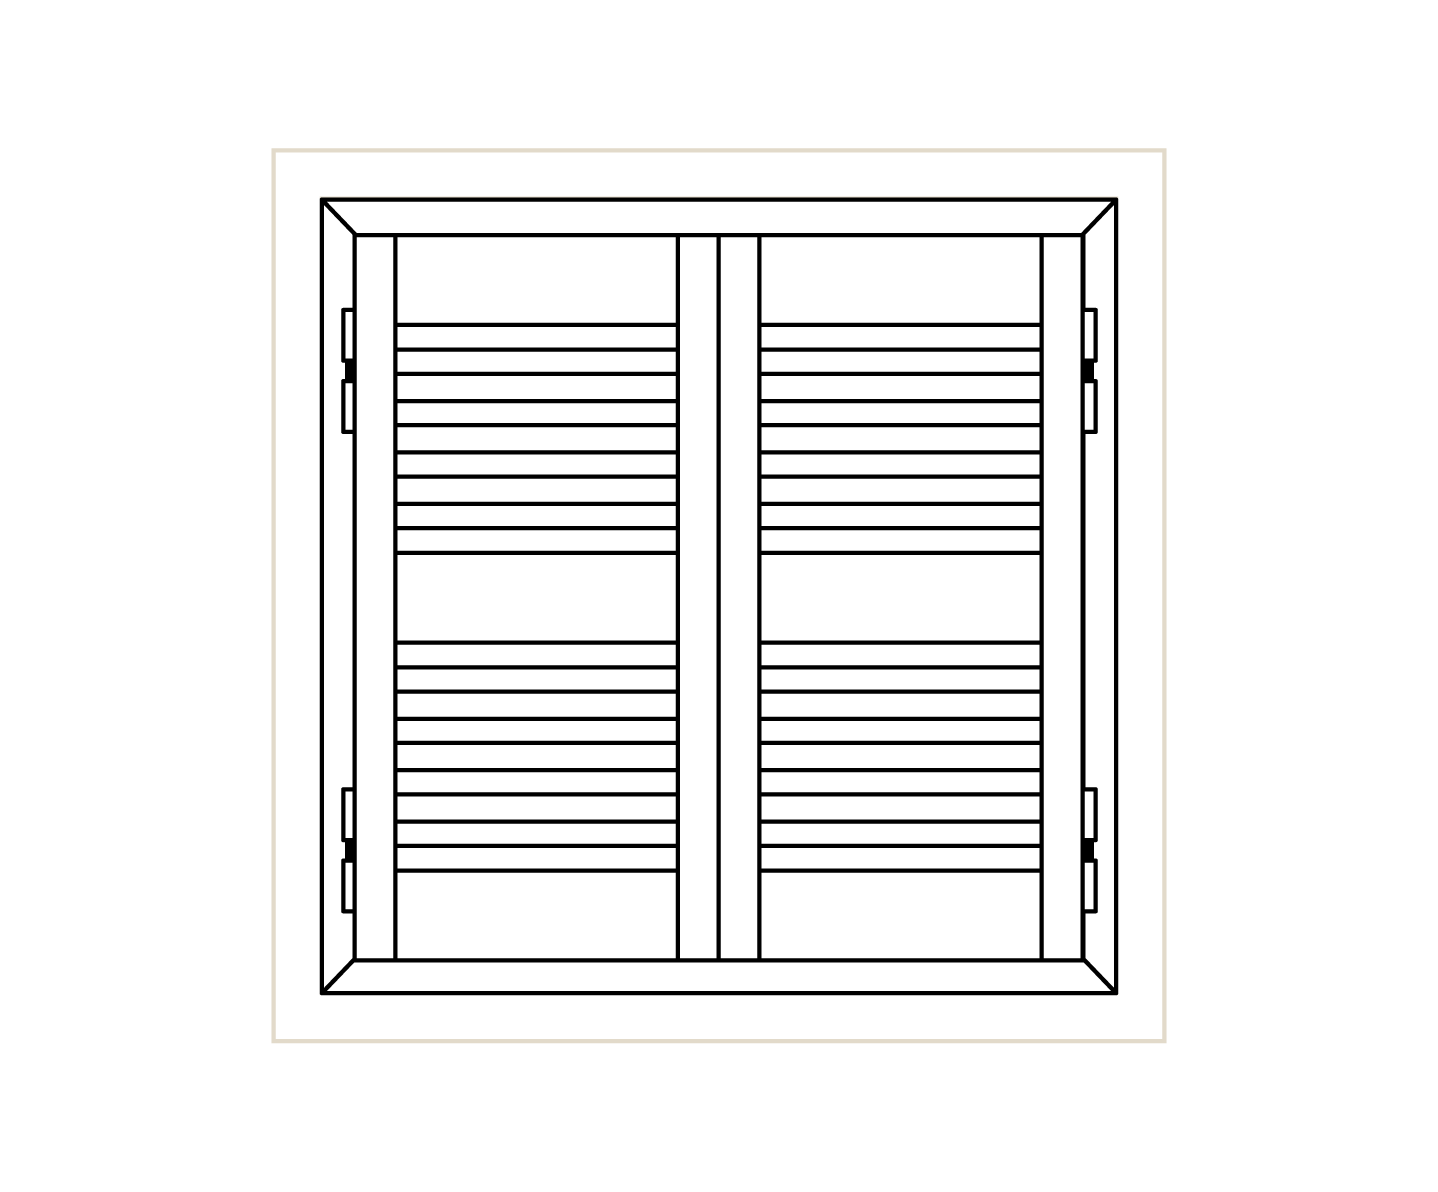
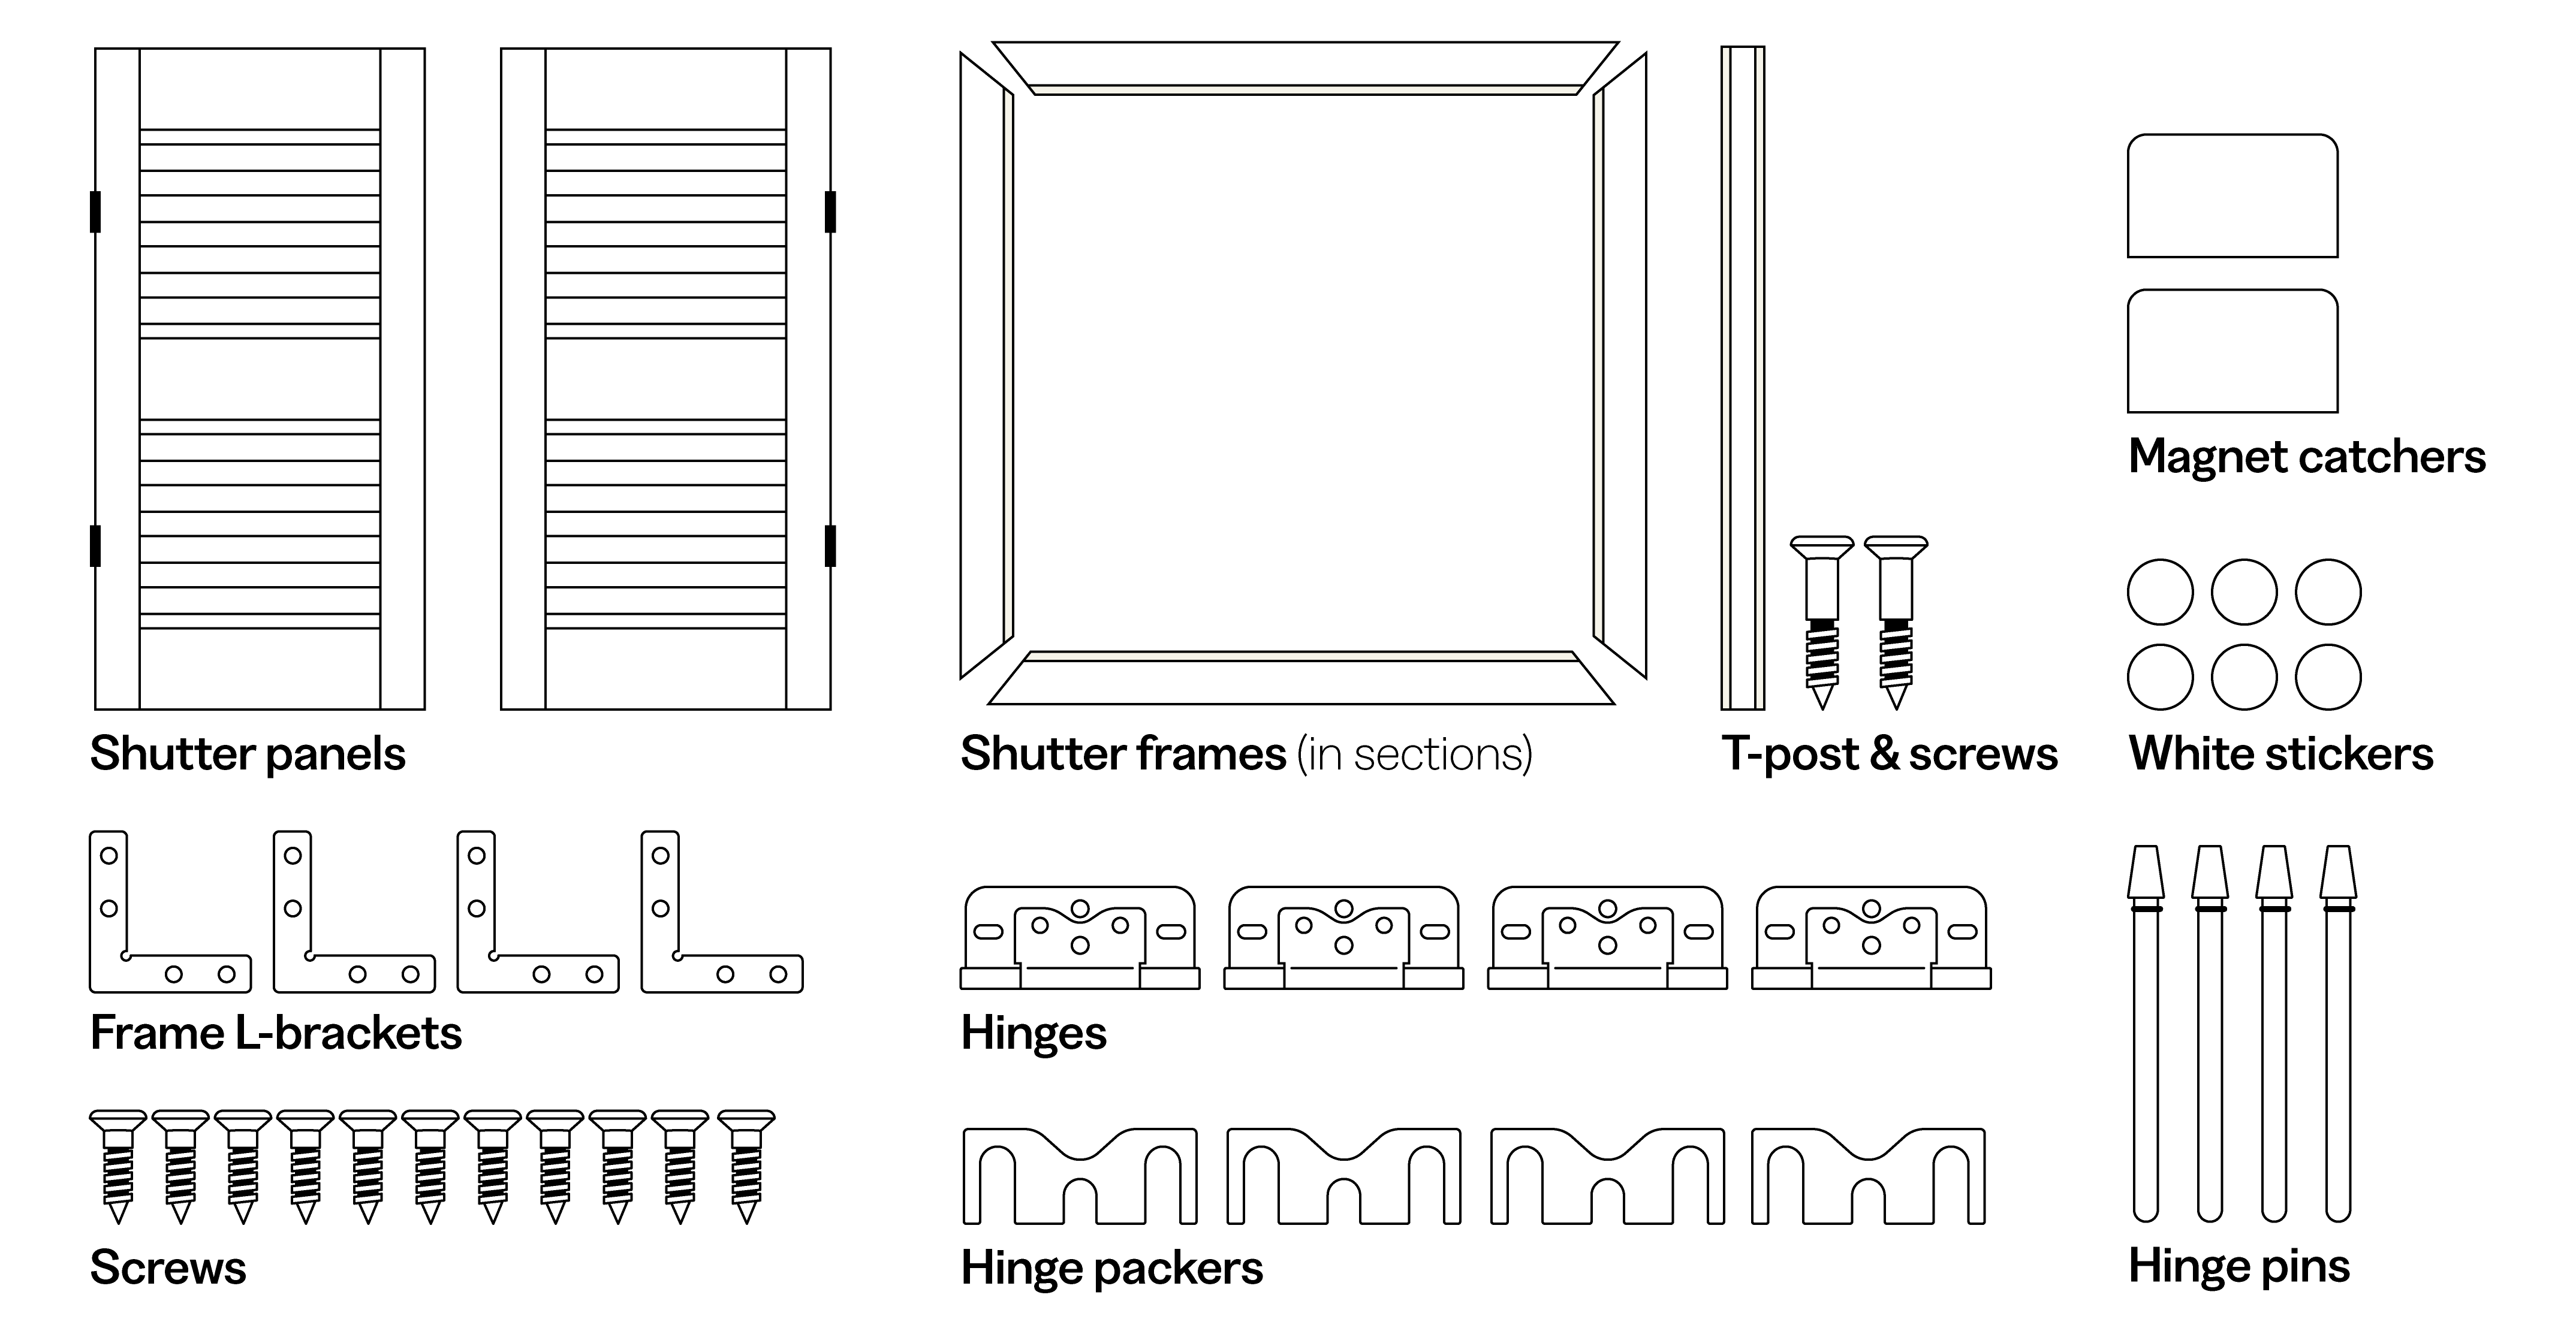
Open up the cardboard box(es) you've received. You'll notice some componentry and a bag of screws. There'll be one bag with all the screws for each of the shutters you've ordered.
*NOTE: Because your shutters are fully customised, the components in your order may differ from those pictured here. Don’t worry, we promise you’ll have everything you need and all the extras you’ve asked for.
4 - Get organised
Your frame and panels are labelled for each of install, which will help you to match up the correct panels and hinges later. Lay out the shutter panels in the correct position.
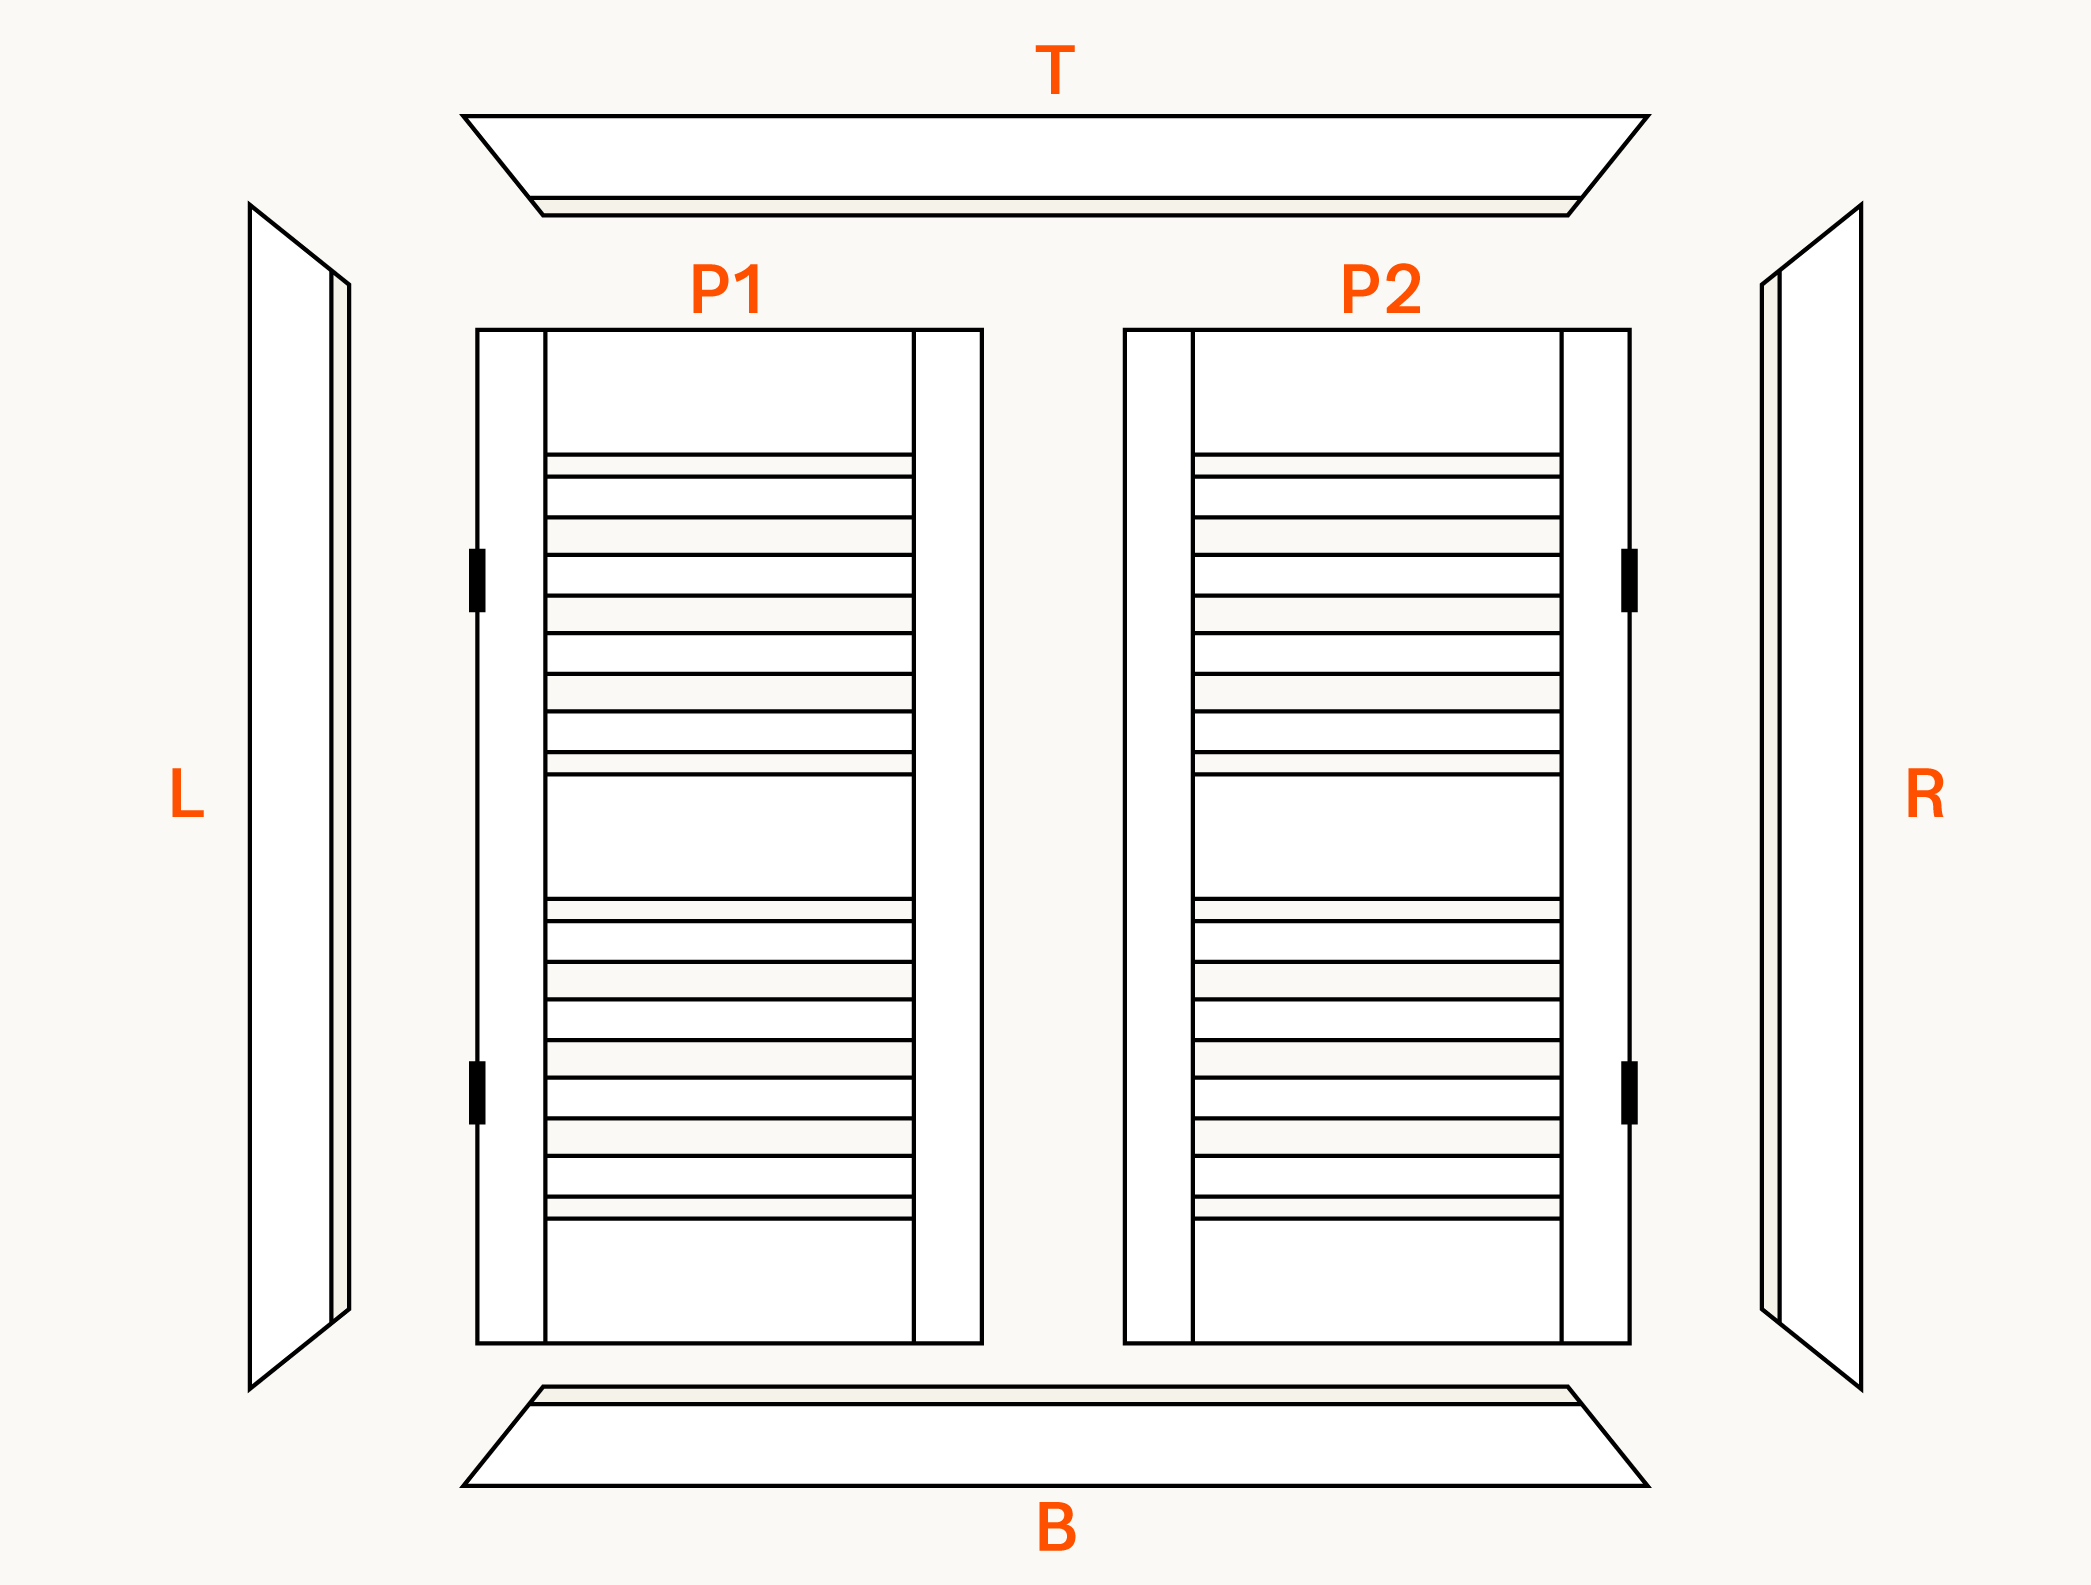
5 - Assemble your frame
Every good project has a solid framework, get yours looking good.
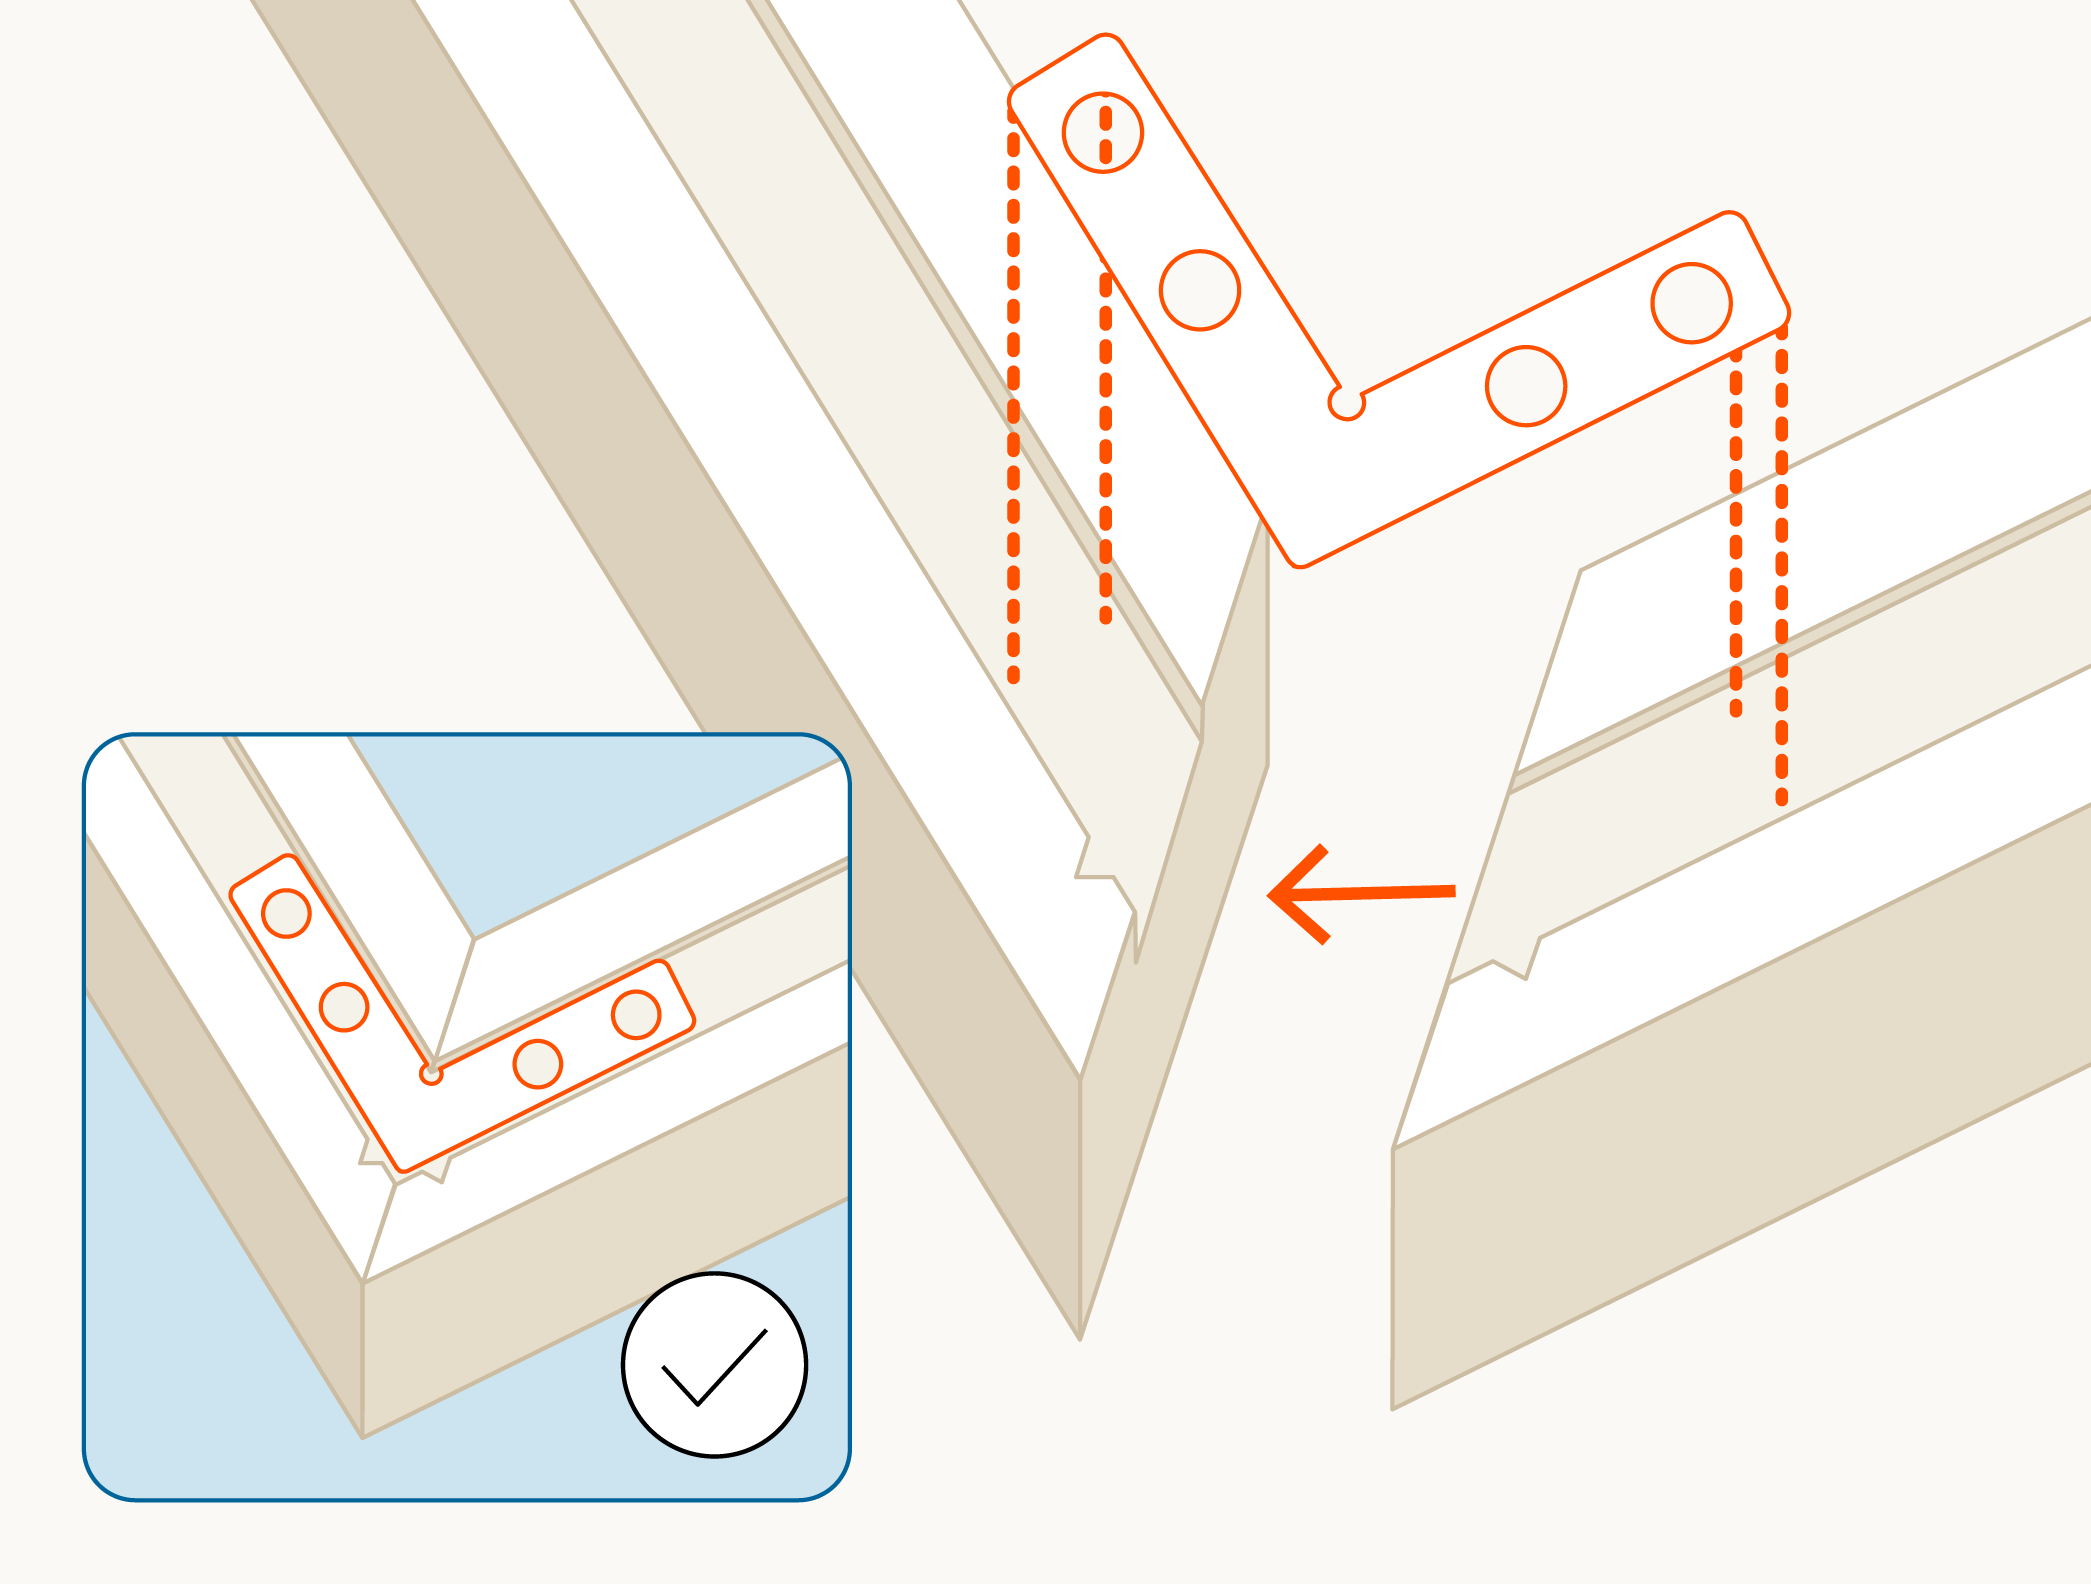
Once you have all the pieces of the frame in order, its time to join them together.
Take two sides of the frame and butt them up against eachother at a 90 degree angle as pictured. Make sure the back of the frame is facing up - this is side of the frame where the channel is as shown in the diagram.
Inside the channel, place one of your L brackets. These will keep your frame together once they are drilled in.
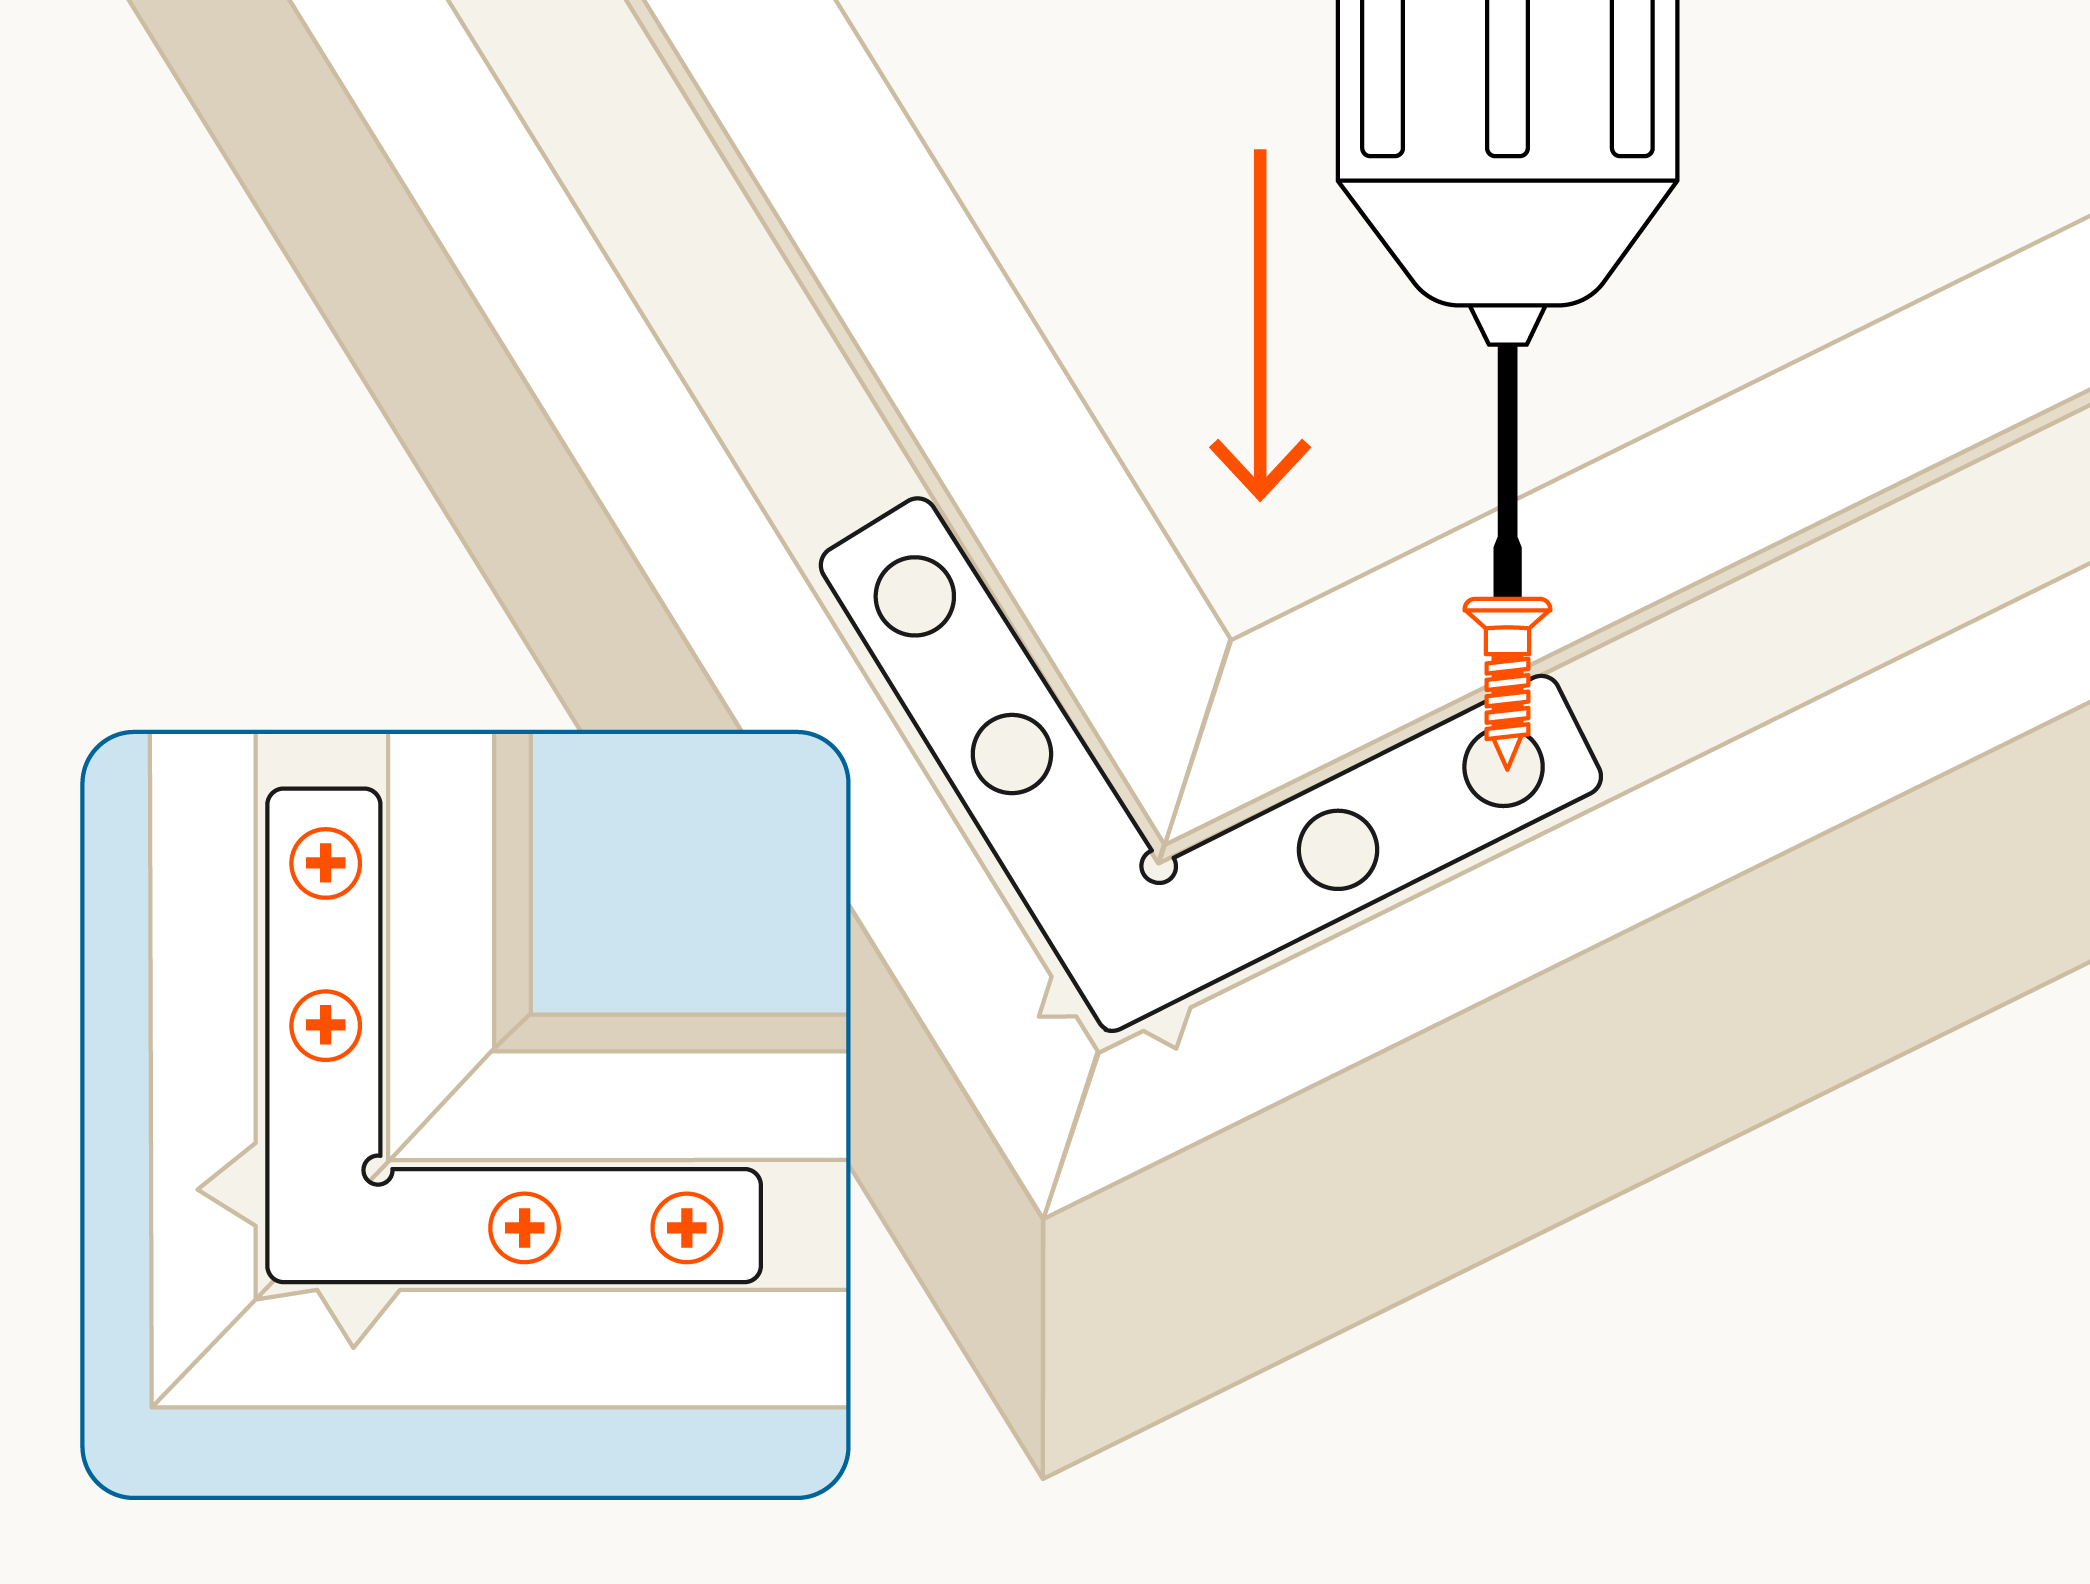
Once positioned, drill the supplied screws into the shutter frame through the holes in the L brackets. Making sure to keep each side of the frame aligned.
After the first corner is secured, repeat this step for the other three corners of your frame.
6 - If you have a T-post
Screw your T-post onto your frame using the long screws in your kit.
There's pre-drilled holes on your frame showing where to attach the T post(s). Each post is labelled also with 'T' being the top orientation and 'B' being the bottom.
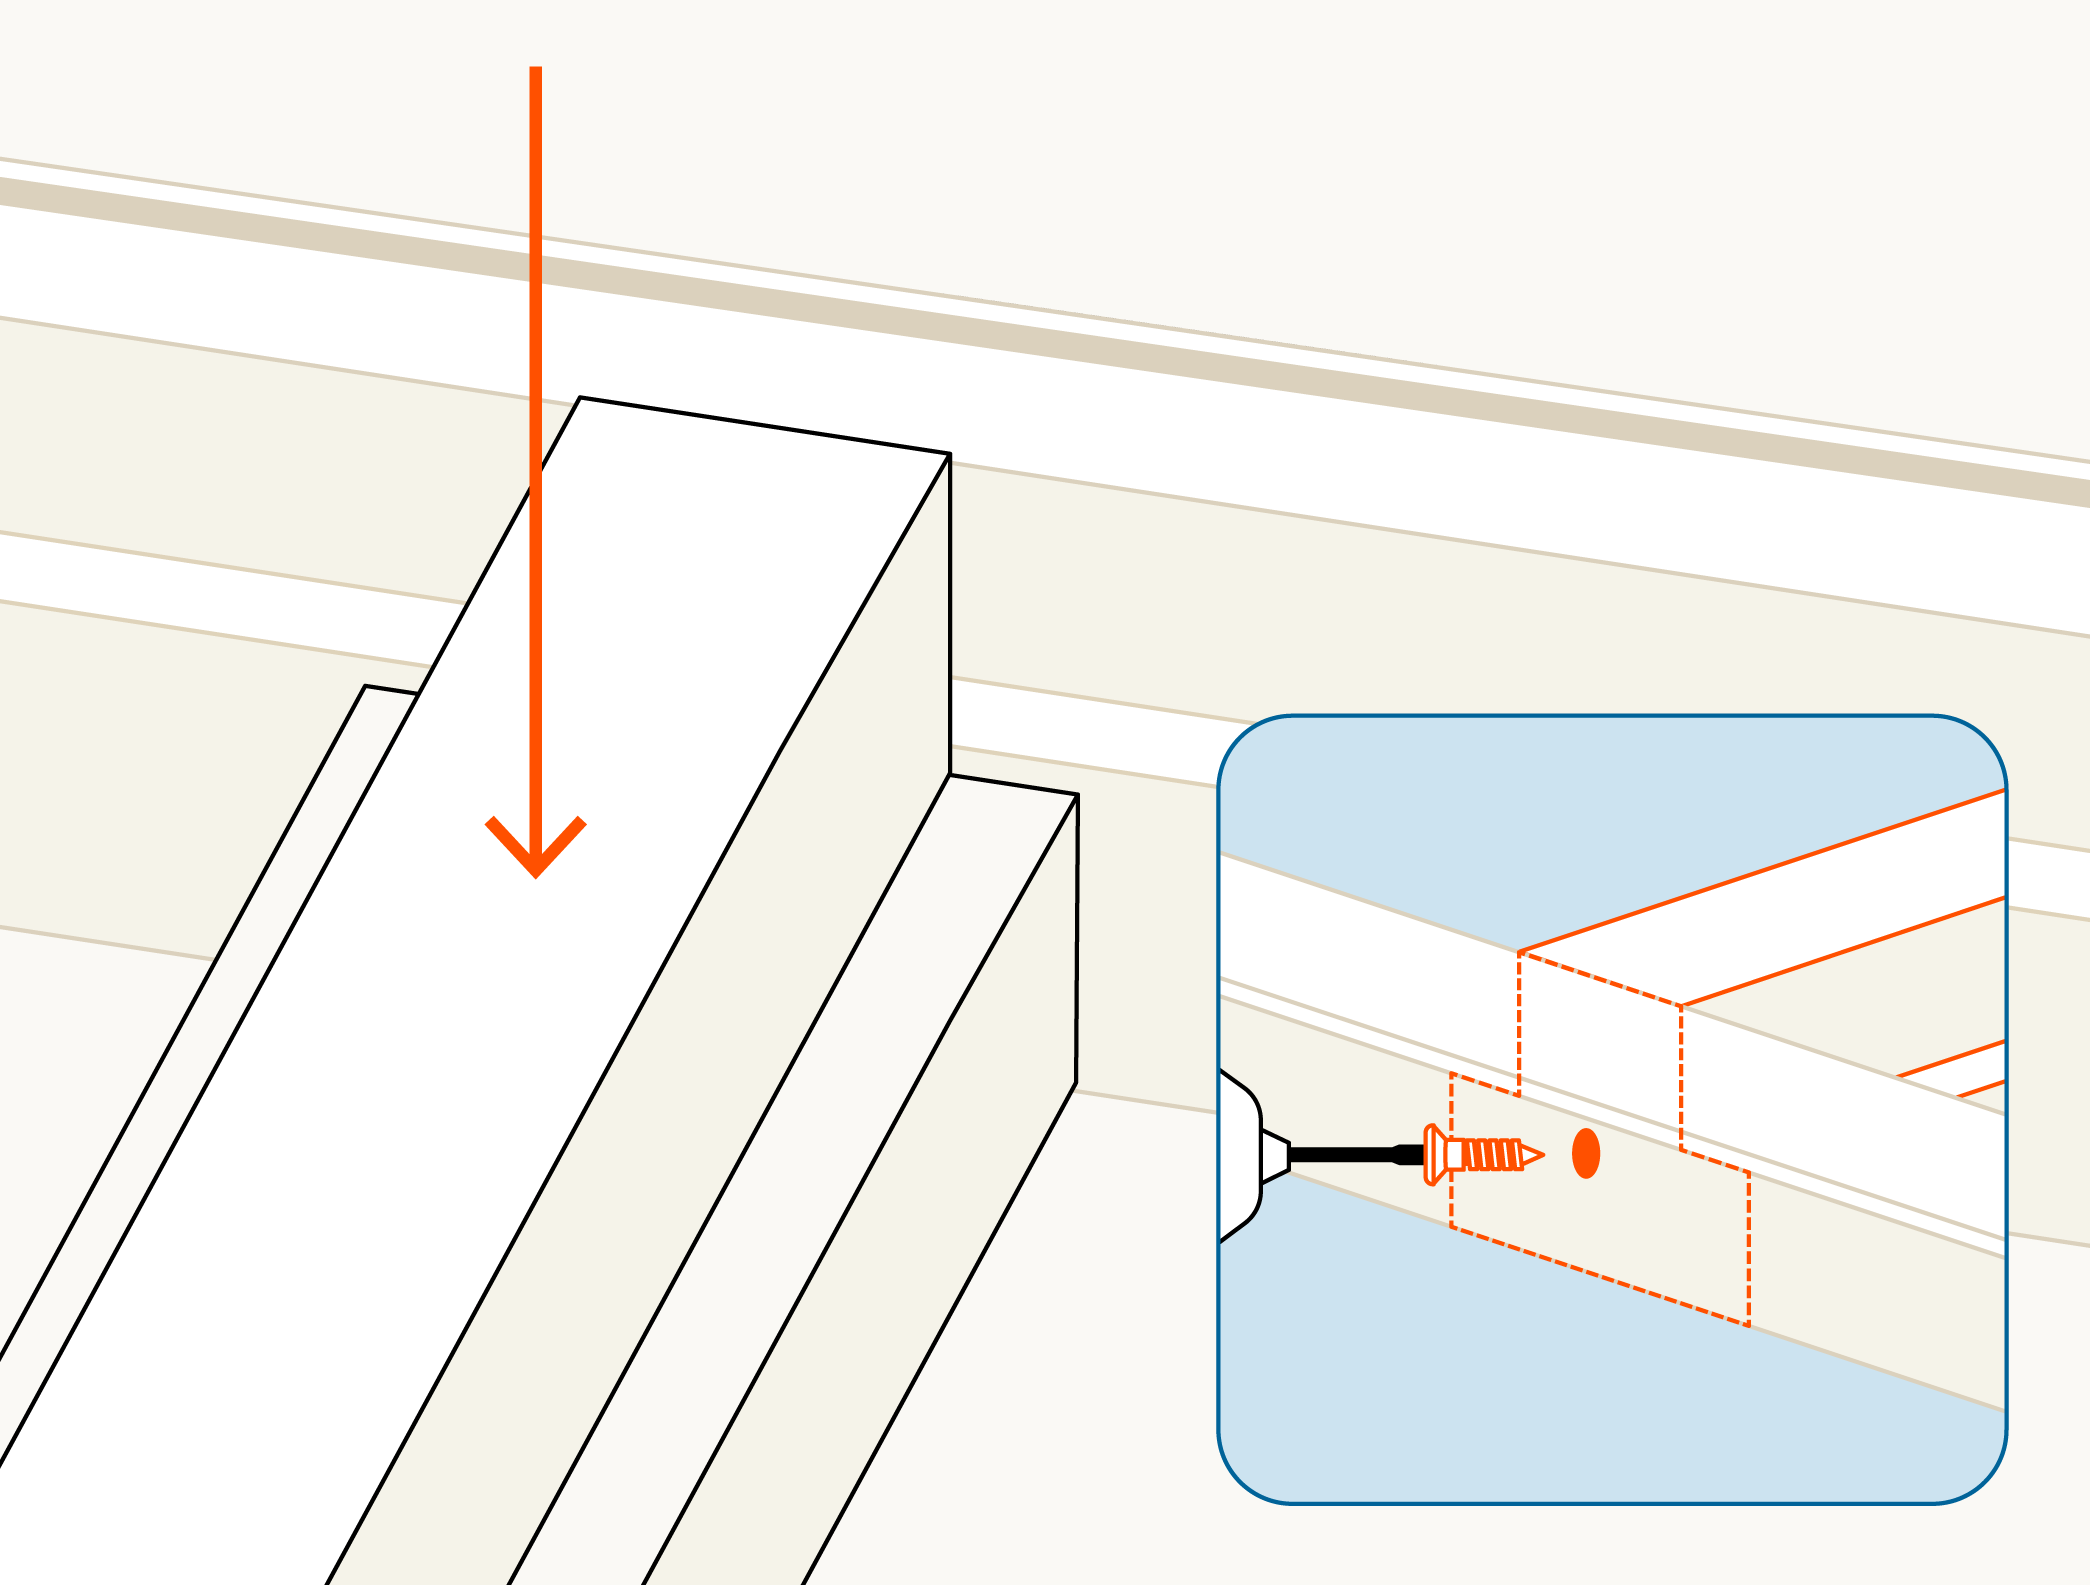
7 - Mark up and drill
We're going to be marking up where your screws will be placed in your shutter frame.
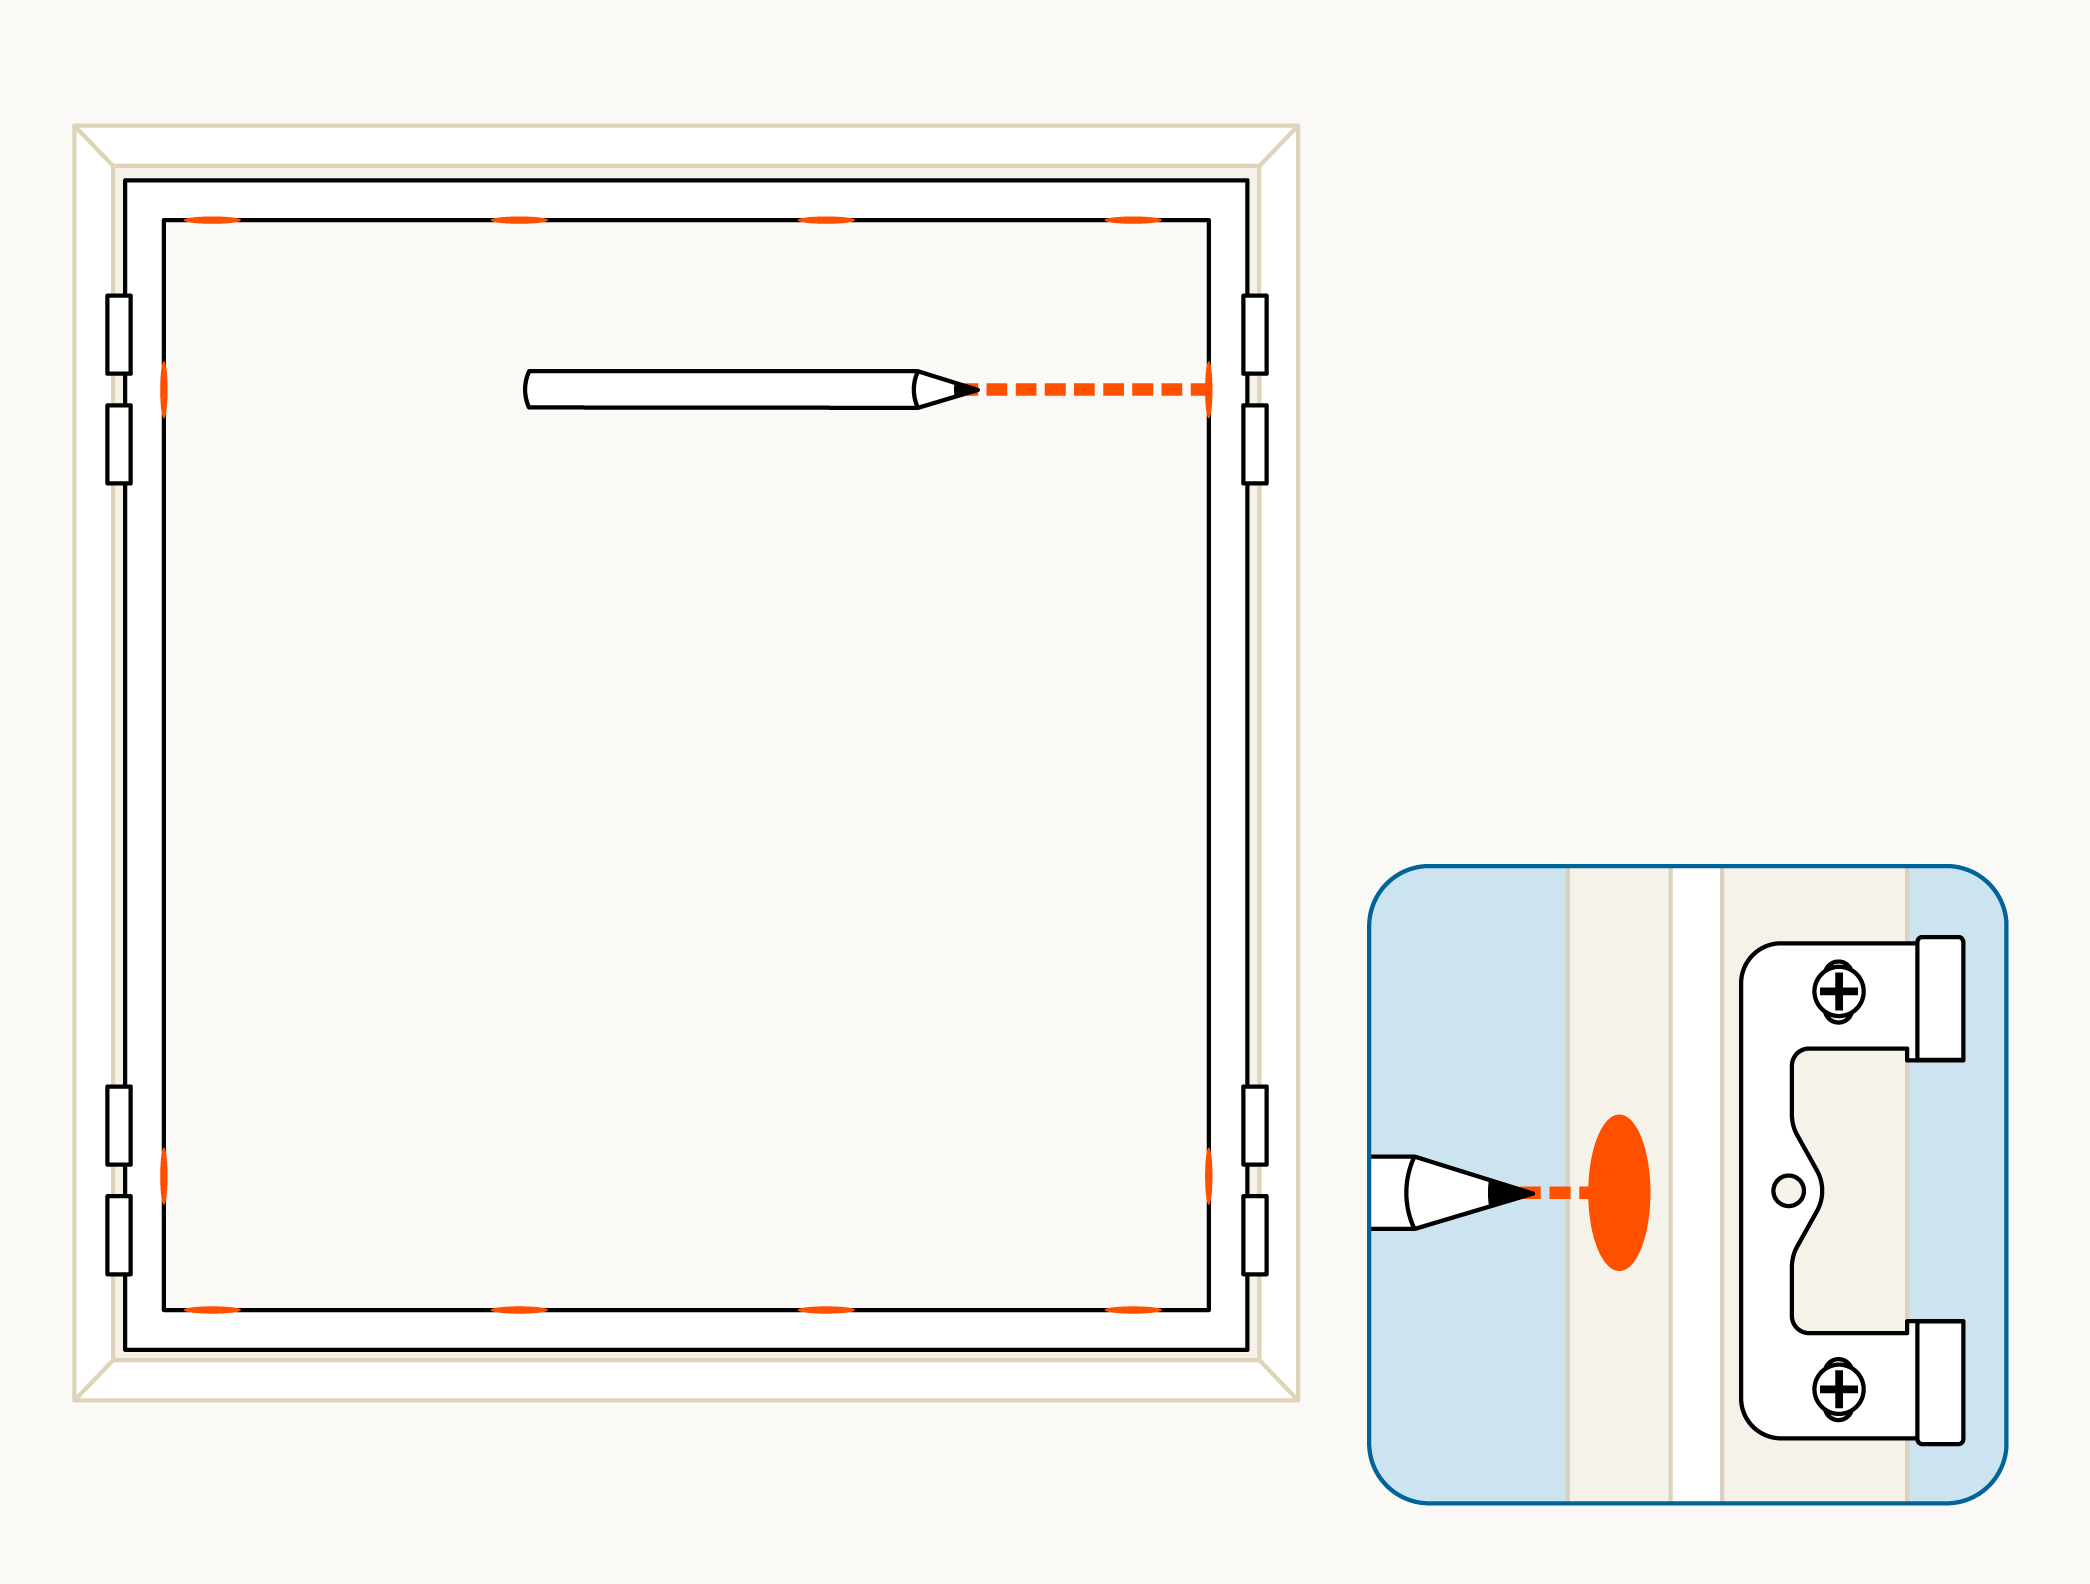
Using a pencil, mark where your screws will go. You'll need a screw inline with each hinge (already attached to the frame) on the vertical side of the frame.
Then also mark four, evenly spaced dots at both the top and the bottom of the frame. The back of the shutter frame will attach to your window frame.
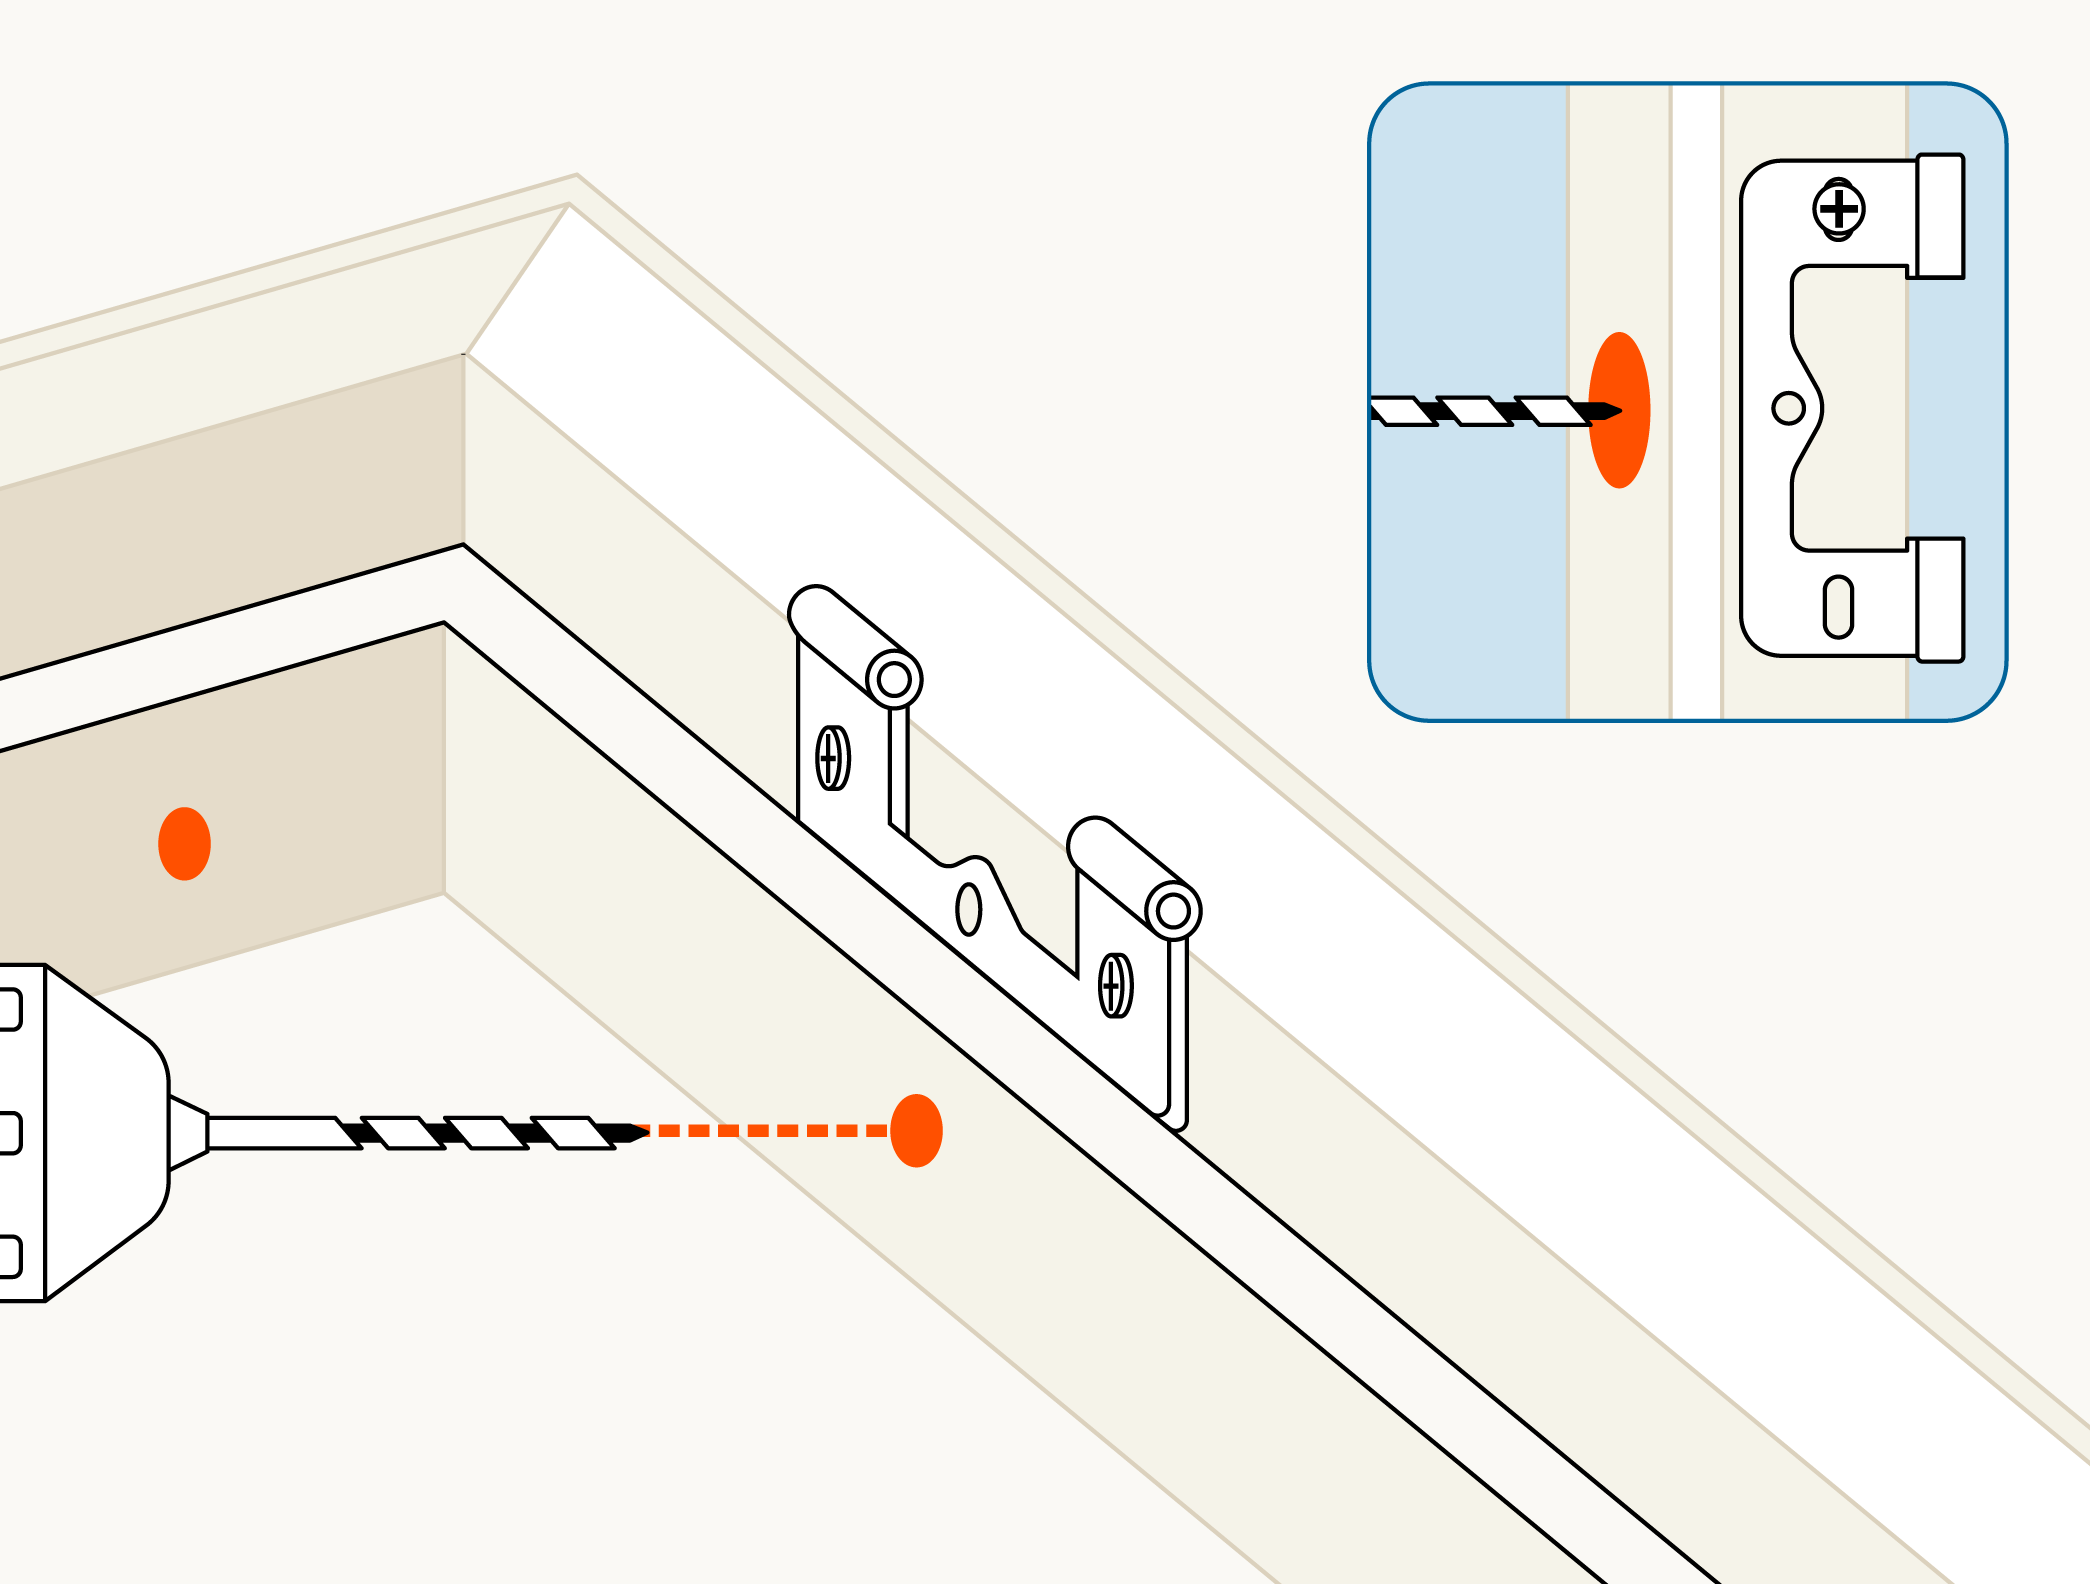
Pop the 3mm drill bit into your drill and pre-drill holes into the back of the frame for each of the screws, where you've marked in the previous step.
Repeat for all screws.
8 - Install your shutter frame
Now you'll be carefully placing your shutter frame into your window recess and then installing it with the supplied screws.
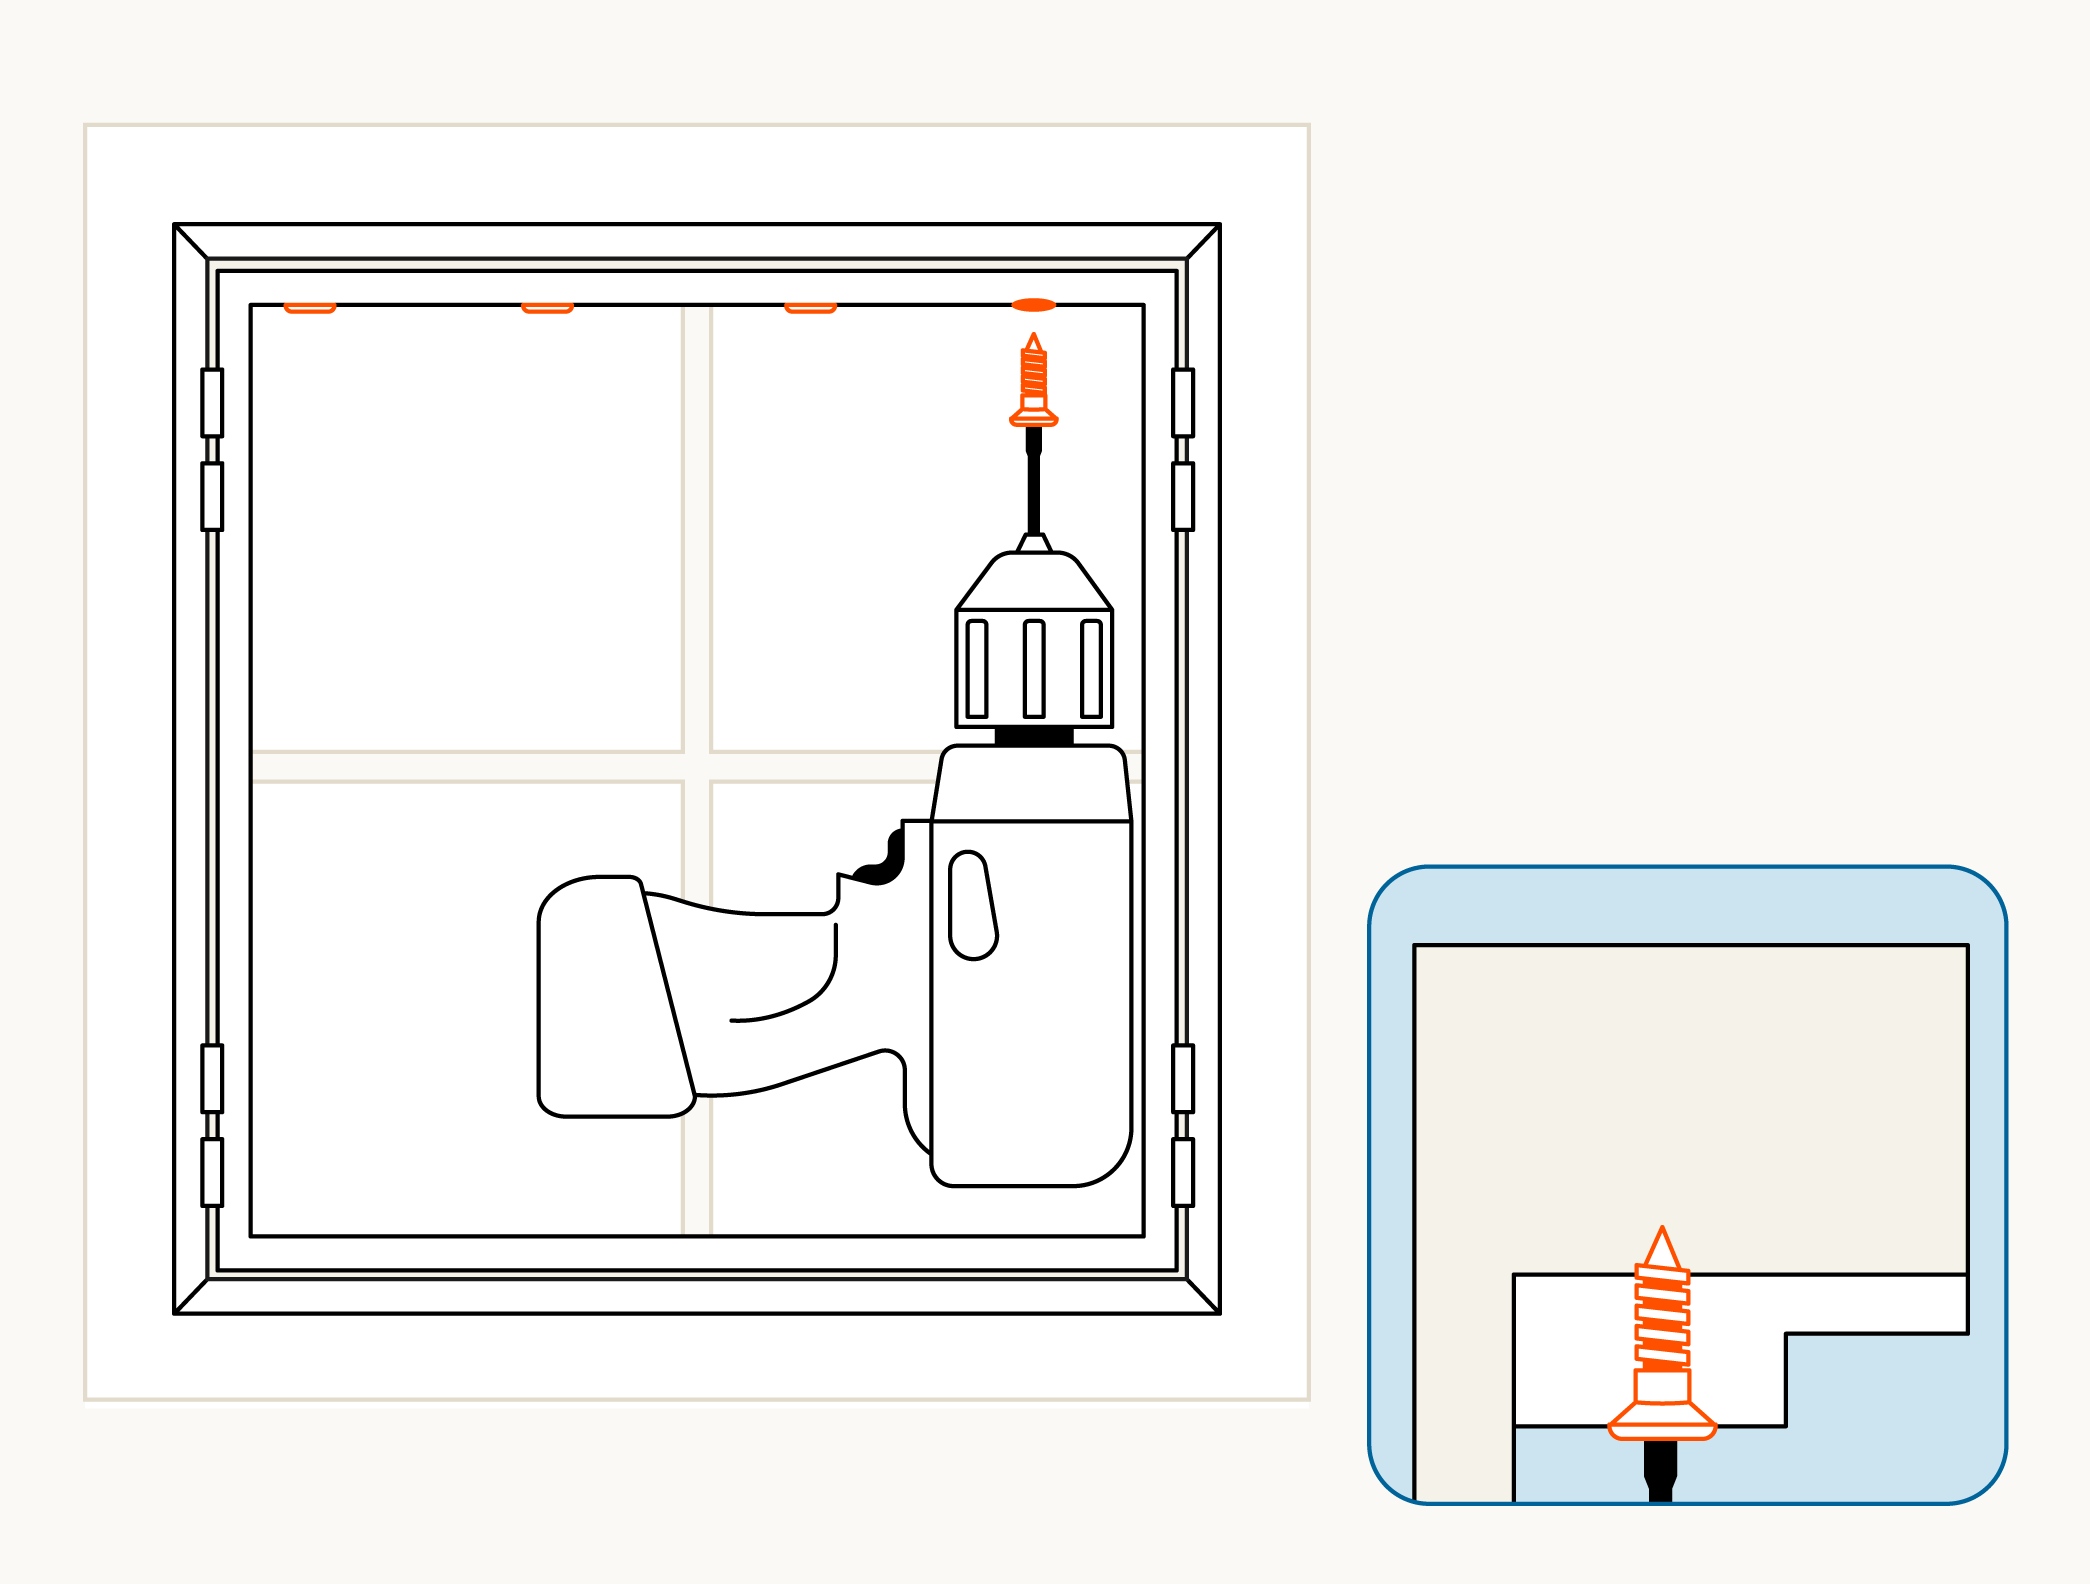
Lift your frame into place ensuring the front edge of the shutter frame is flush with your recess and partially drill each screw at the top of your shutter frame, ensuring to not fully drill them in.
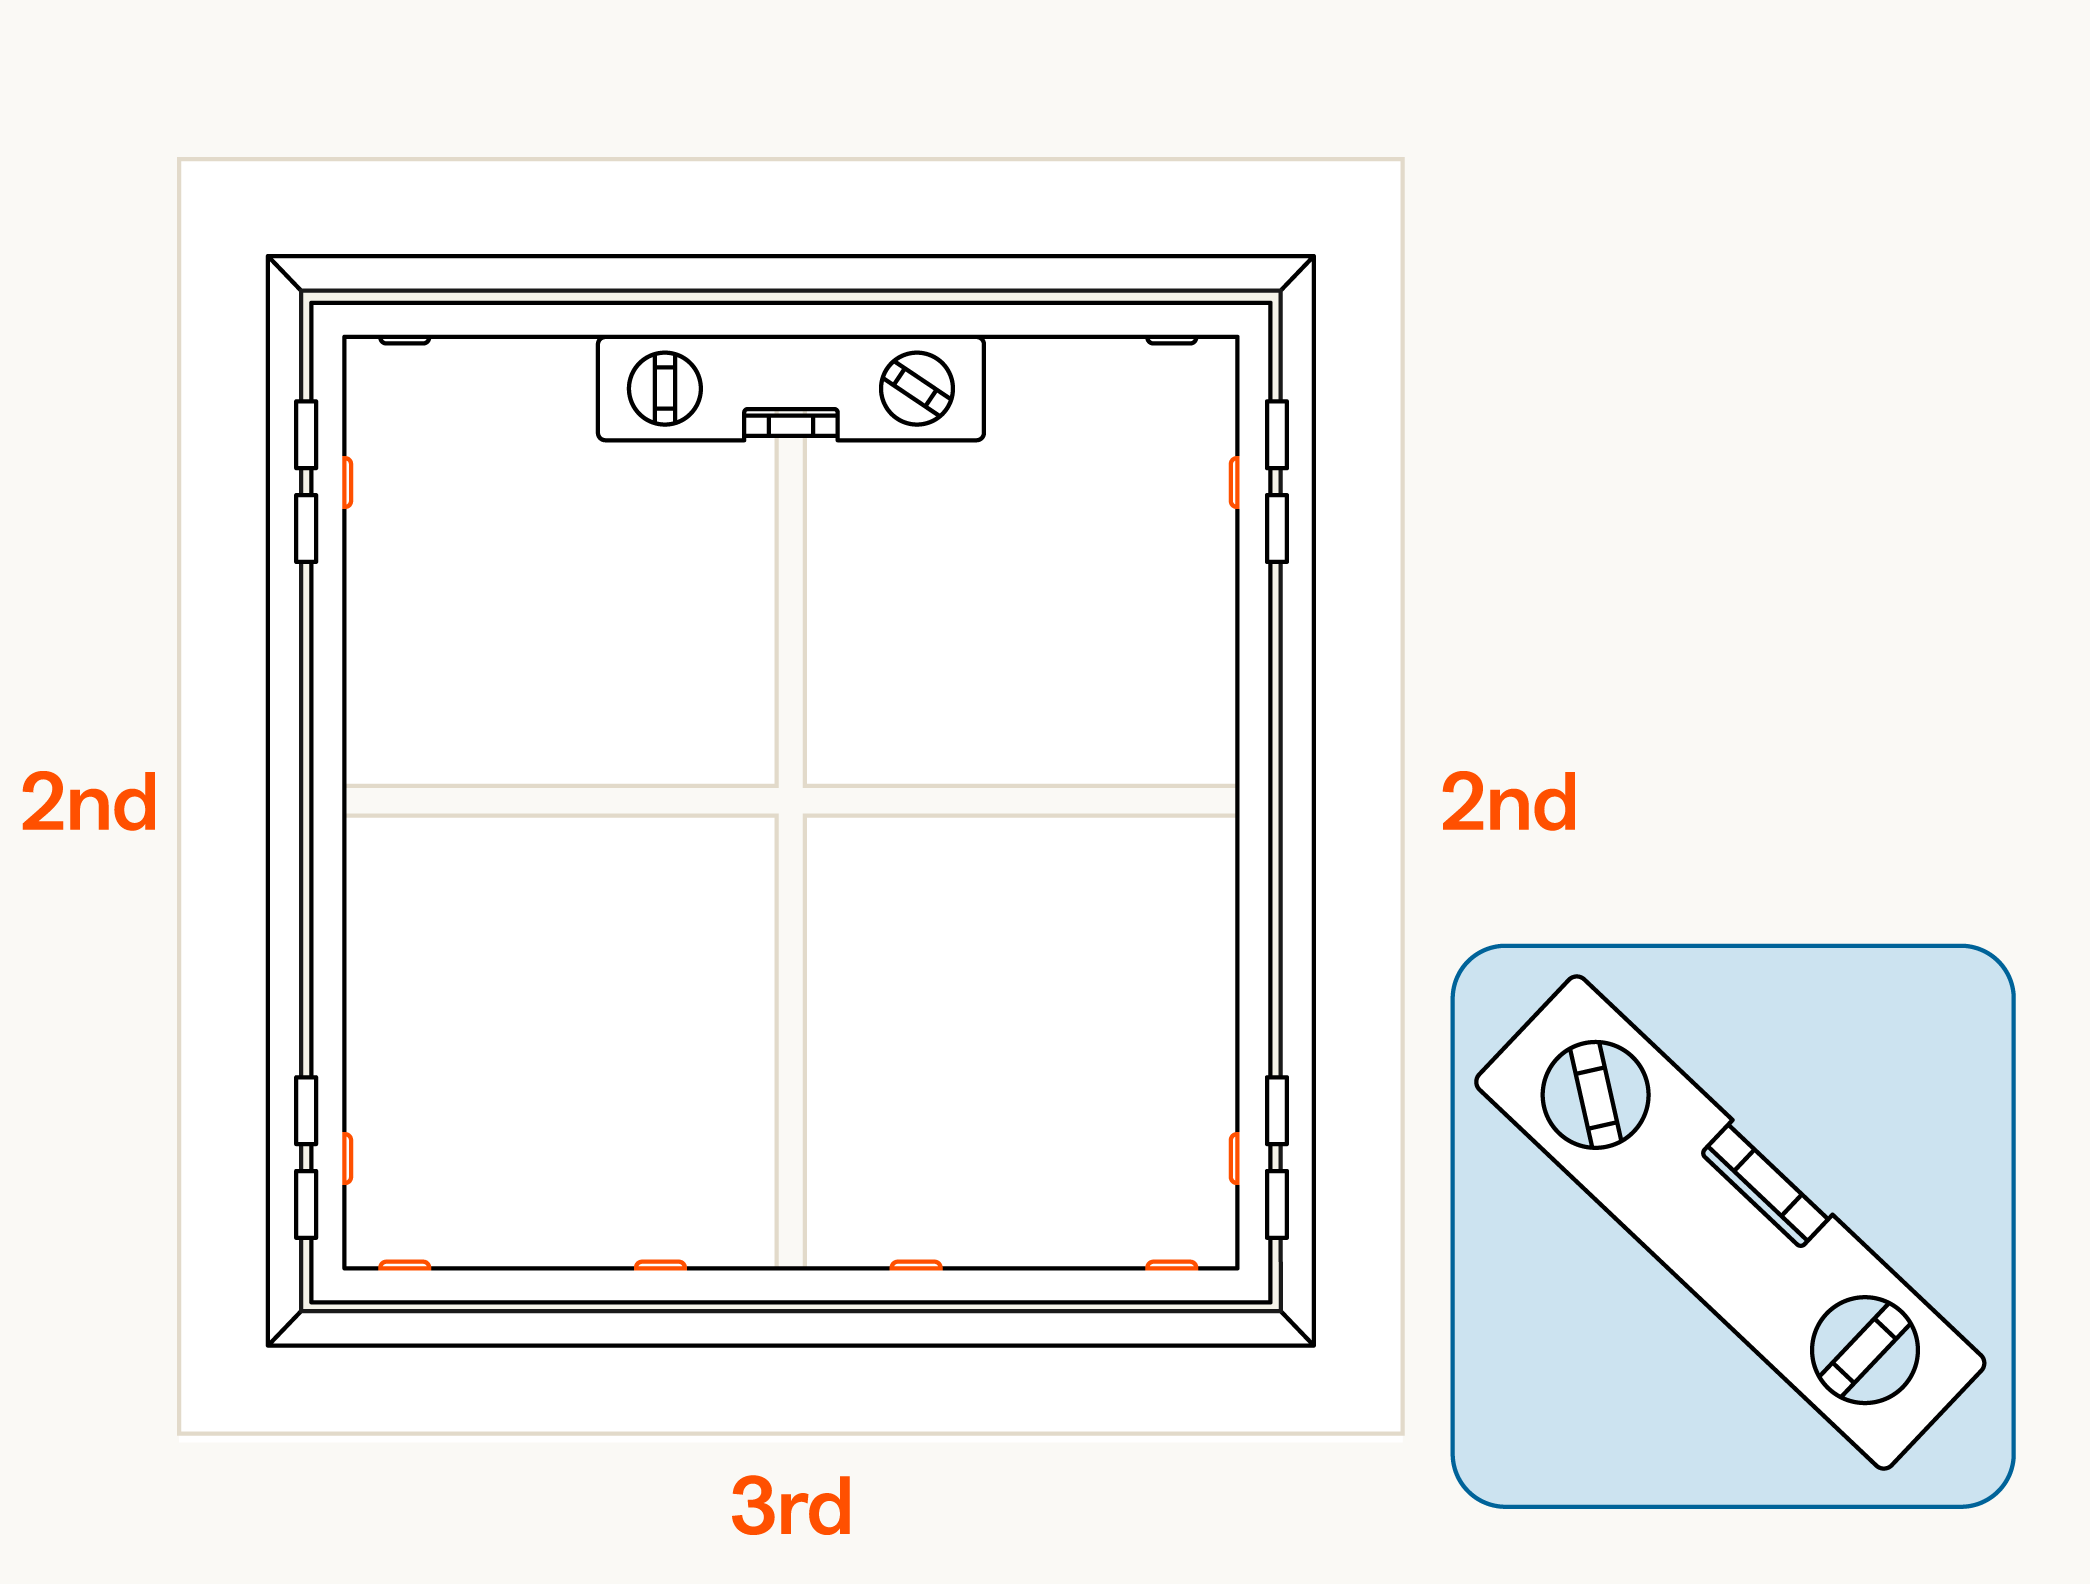
It's best to use a spirit level to ensure your frame is straight before screwing in the other sides. Place your spirit level under the top of the frame and adjust until the frame is straight, then tighten the screws in the top of the frame.
Once the top of the frame is secured, screw in each side on the frame and finally scew in the bottom. Nice one, that shutter frame is going nowhere!
9 - Install your shutter panels
We're nearly there. Just simply attach the hinges of your shutter panels to the hinges on your shutter frame
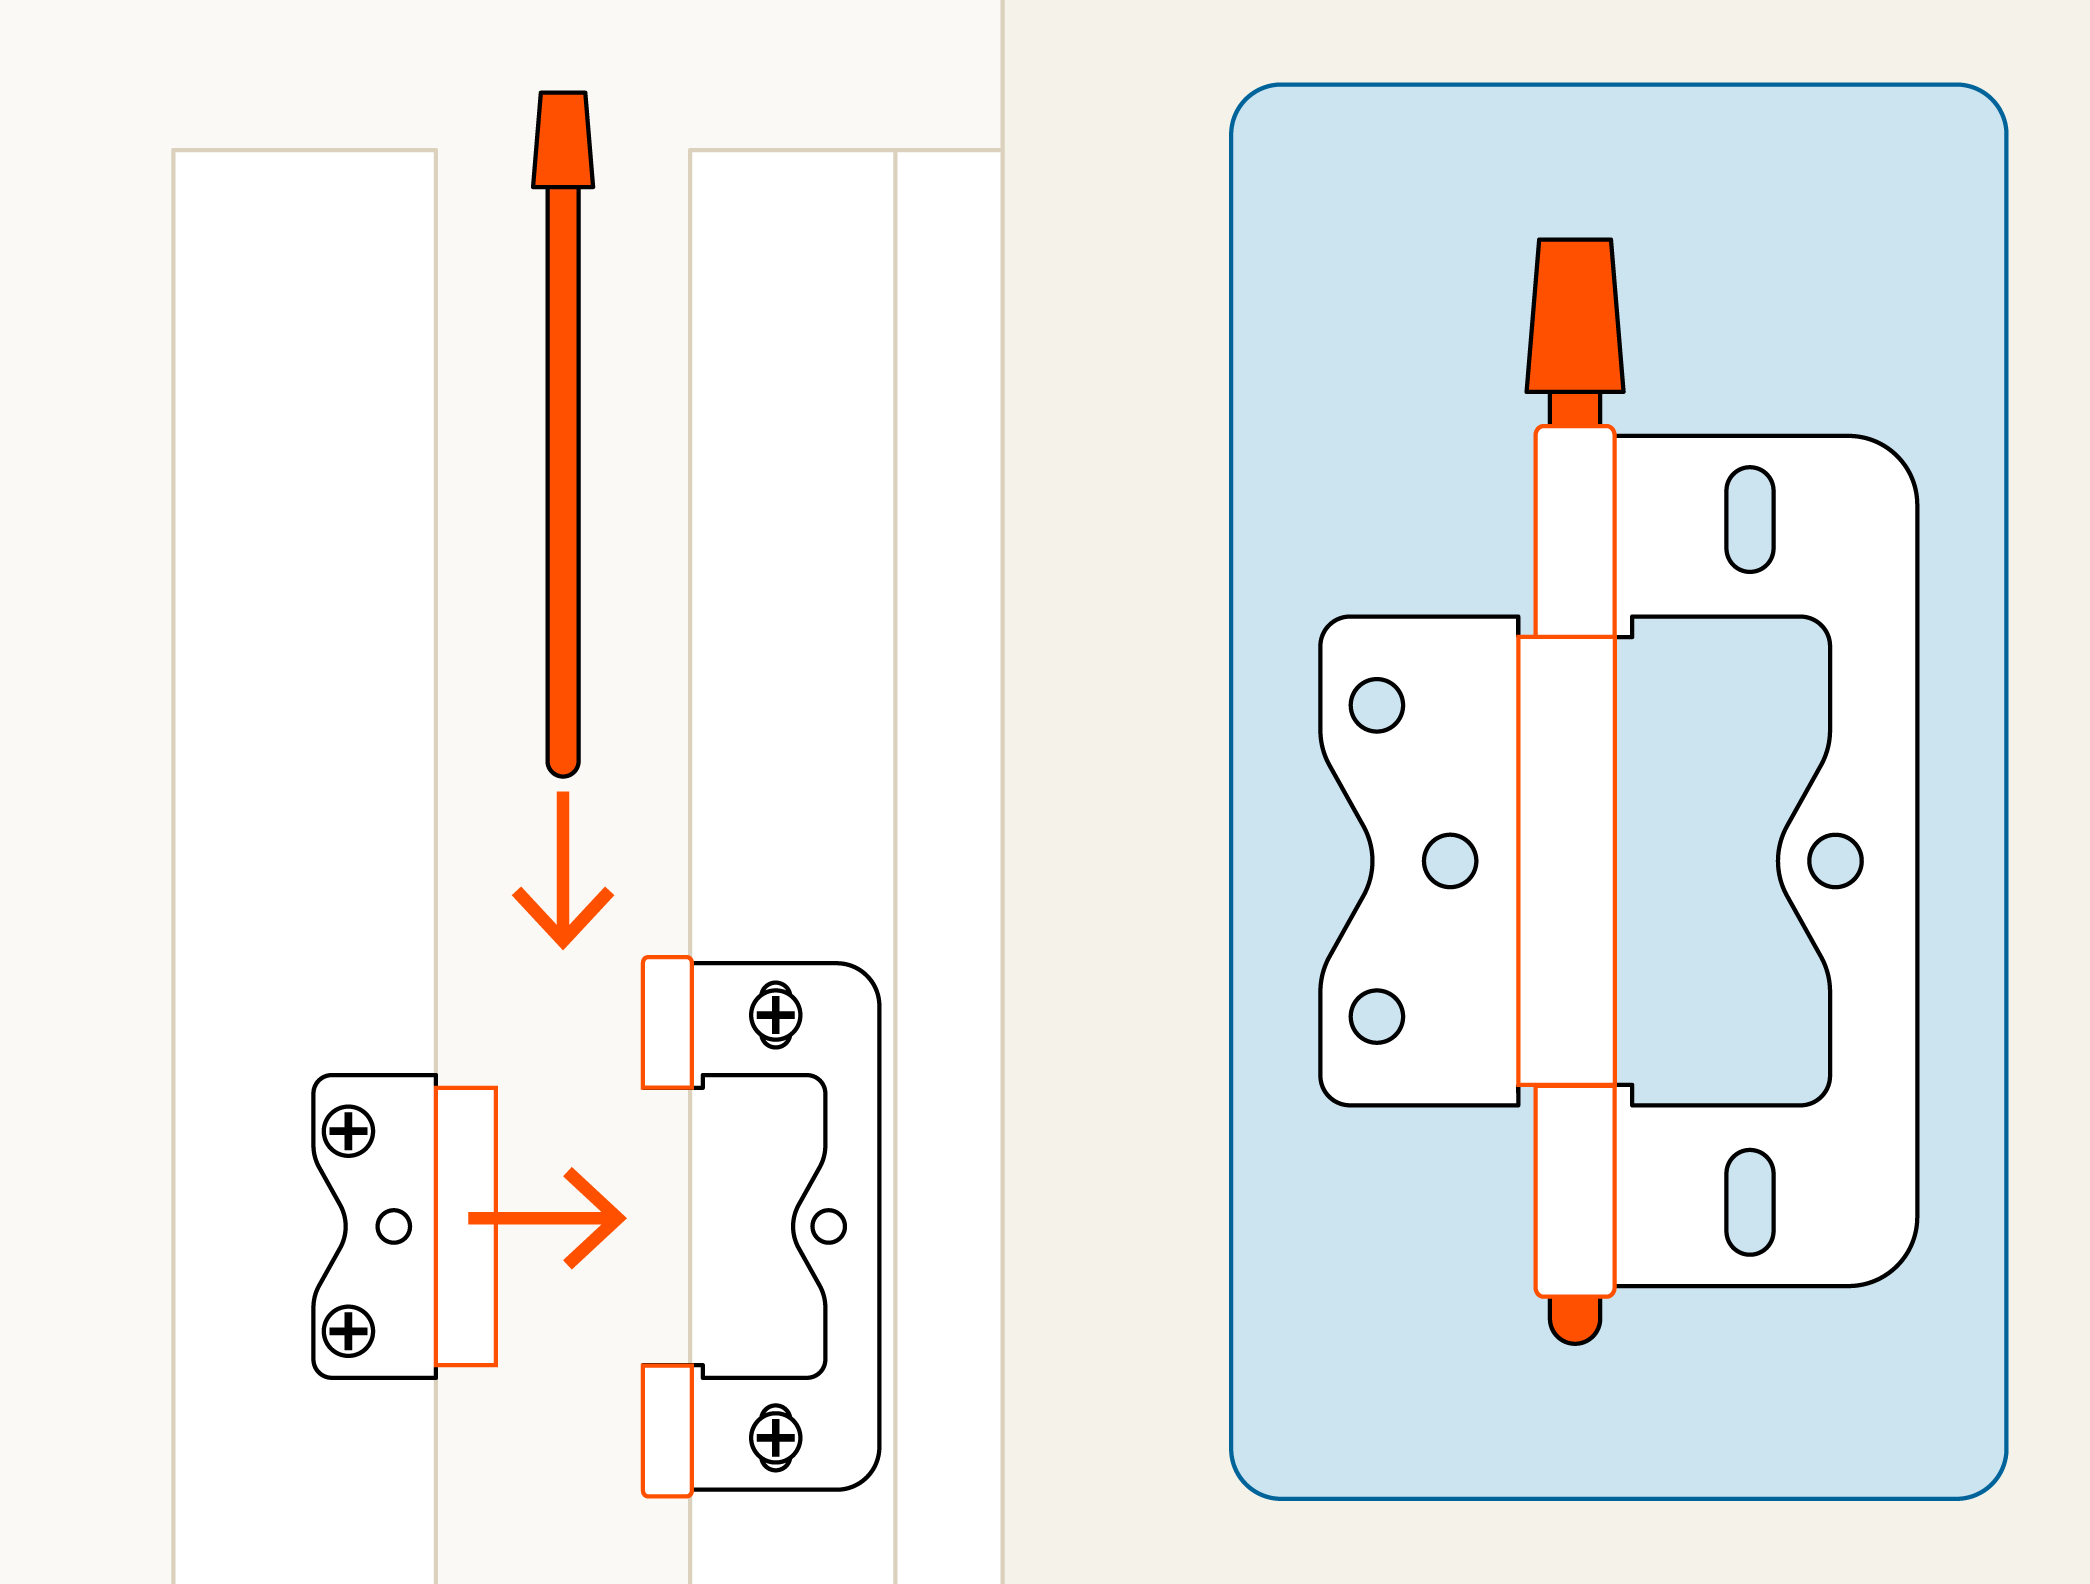
Lift your leftmost panel into position. The hinges should line up on the left side of your shutter frame and your panel.
Insert a hinge pin by sliding it through the bracket, from the top.
Repeat for each panel.
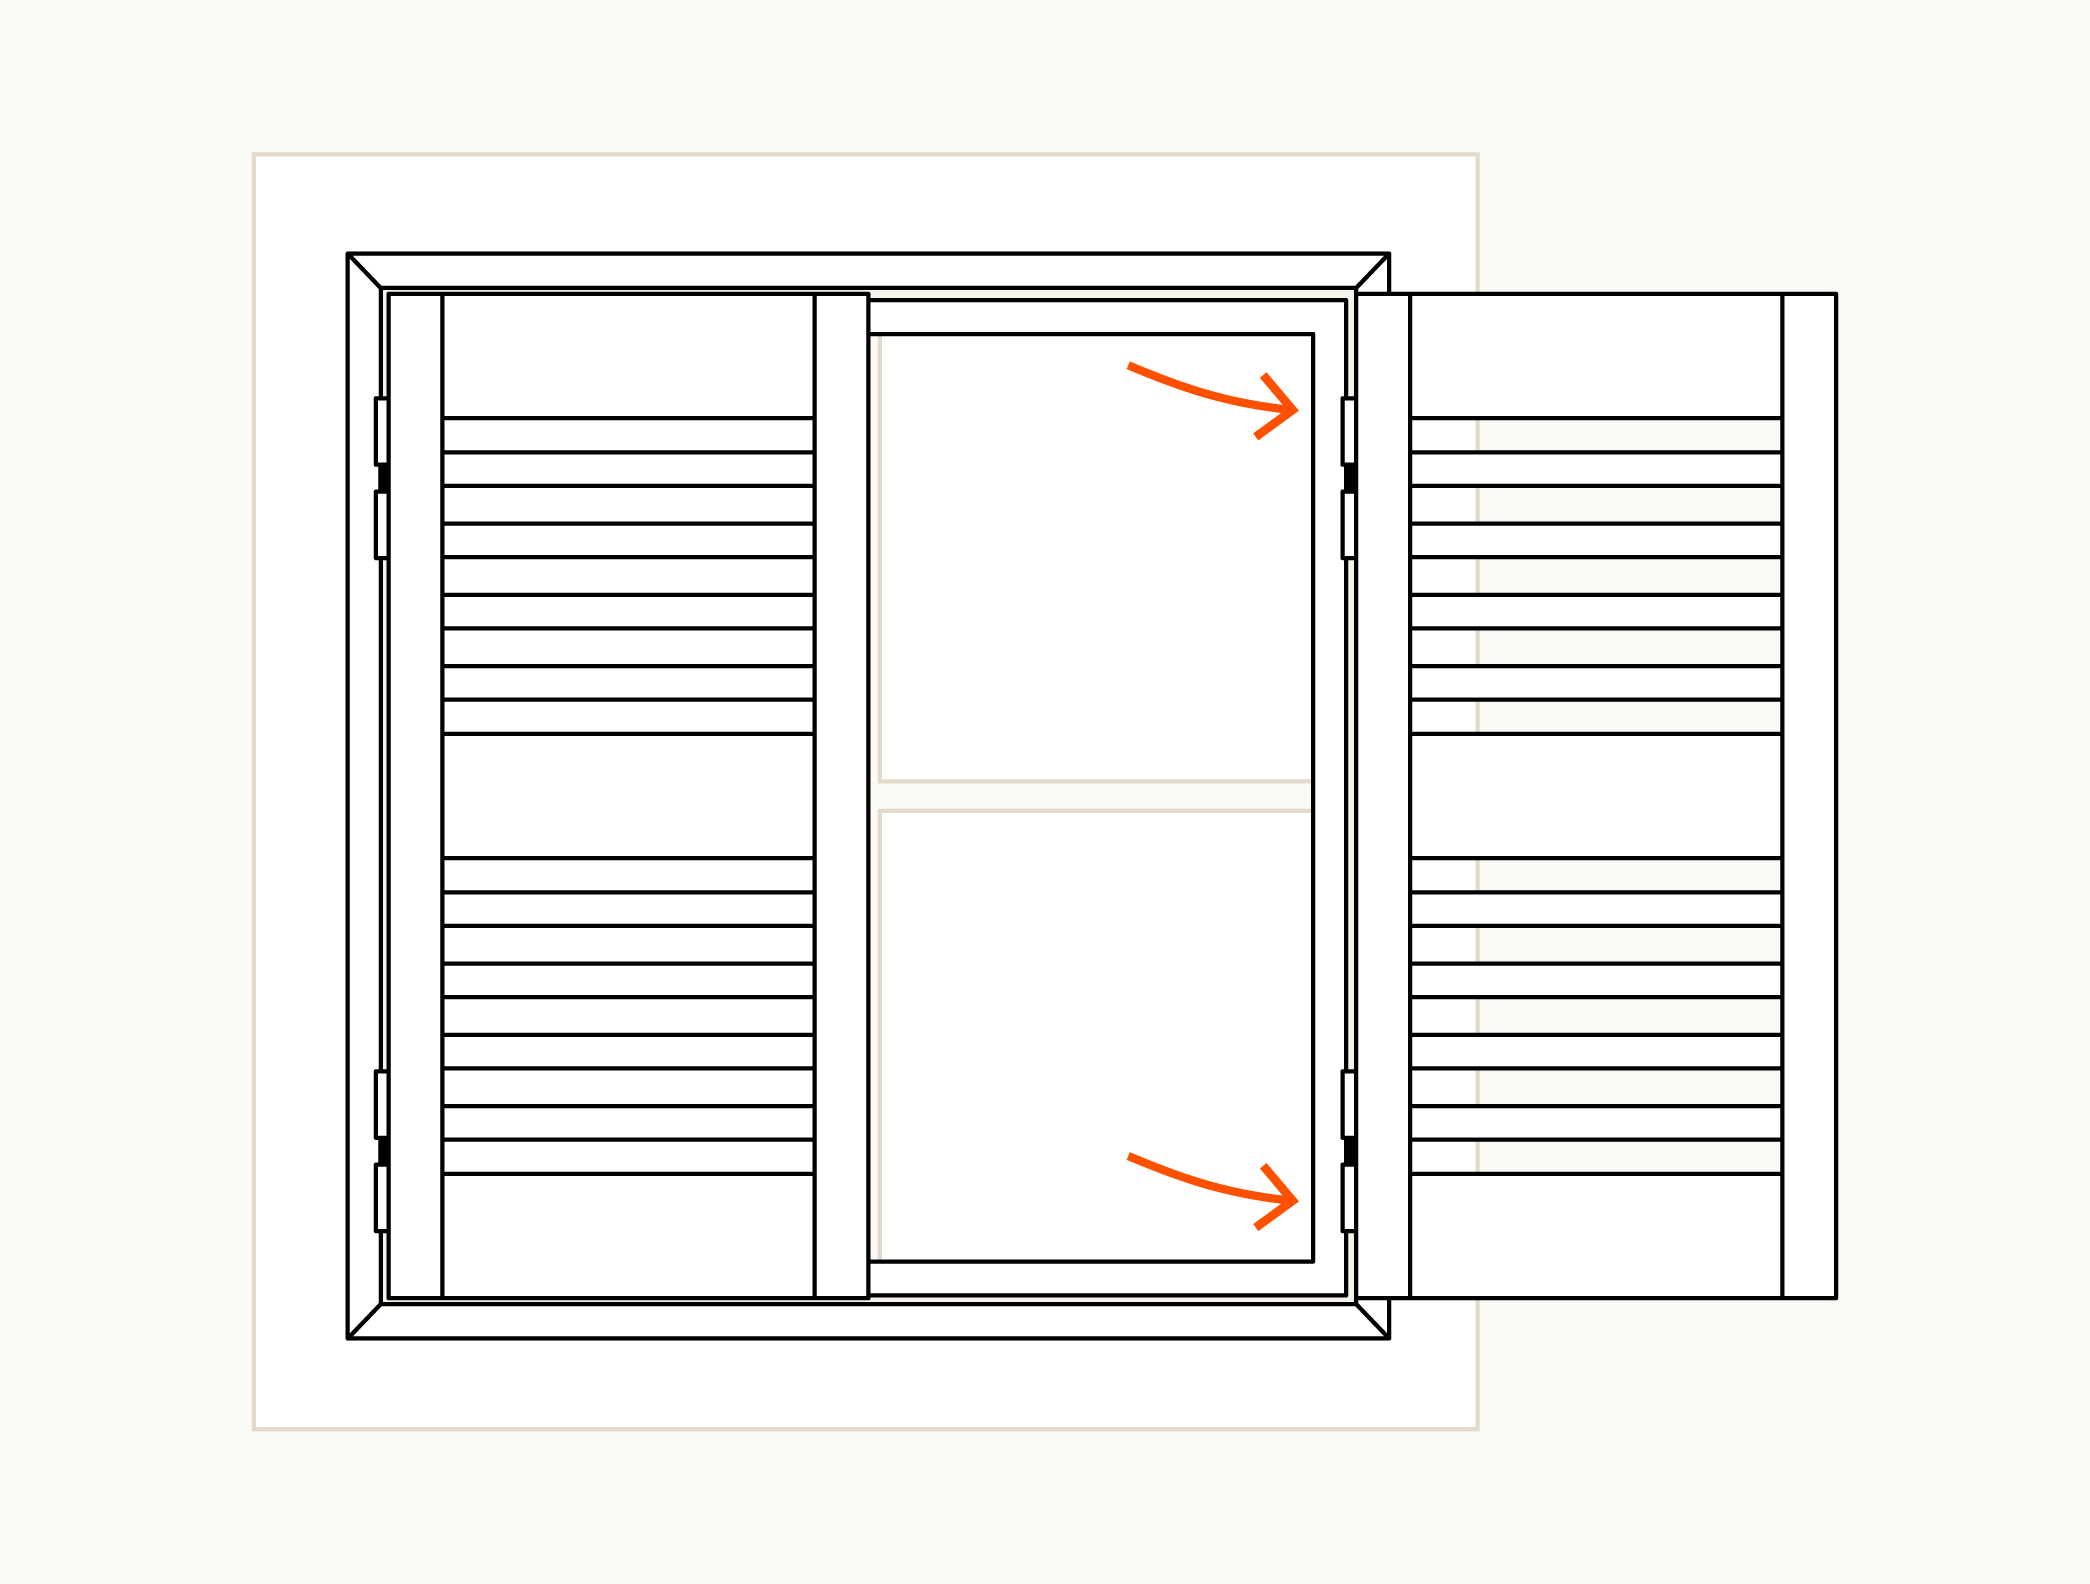
Check that your panels open and close correctly. You may have to slightly lift the panel to open to begin with if you have large panels. You should be confident everything is installed correctly if you can see an even thin gap on all sides between the shutter frame and panels.
10 - The final touch
Grab the small stickers found in your packaging and stick them onto each visible screw.
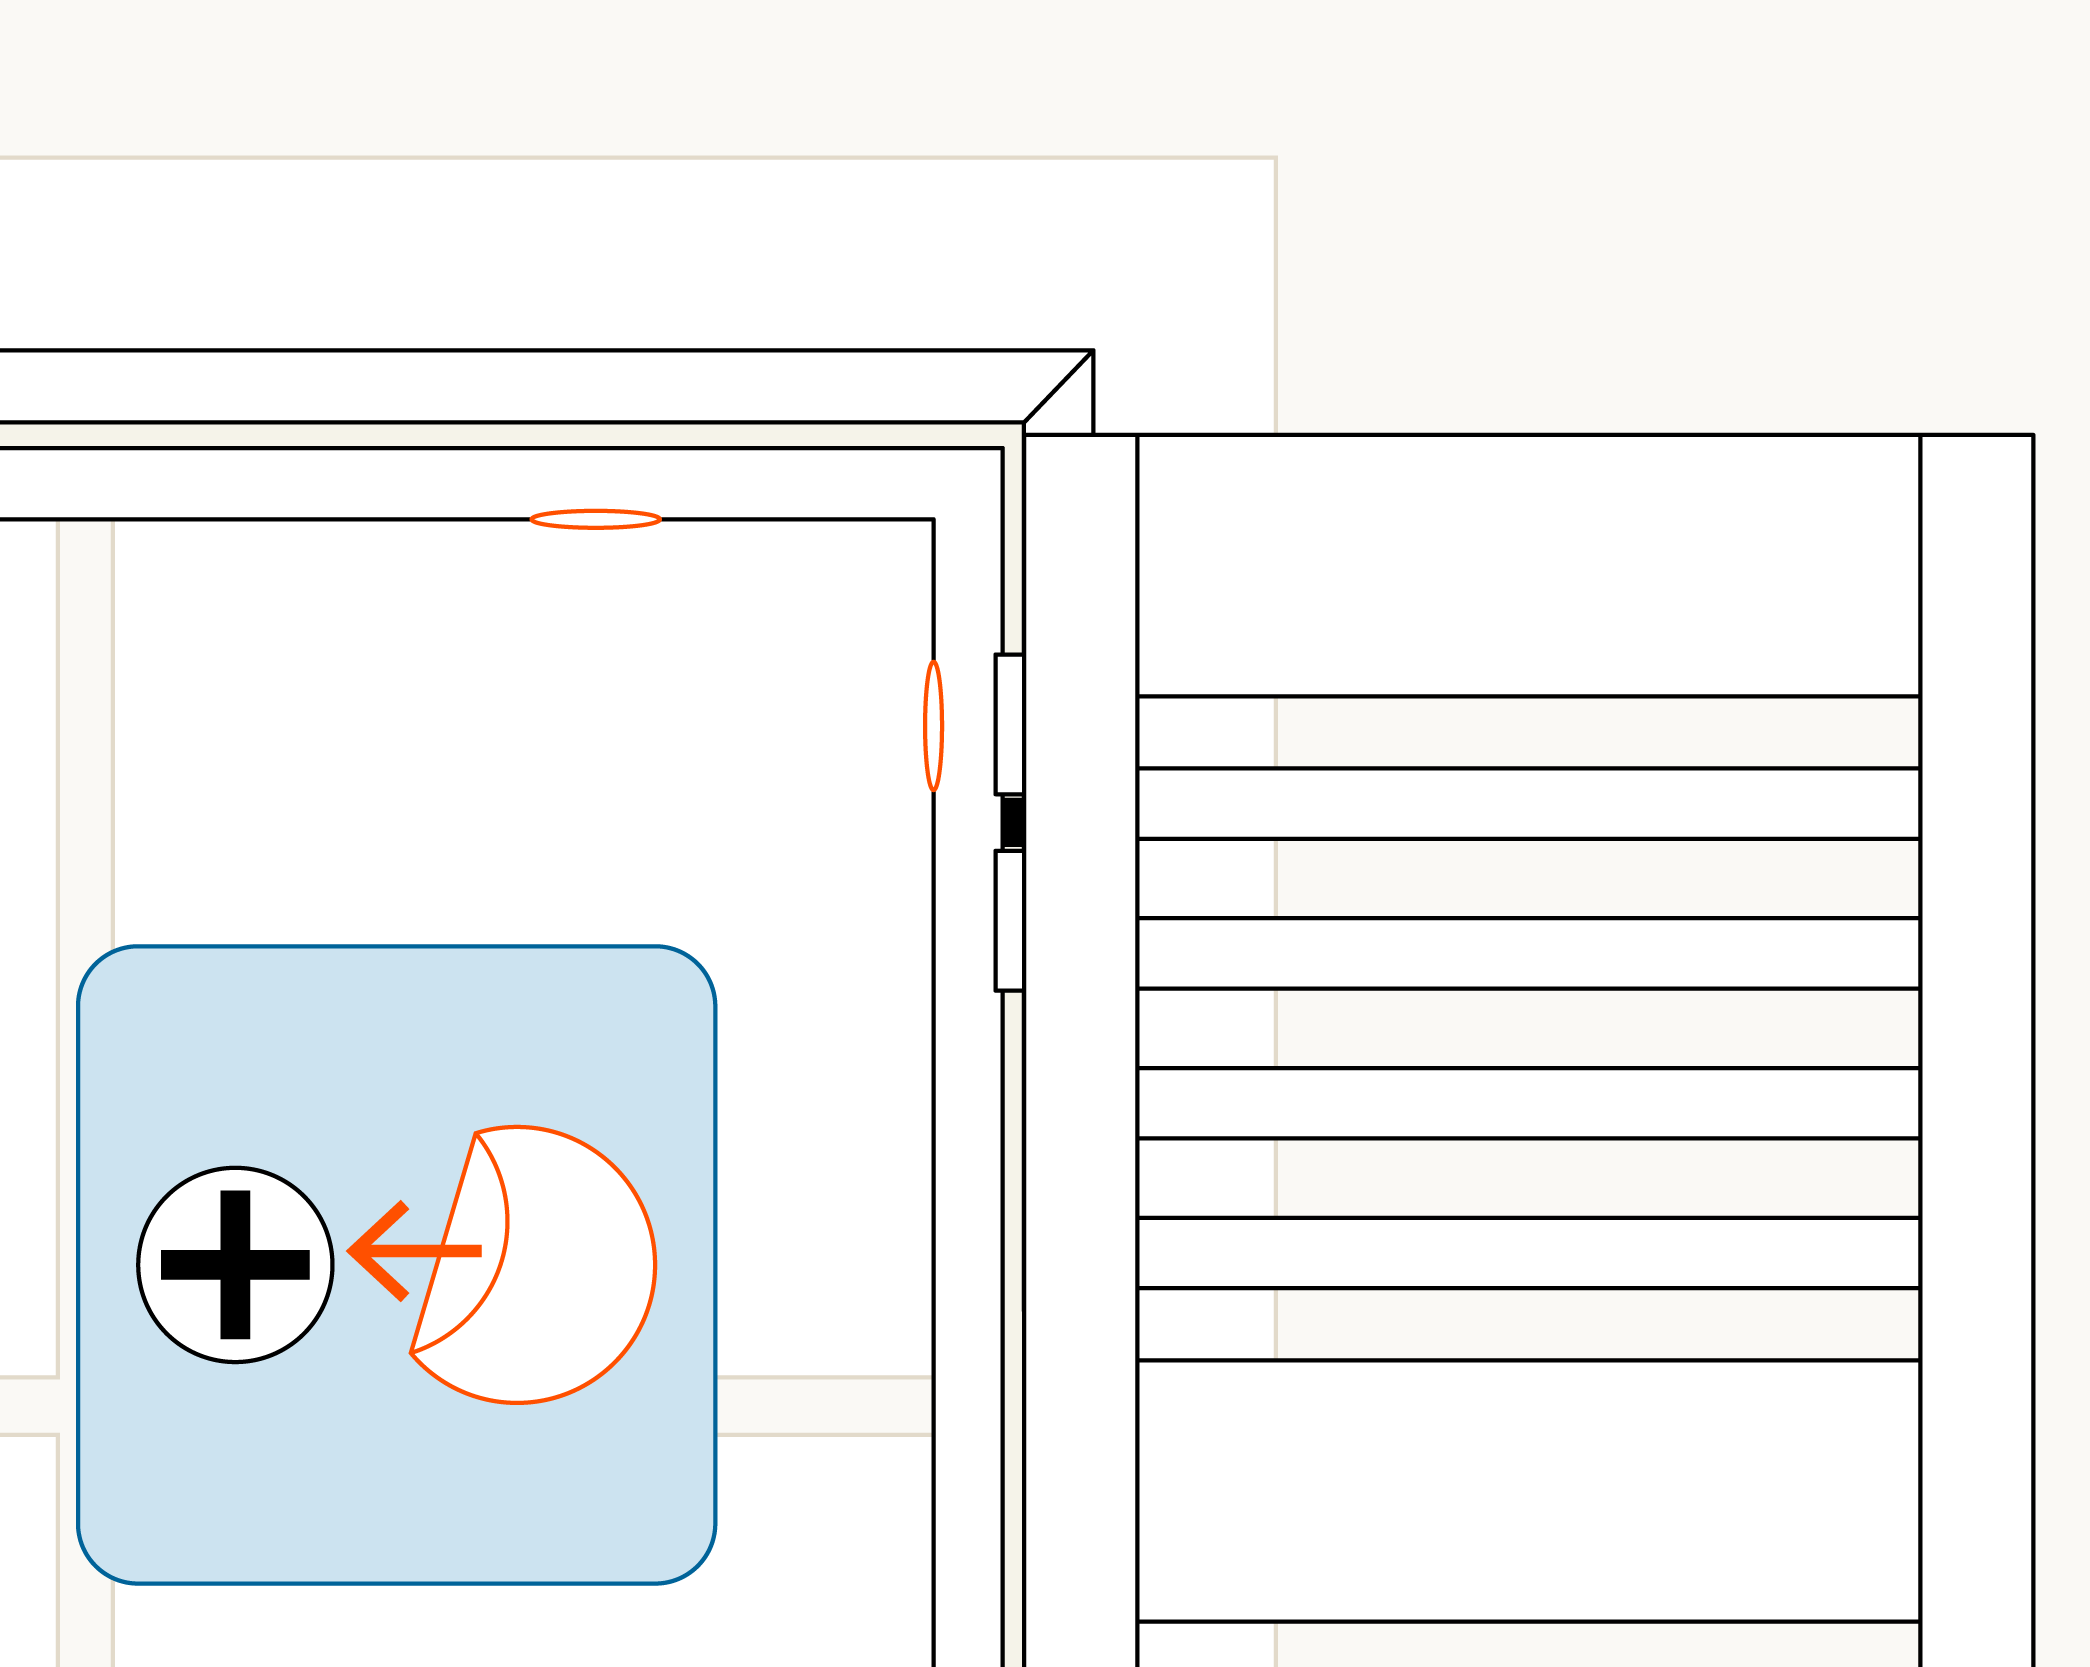
11 - You've done it!
Well done on installing your new shutters - it's pretty easy right? If you have more shutters in your order, it'll be much easier the second time!
Thanks for reading along and here at Shadey we hope you enjoy your new shutters.


We’ve got your windows covered.
We Measure Up
Rest assured at Shadey our products and support Measure Up. If you need extra support feel free to contact us here.
