How to install Roman Blinds
1 - Getting Started
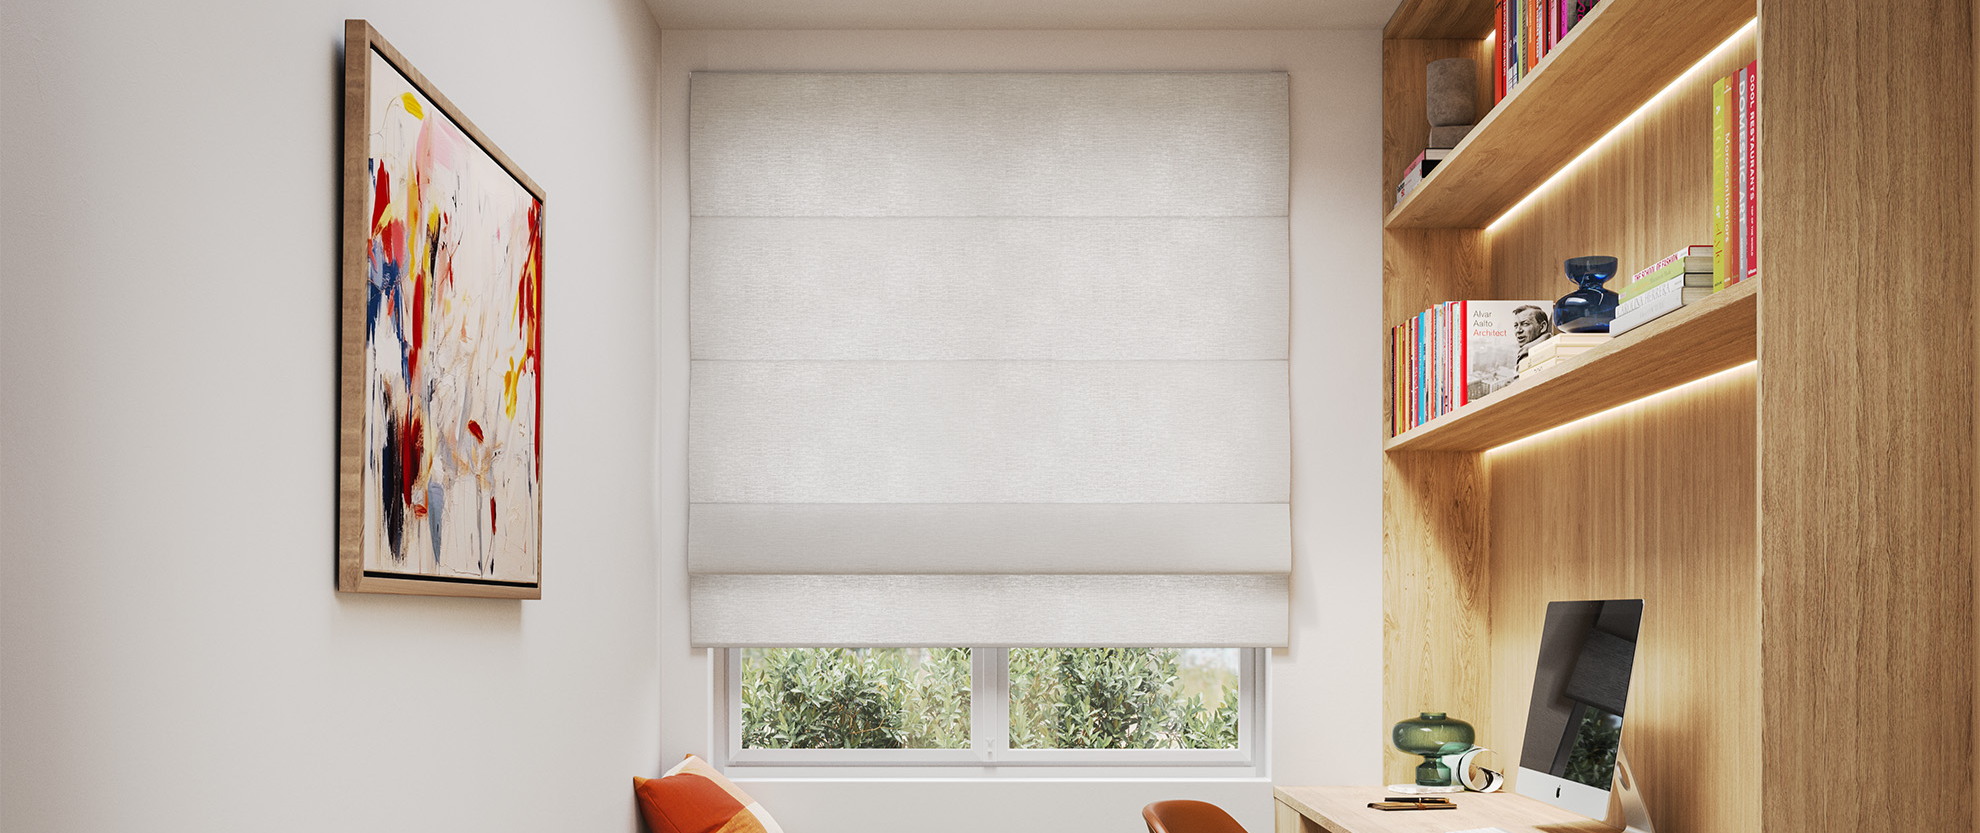
Blending a classic aesthetic with modern functionality, Roman blinds are such as versatile product. Wheter you've ordered a chain drive or a cord and cleat system, light control is made easy. Not only that, but Roman blinds are a breeze to install.
Unpack your boxes, remove the outer plastic wrapping and look out for the label affixed to the wrapping on your blind, showing your product name & basic specs. Get all your parts organised and be sure to keep the soft foam wrapping attached to your pieces to prevent any pre-intallation marks and scratches.
- 1 to 2 people
- A metal tape measure
- A pencil
- Step Ladder
- Drill with phillips head drill bit
- 3mm drill bit for pilot holes
5-10 mins
2 - Your fitting
You'll be installing your Roman blind brackets above your window frame. Be sure to install your brackets at the same hieght you measured from when you ordered your blinds.
The brackets have multiple fixing points, however to achieve maximum coverage ensure to install the screws through the back of the bracket into the wall.
It only takes a few minutes to install your Roman blinds, so let's get started.

3 - What's in the box?
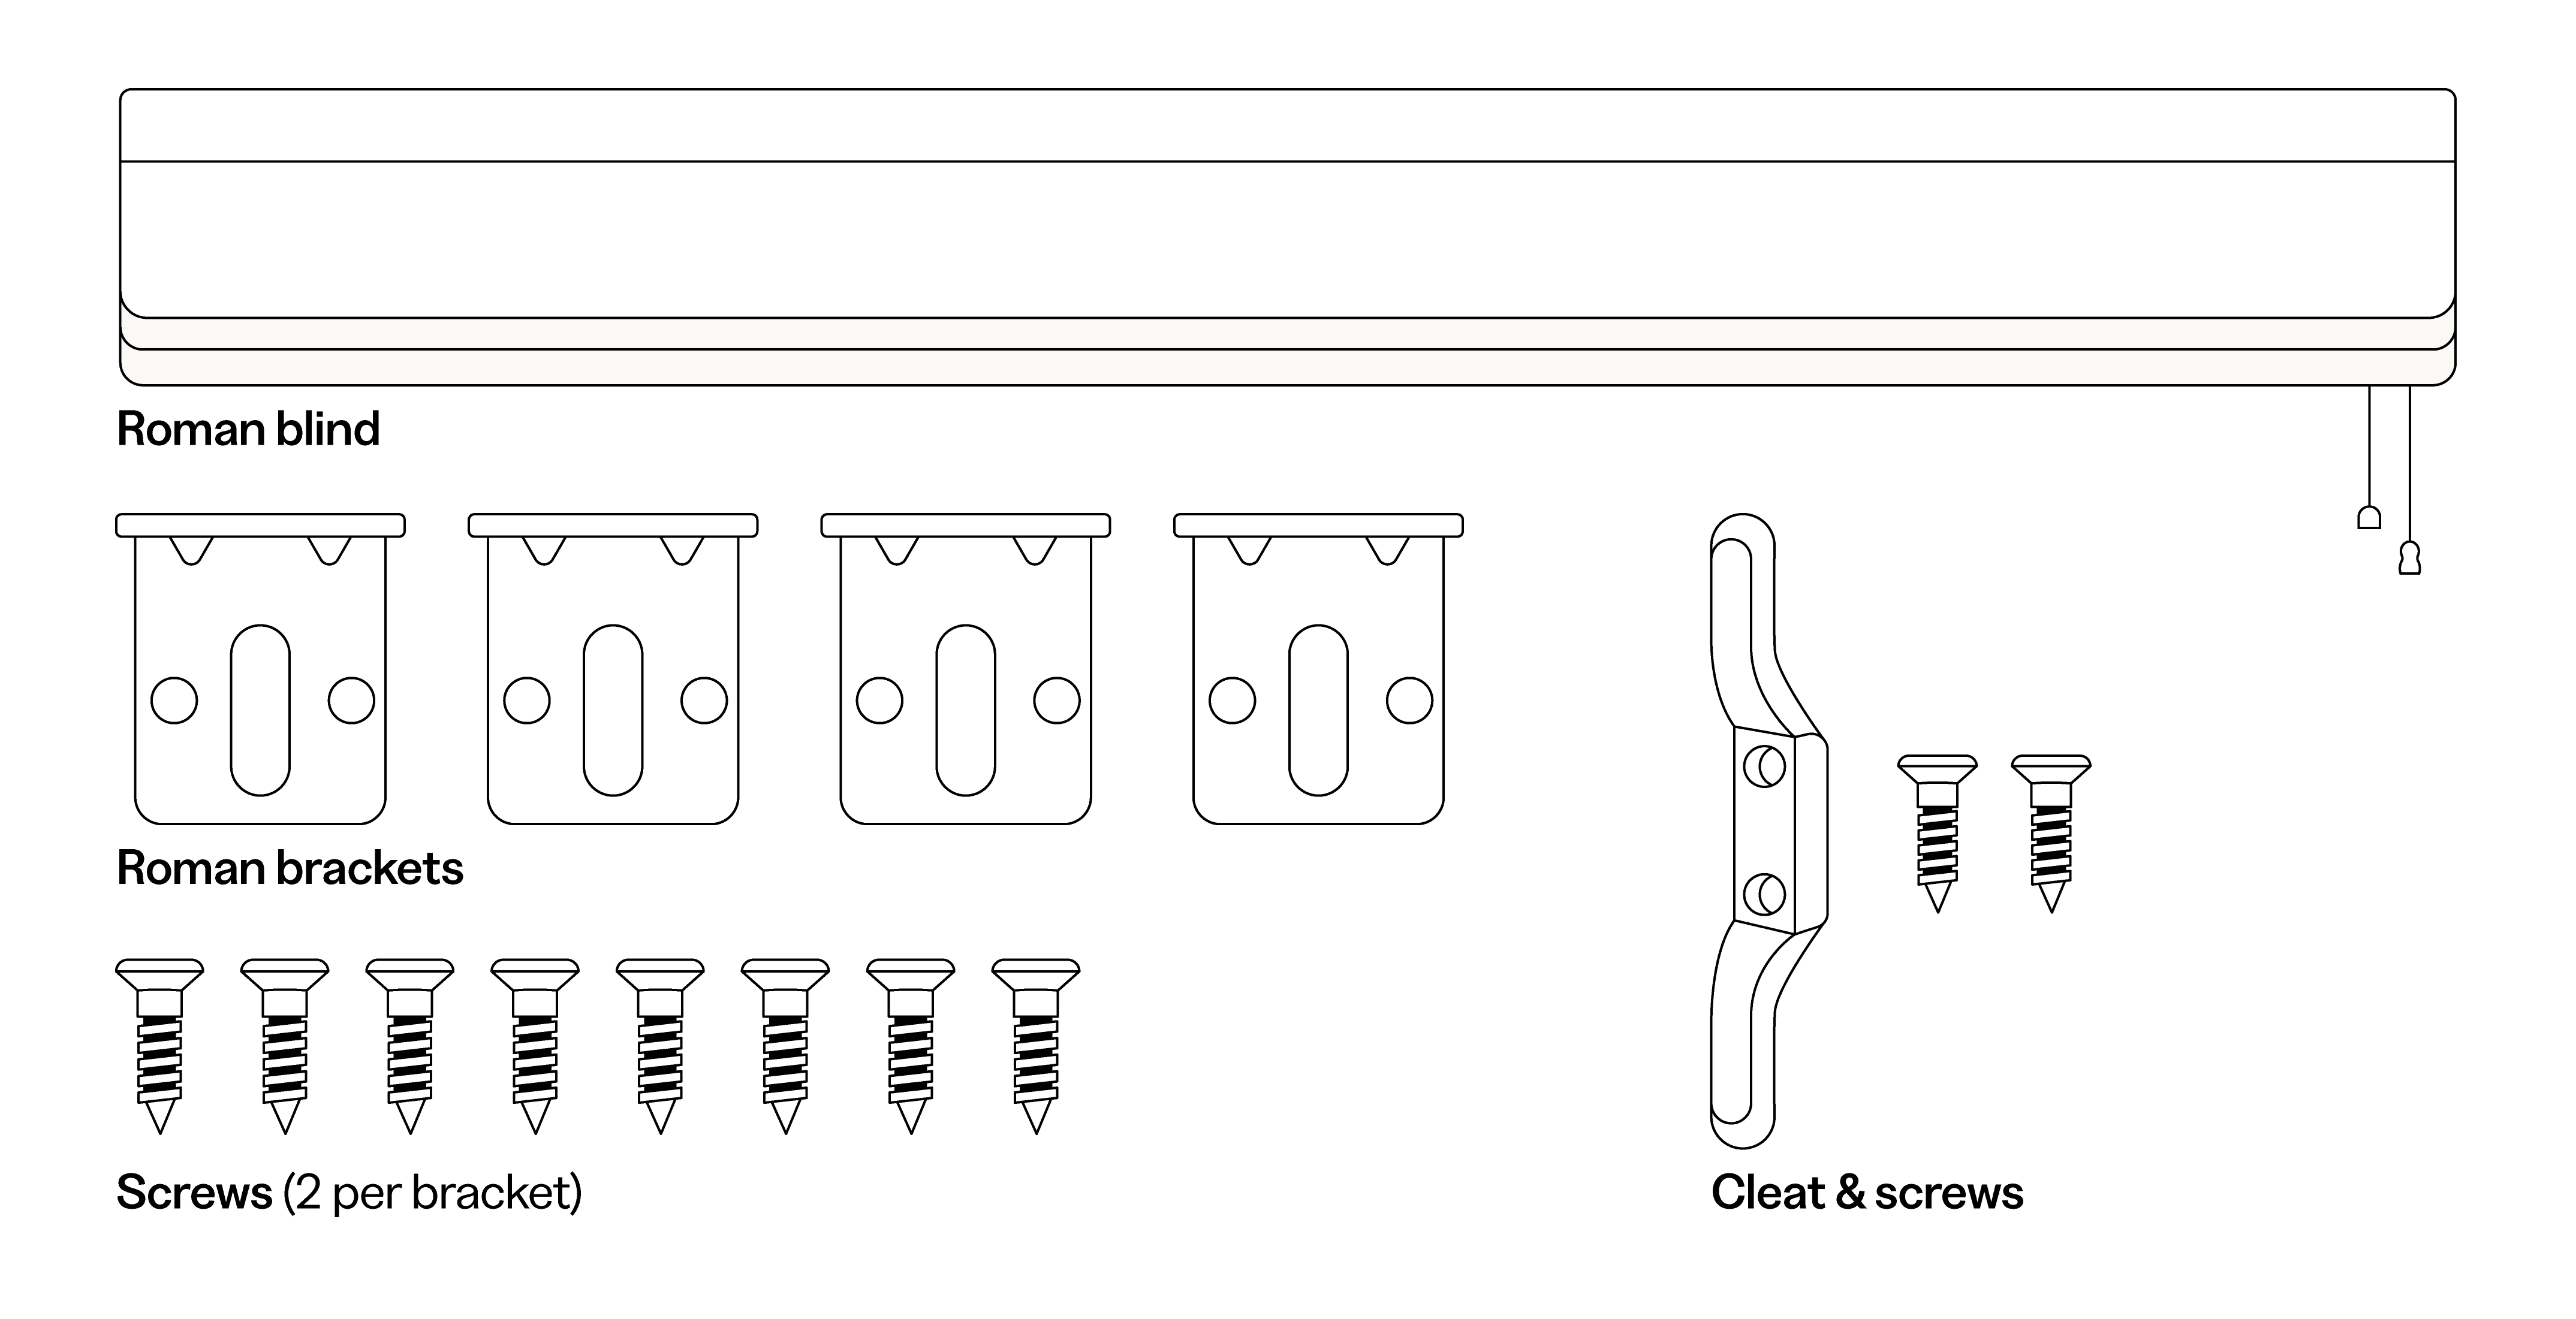
Open up the cardboard box(es) you've received. Open the outer layer of plastic surrounding your blind(s). You'll notice some bracket componentry, a blue plastic bag containing the child safety clip and a bag of screws. There'll be one bag with all the screws for each of the blinds you've ordered - there should be two screws per bracket.
*NOTE: Because your honeycomb blind is fully customised, the components in your order may differ from those pictured here. Don’t worry, we promise you’ll have everything you need and all the extras you’ve asked for.
4 - Position your brackets
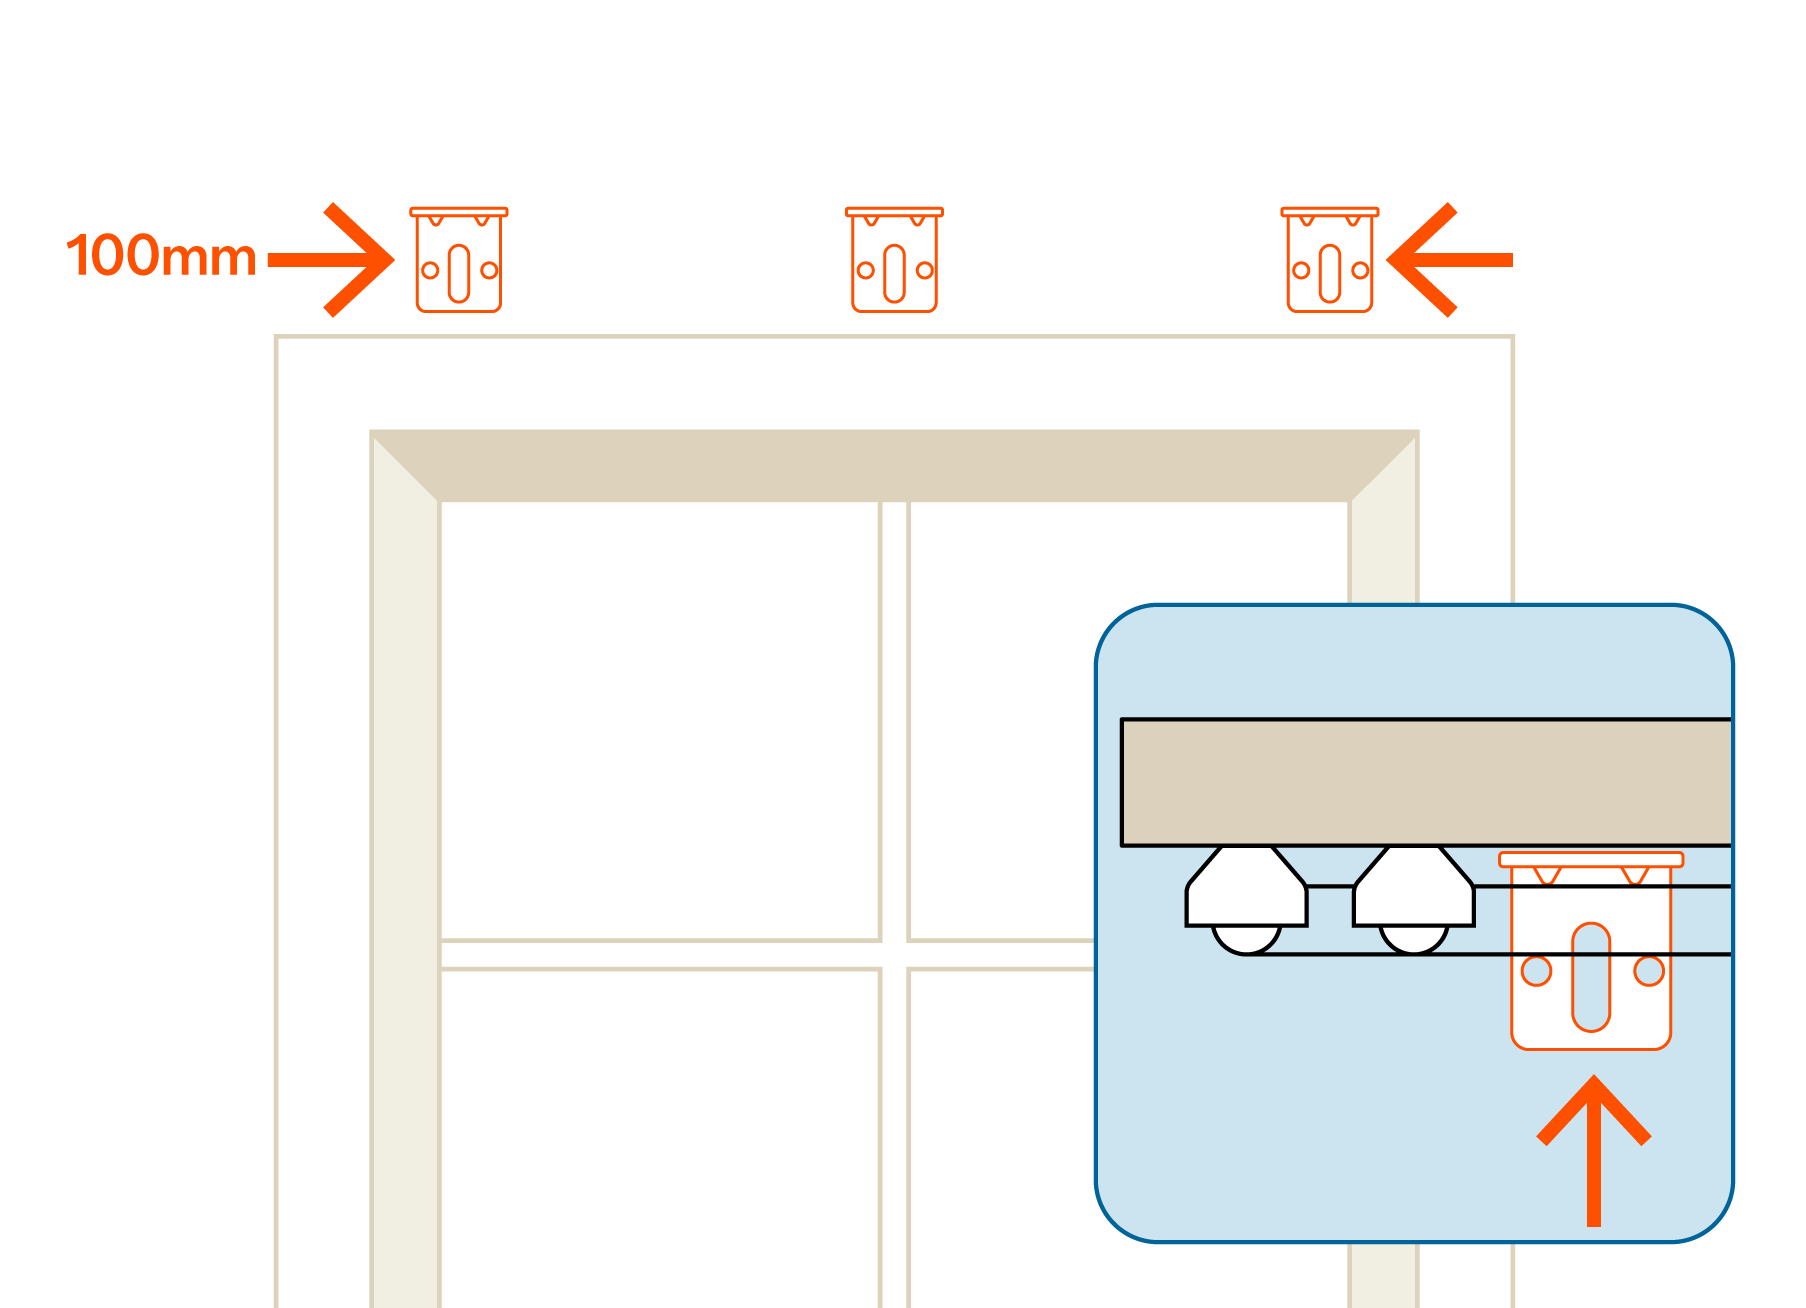
Before you install your brackets, its important that your outer most brackets are postisioned at least 100mm from the end on your blind.
It is important to factor in were the operating mechanism of the blind is situated and plan where your brackets sit to avoid the componentry.
5 - Mark up
You're going to be marking up where your brackets will be installed.
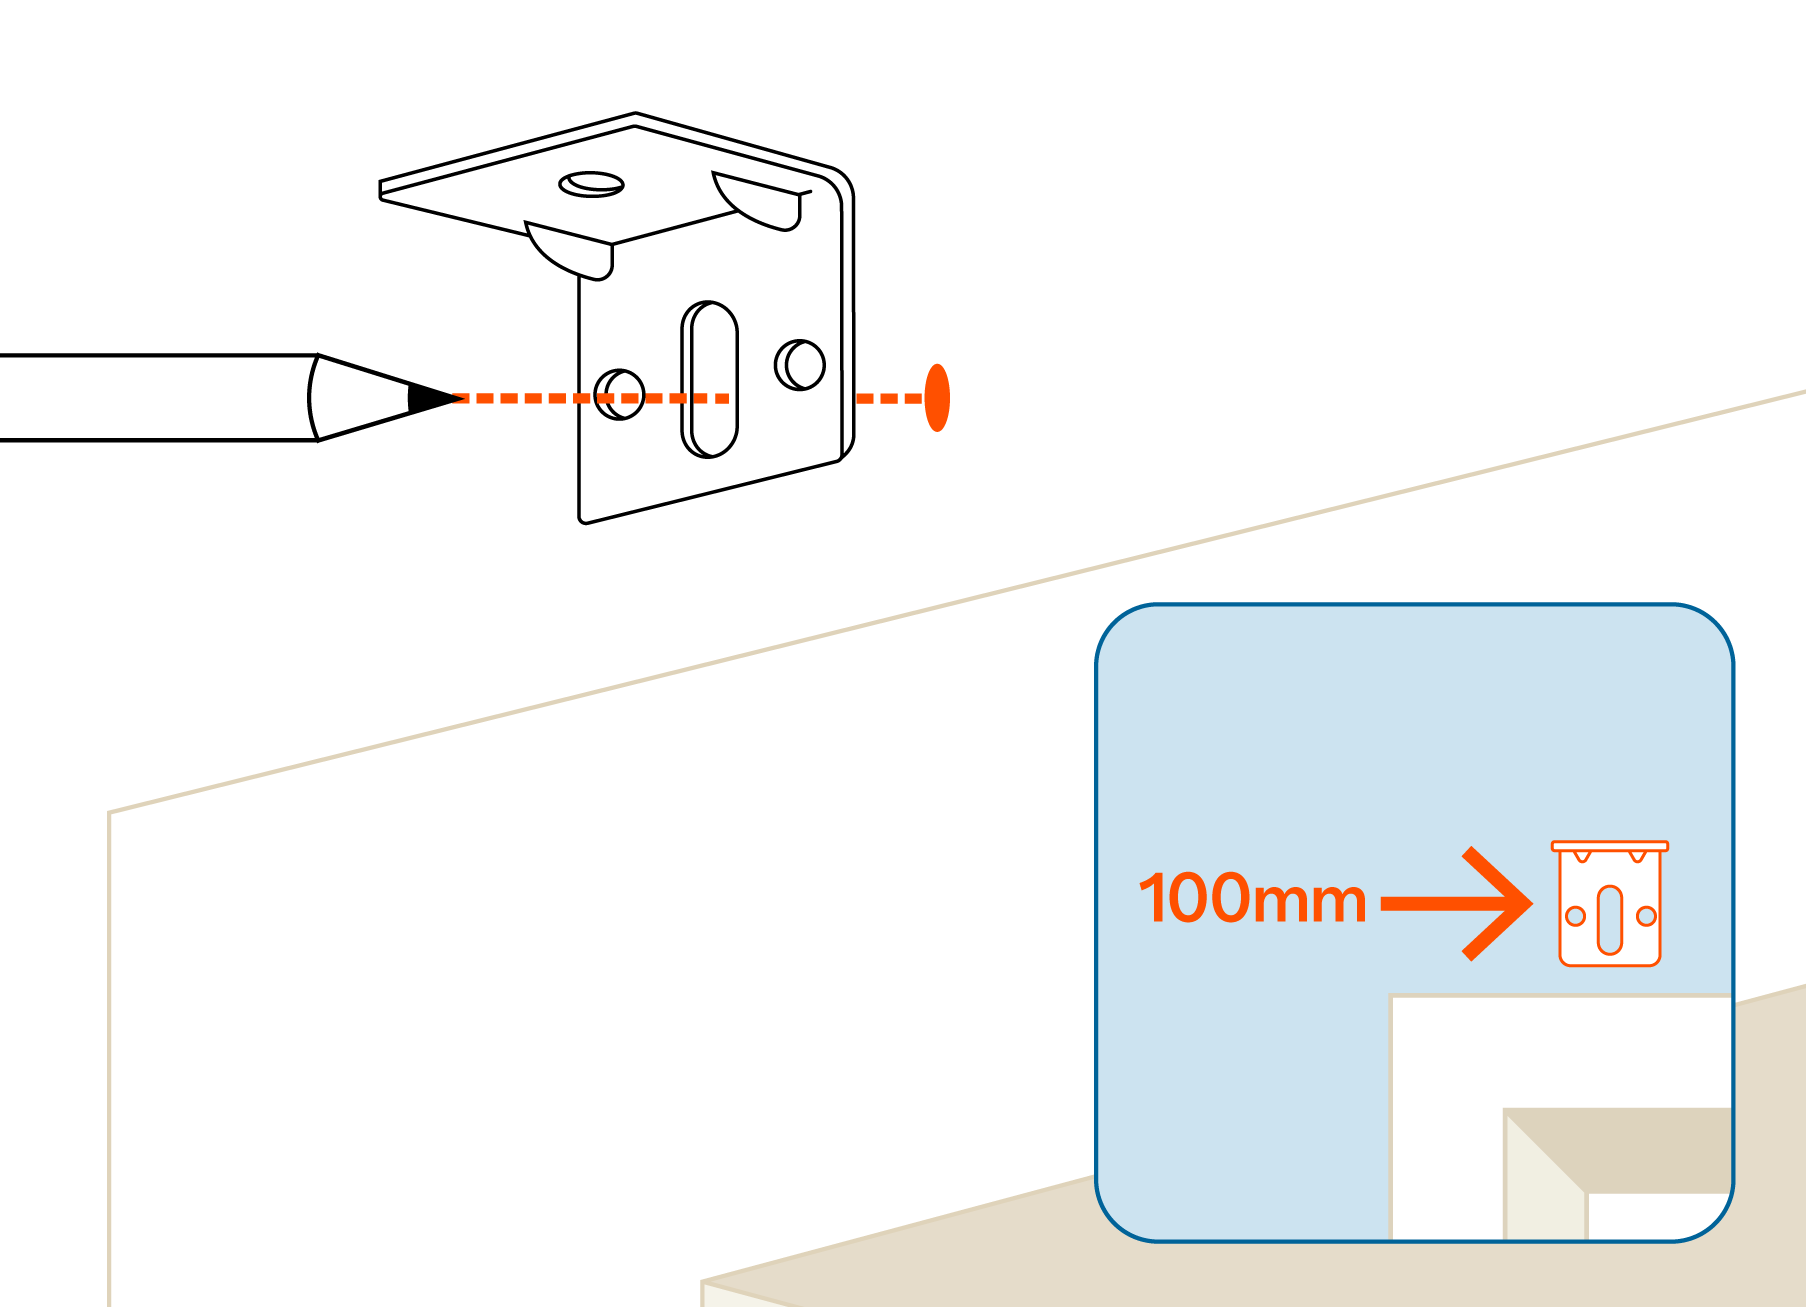
Gather your brackets, the number of brackets may differ depending on the length of your blind.
Lift each bracket above your window with each bracket flush with the wall. Make a mark through the back of your brackets as shown in the image. Make sure the back of the bracket is at least 10mm any obstructions and that your end brackets are inset 100mm.
Repeat for all remianing brackets, keeping them evenly spaced.
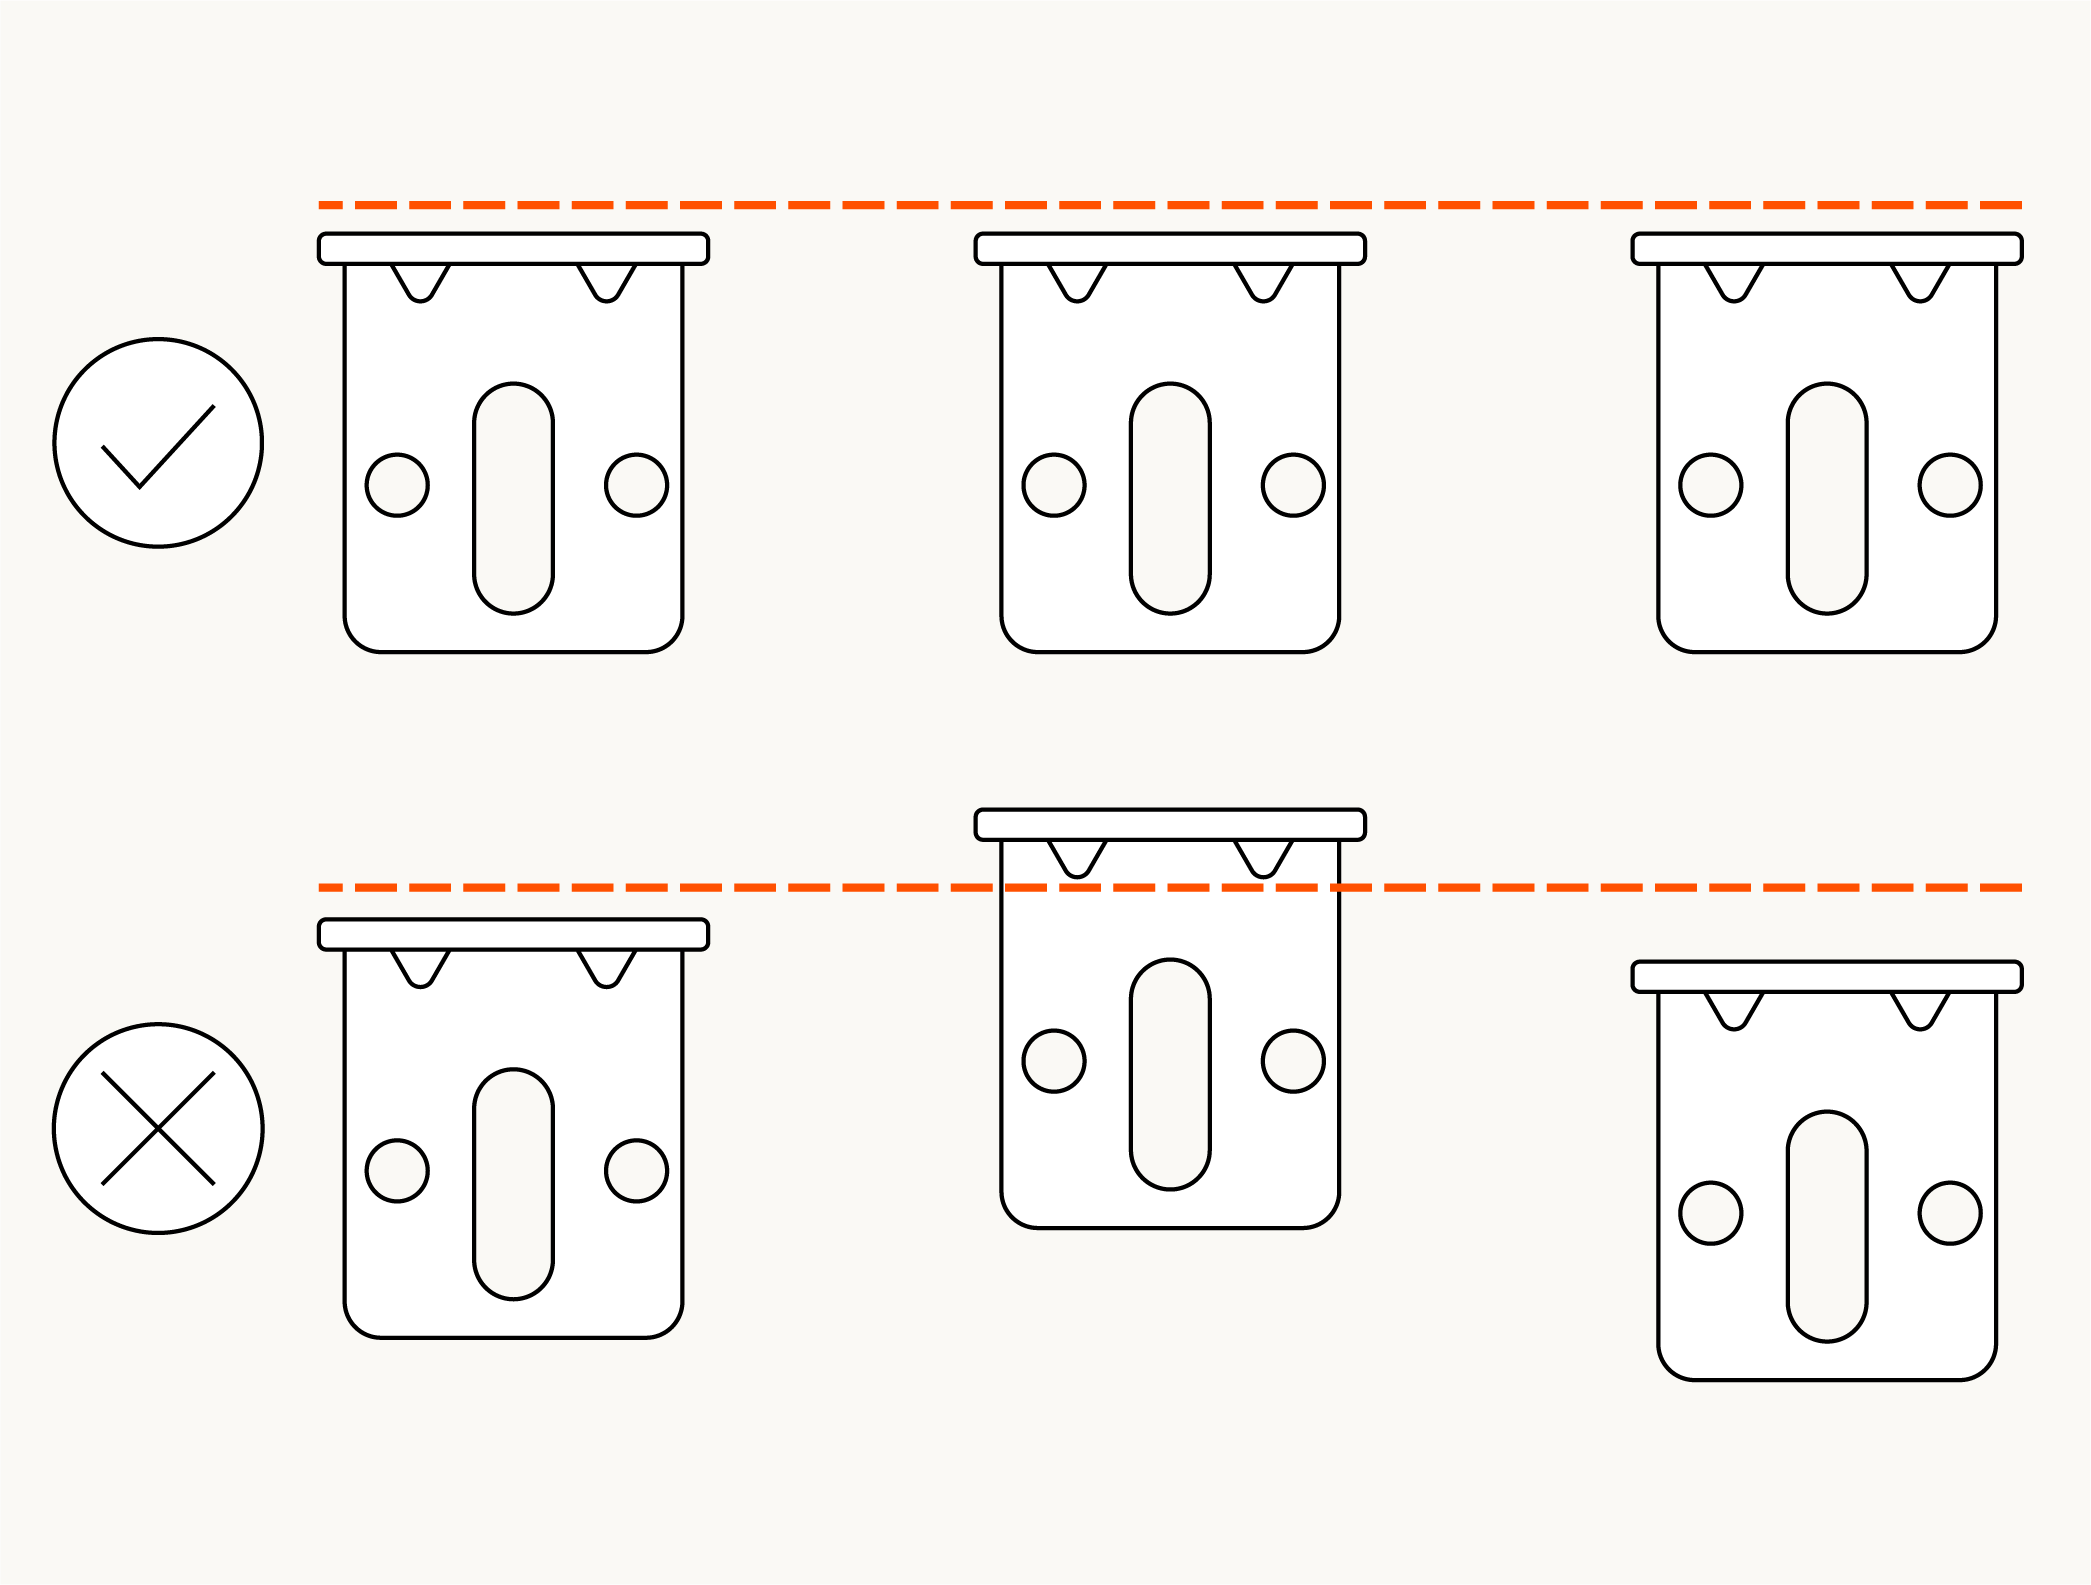
To make install as easy as possible, it's important that your brackets are inline with eachother.
Tip: Use your tape measure as a guide to keep your brackets level as you mark up each one.
6 - Install your brackets
Now you'll be drilling pilot holes for your brackets and then installing them with the supplied screws.
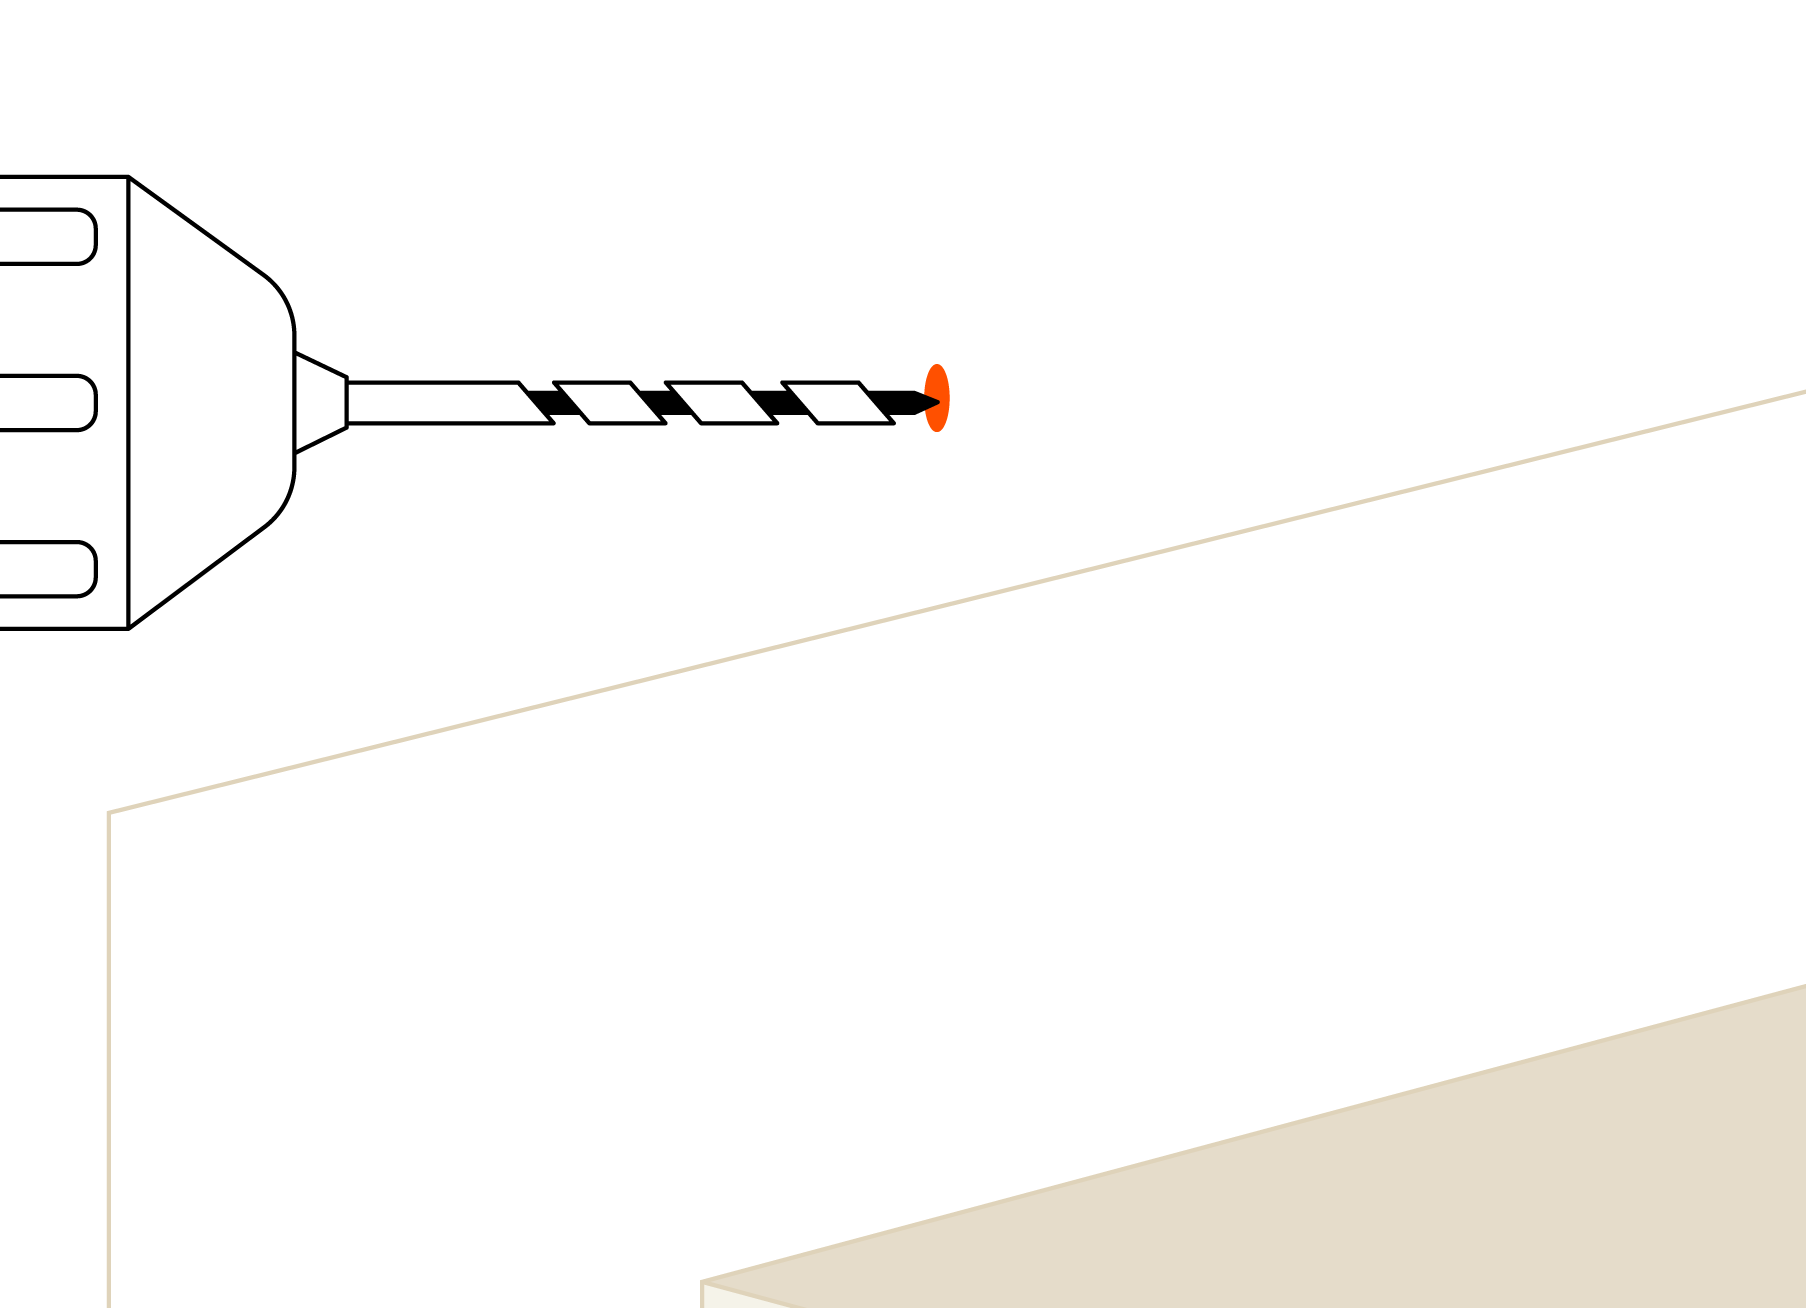
Pop the 3mm drill bit into your drill and pre-drill holes for each of the Roman blind brackets where you've marked in the previous step.
Repeat for all brackets.
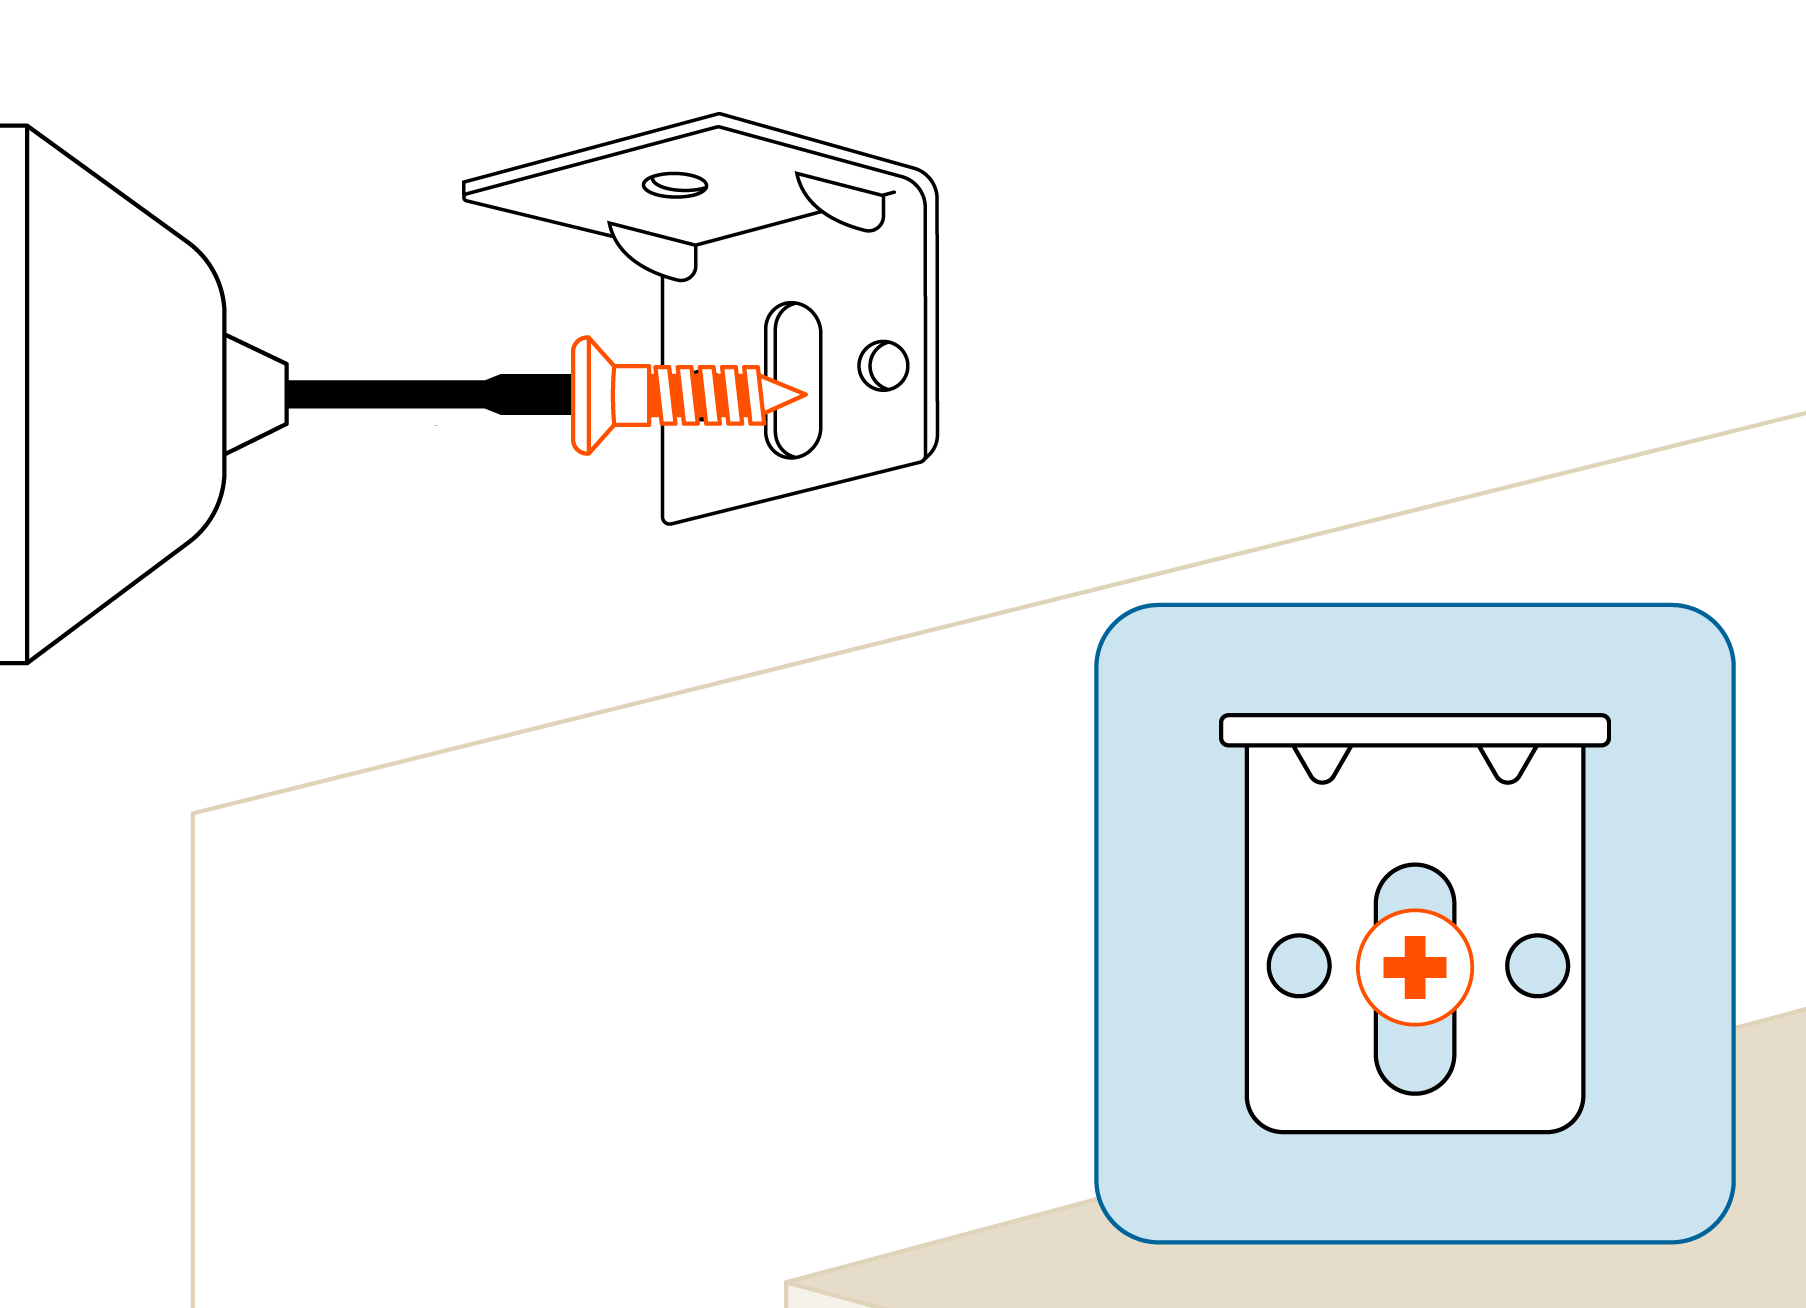
Install your brackets by holding each up and drilling a screw through the pilot hole.
Repeat this process for all remaining brackets.
7 - Install your blind
You're nearly there. Just simply click your Roman blind into your already installed brackets.
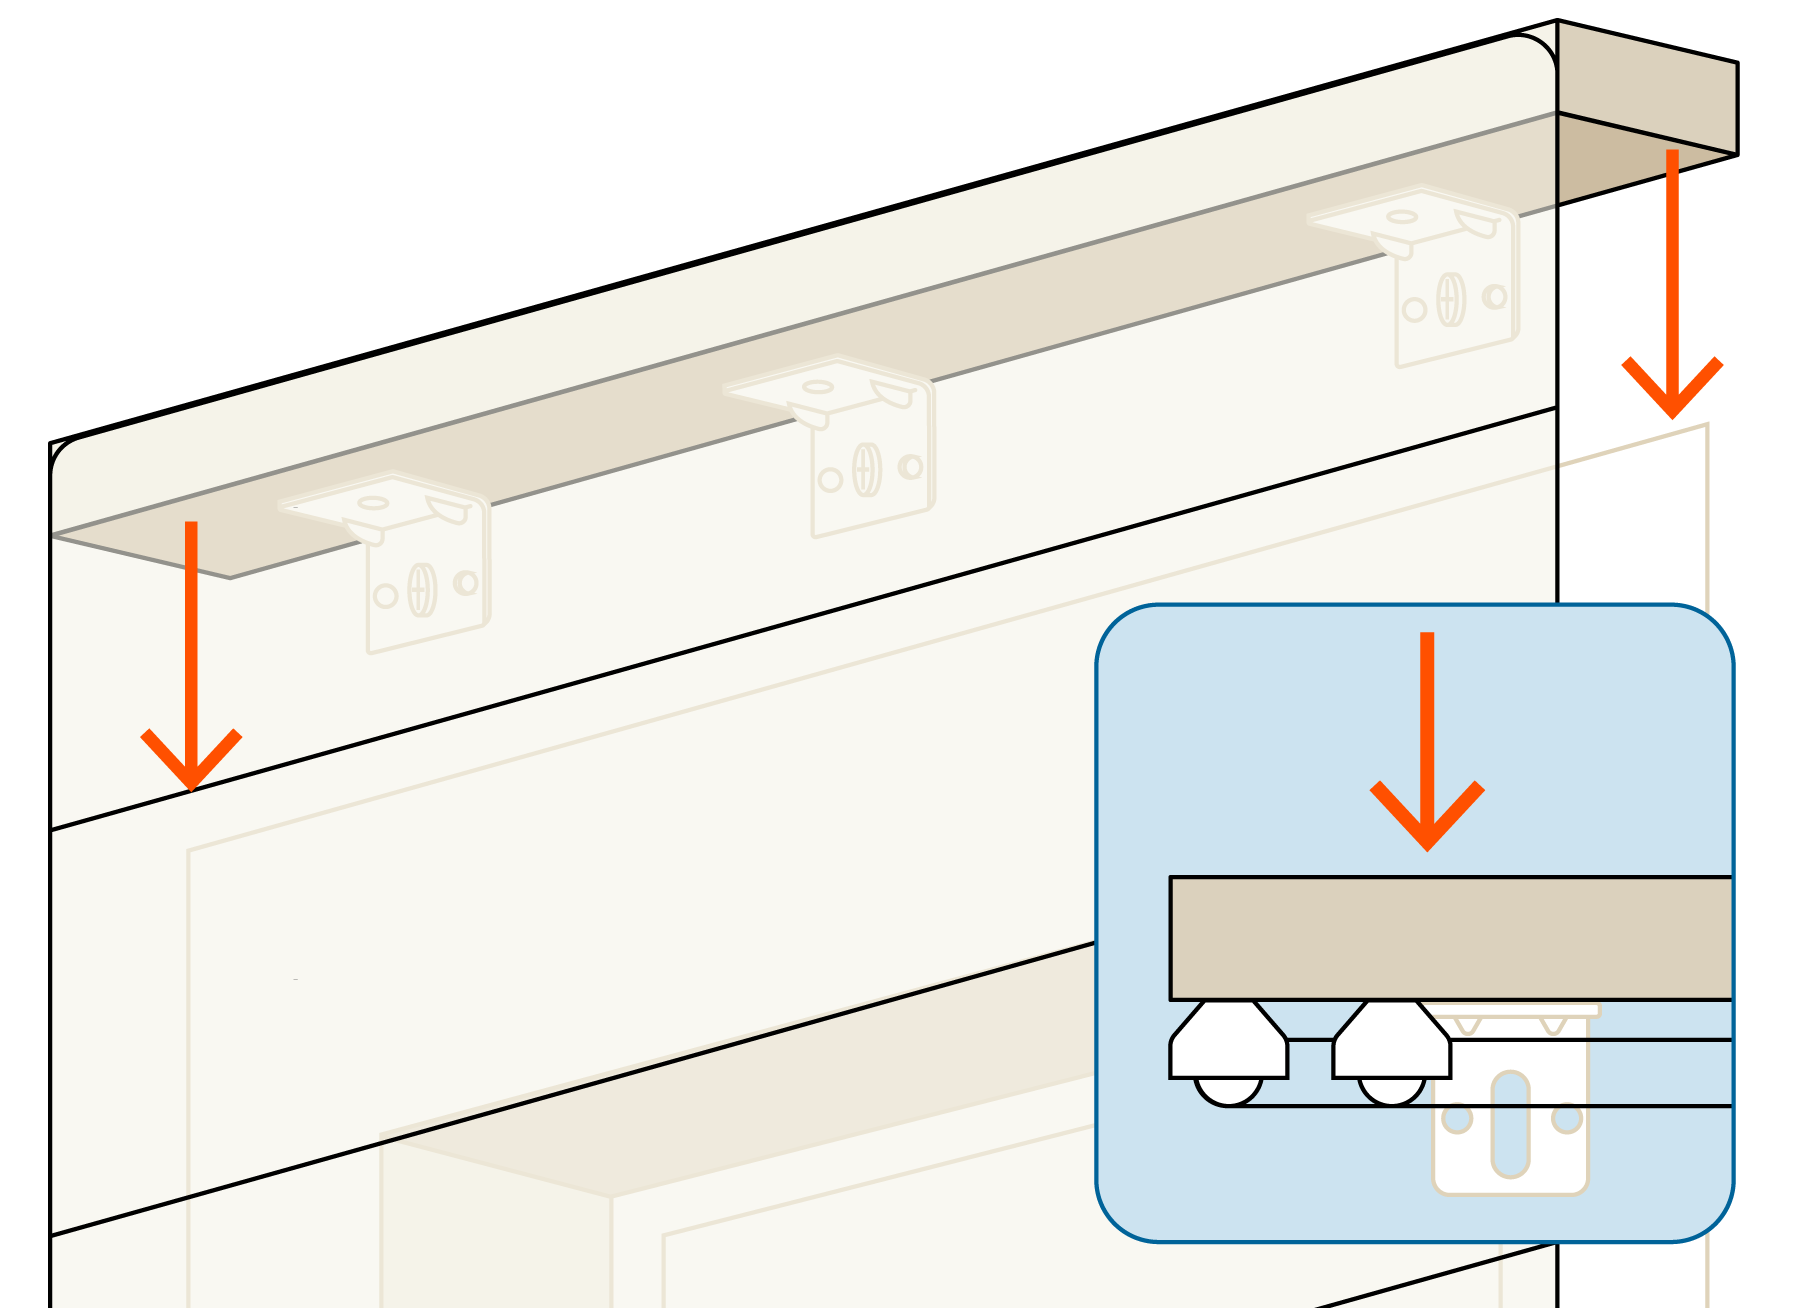
Lift up your Roman blind and place the headrail on top of your brackets. The blind will rest nicely in place provided that the brackets are in line.
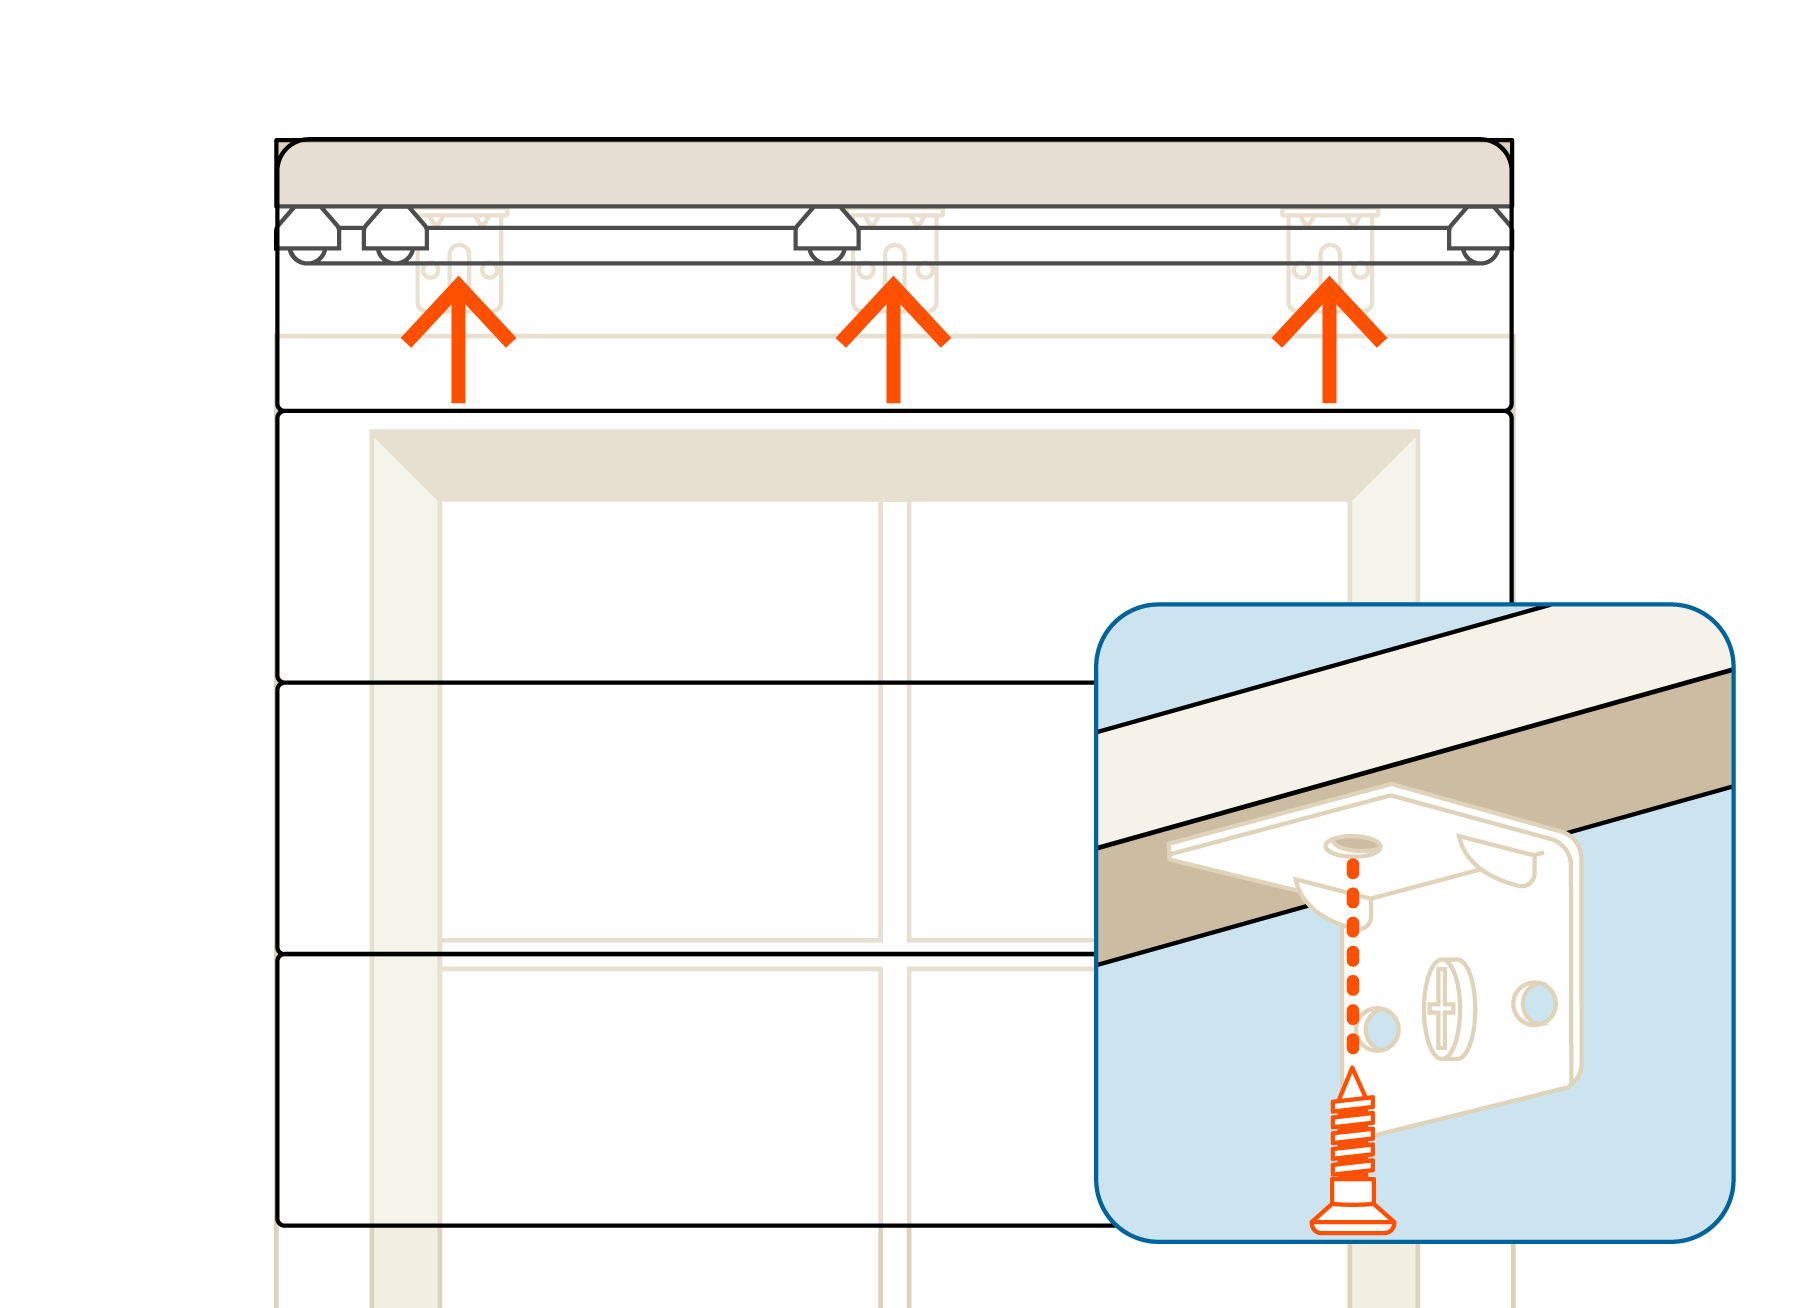
Keeping your blind steady, take a screw and drill it up through the top of the bracket, directly into the headrail, through each bracket. Begin with the middle bracket first for stability.
Repeat the process for the remaing brackets. Your blind is now secure, great Job!
8 - Child safety
If like us at Shadey, you take child safety seriously, make sure to follow the steps below.
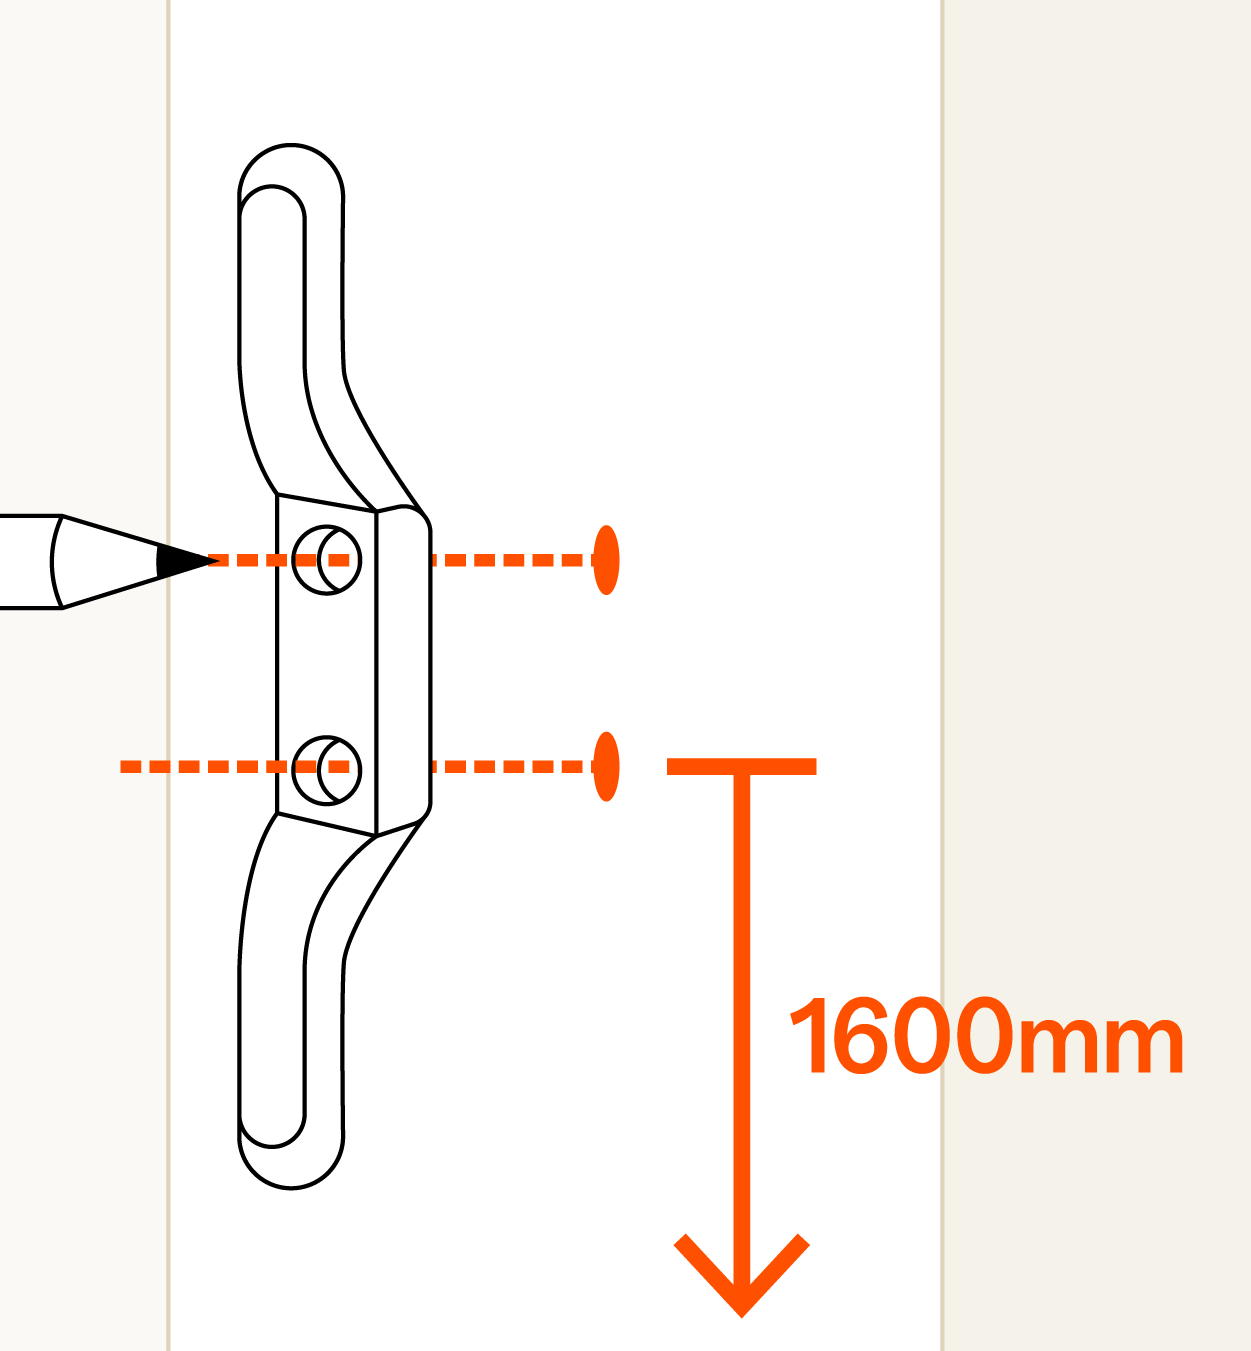
Position your cleat outside of your window at least 1600mm above the floor. With your pencil make marks onto the wall.
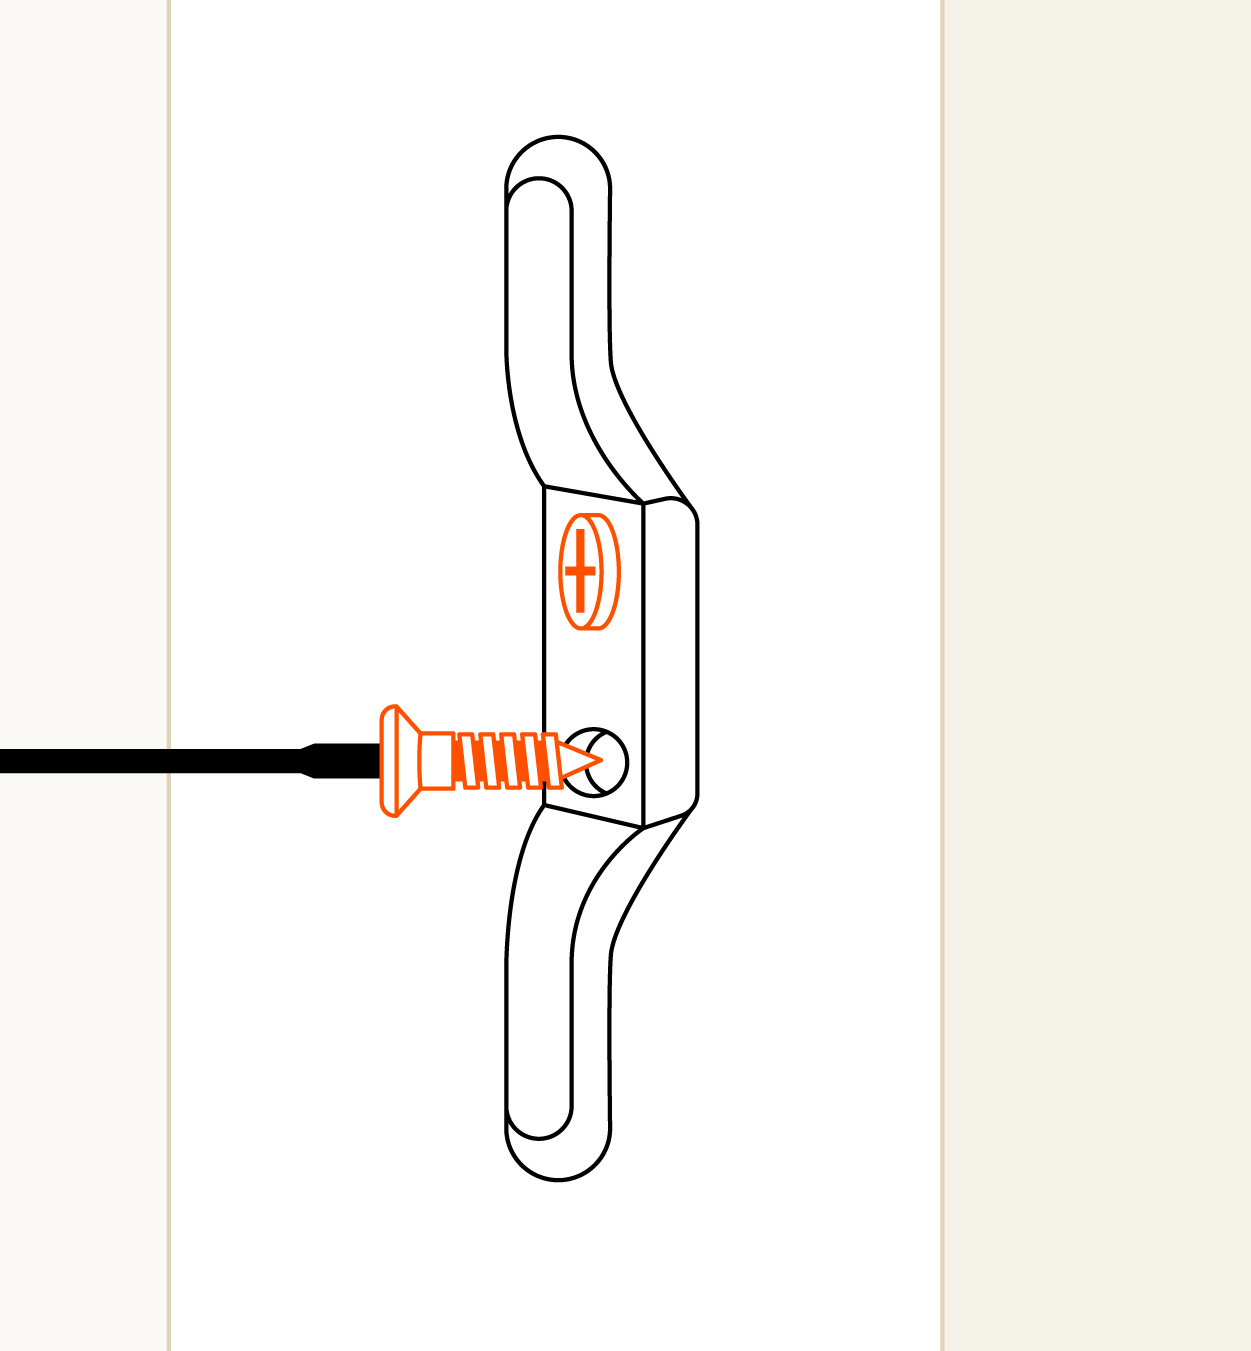
Grab your drill and screw the cleat onto your wall with the supplied screw.
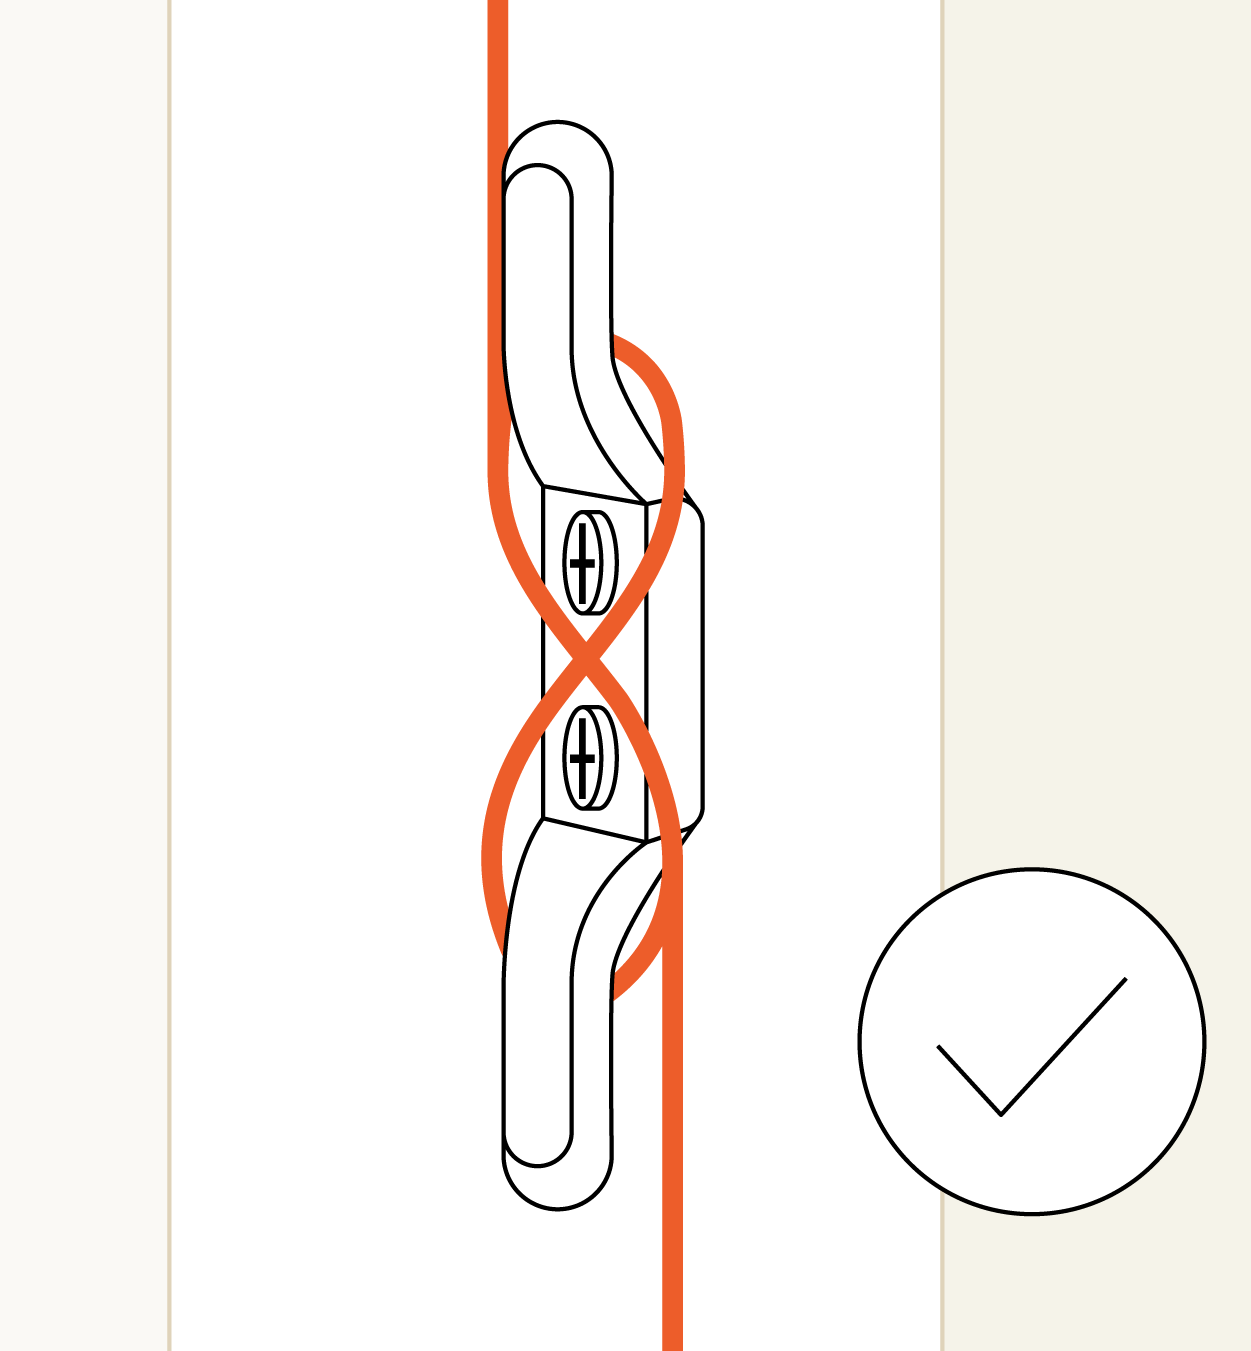
Take the blind cord and wrap it around the cleat in a figure eight as seen in the image.
Congrats, your Roman blind is installed and you've secured the cord.
9 - You've done it!
Well done on installing your new Roman blind - it's pretty easy right? If you have more roller blinds in your order, it'll be much easier the second time!
Thanks for reading along and here at Shadey we hope you enjoy your new Roman blind.

We’ve got your windows covered.
We Measure Up
Rest assured at Shadey our products and support Measure Up. If you need extra support feel free to contact us here.
