How to install Curved Curtains
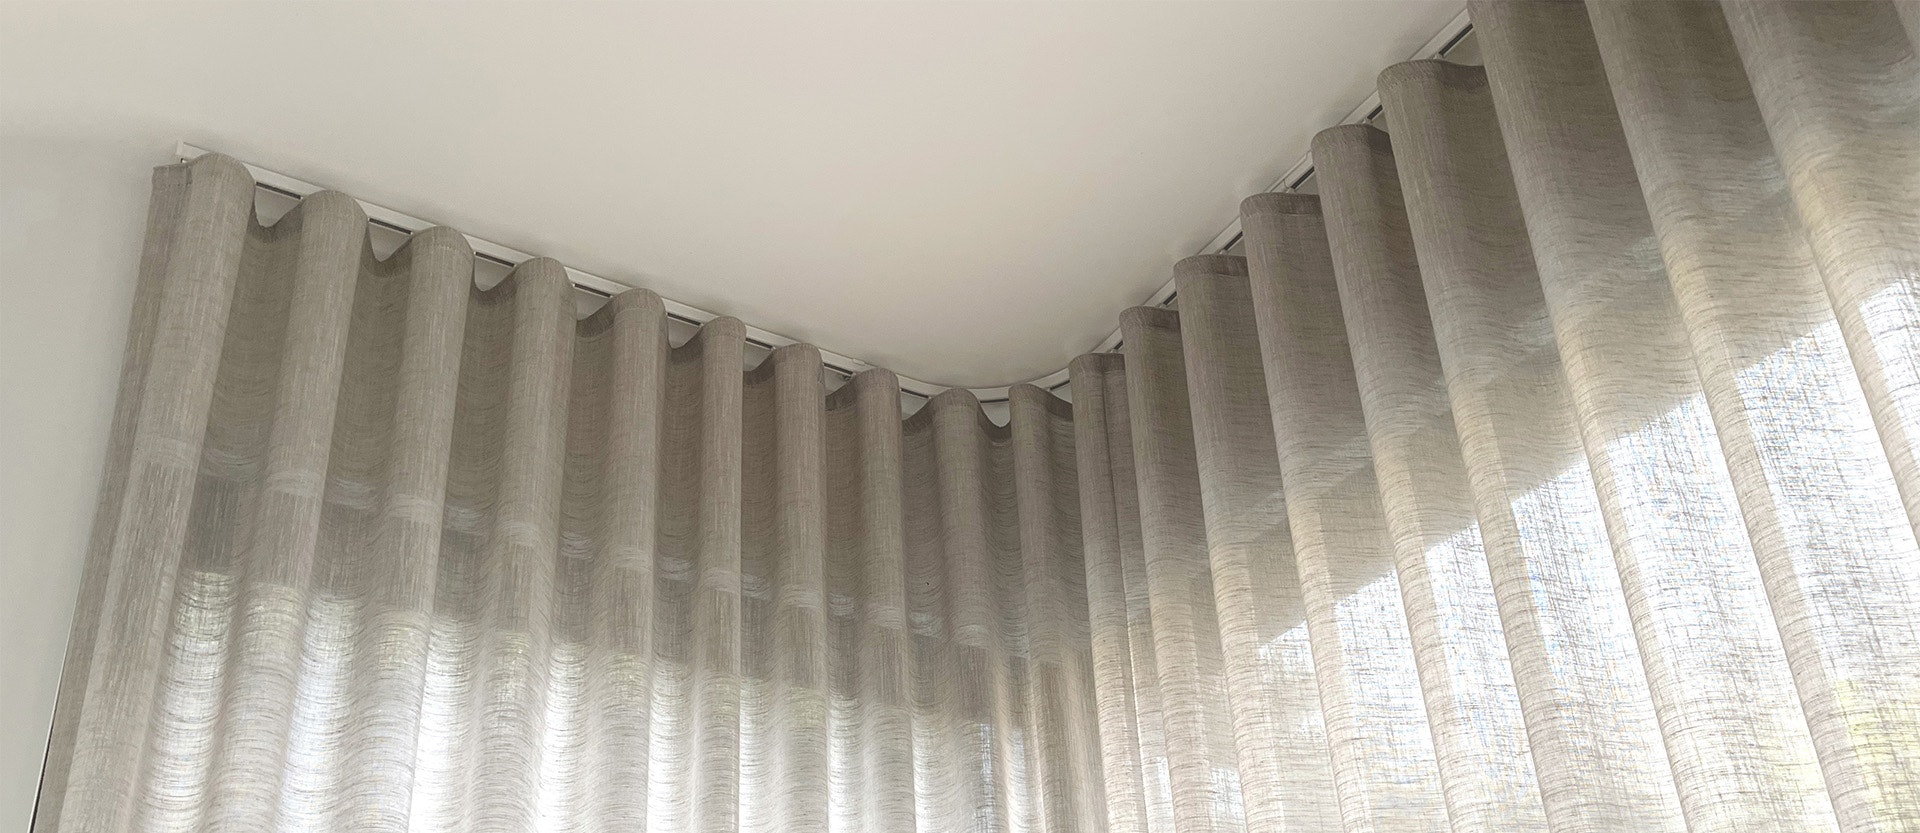
1 - Getting Started
Create a homely space with the ultimate soft furnishing to control light, privacy and design. In this guide we will show you just how simple it is to cover two walls with your customised curved curtain. It's not as hard as you think to install a curtain yourself.
Know the Drill:
Before you start making holes, it's important to investigate what exactly you are drilling into, as you may need additional equipment.
- If you are drilling into Timber; That’s perfect, just follow the below instructions
- If you are drilling into Plaster; Check to see if you have wall studs where the brackets will attach, if not, we recommend using a Ramset hollow wall anchor gun and 10mm wall anchors.
- If you are drilling into Concrete, stone, brick or tile, use a Masonry drill and suitable plugs, anchors or screws
Reach out to us in our online help center if you need some extra advice on this.
- 1 to 2 people
- A metal tape measure
- A pencil
- Step Ladder
- Drill with phillips head drill bit
- 3mm drill bit for pilot holes
5-10 mins
2 - Your fitting
You'll be installing the curtain directly onto your ceiling. It only takes a few minutes to install your new curtain, so let's get started.

3 - What's in the box?
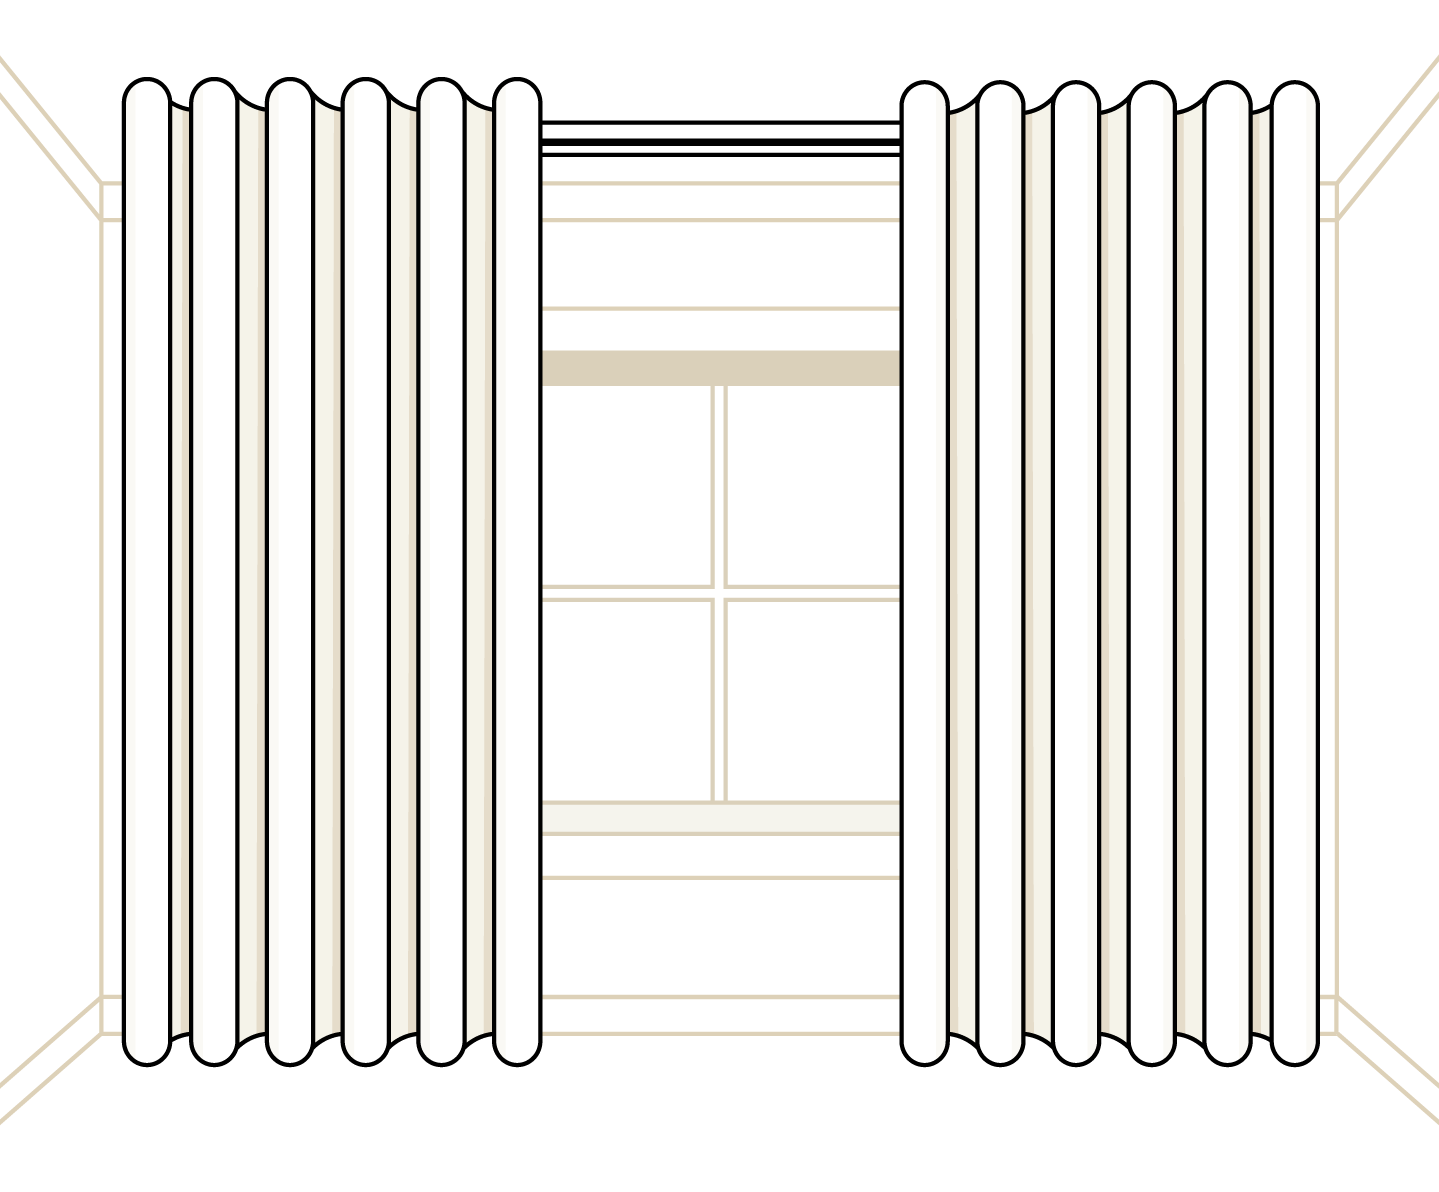
Open up the cardboard box(es) you've received. You'll notice some bracket componentry, a plastic bag containing a bag of screws. There'll be one bag with all the screws for each of the curtains you've ordered (at least 1 per bracket).
*NOTE: Because your curved curtain is fully customised, the components in your order may differ from those pictured here. Don’t worry, we promise you’ll have everything you need and all the extras you’ve asked for.
4 - Find your ceiling battens
Ceiling battens are the structural pieces of wood that keep your ceiling up. These are important beacuse they are the easiest place to screw in your brackets.
Use your stud finder to find your ceiling battens or do this the old fashion way, knocking on your ceiling and listening for the difference in sound.

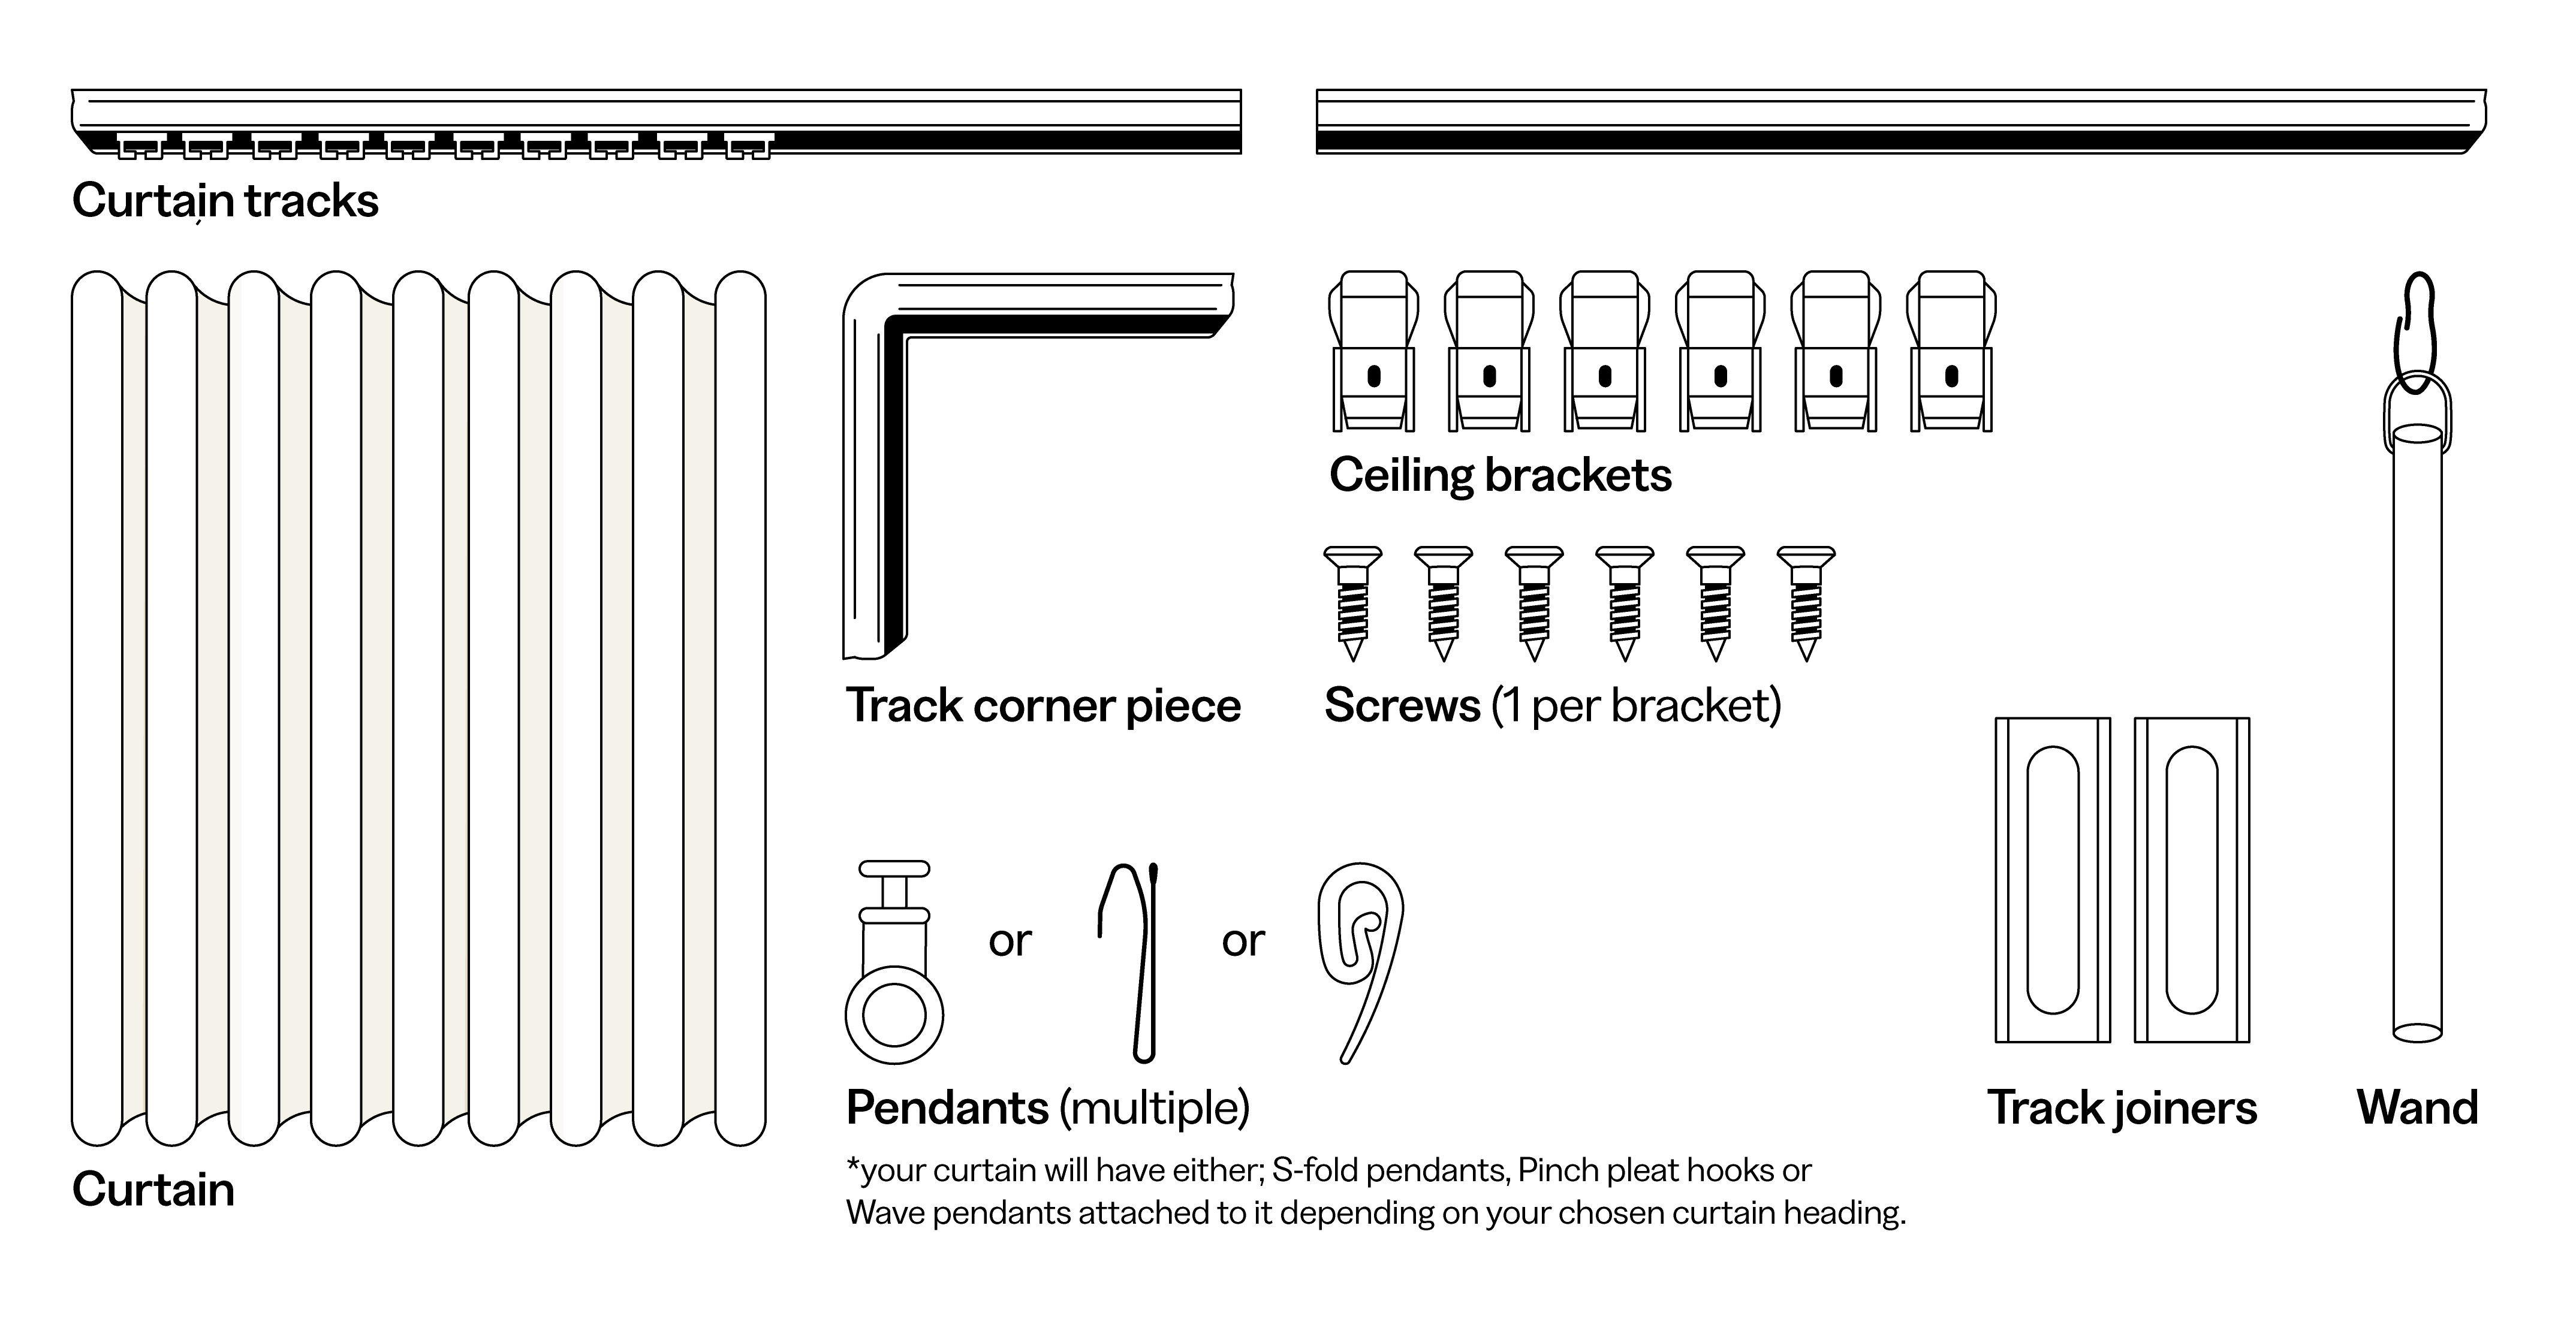
Mark with a pencil each ceiling batten across the length of your curtain track. It's best to mark them 40mm out from your wall or out from any obsturctions that project out from the wall. These marks are where the back of your brackets will line up.
tip: Keep in mind, you'll need brackets near both ends and in the middle of your curtain track.

Mark with a pencil at intervals of 700mm across the length of your chosen batten. It's best to mark them 40mm out from your wall or out from any obsturctions that project out from the wall. These marks are where the back of your brackets will line up.
tip: Keep in mind, you'll need brackets near both ends and in the middle of your curtain track.
5 - Space out your brackets
Place you curtain track below the window and use you measuring tape to space out your brackets.
For curved curtains, pay close attention to the corner piece of your track. You will need to place brackets at each end of the piece to help the track's structure.
In your order, there are enough brackets to space each one 700m apart. This is the standard distance between ceiling battens. Measure out the additional brackets at the reccomended intervals. Your corner piece brackets will be closer together and that is exactly what we are looking for.
6 - Mark up your Corner piece
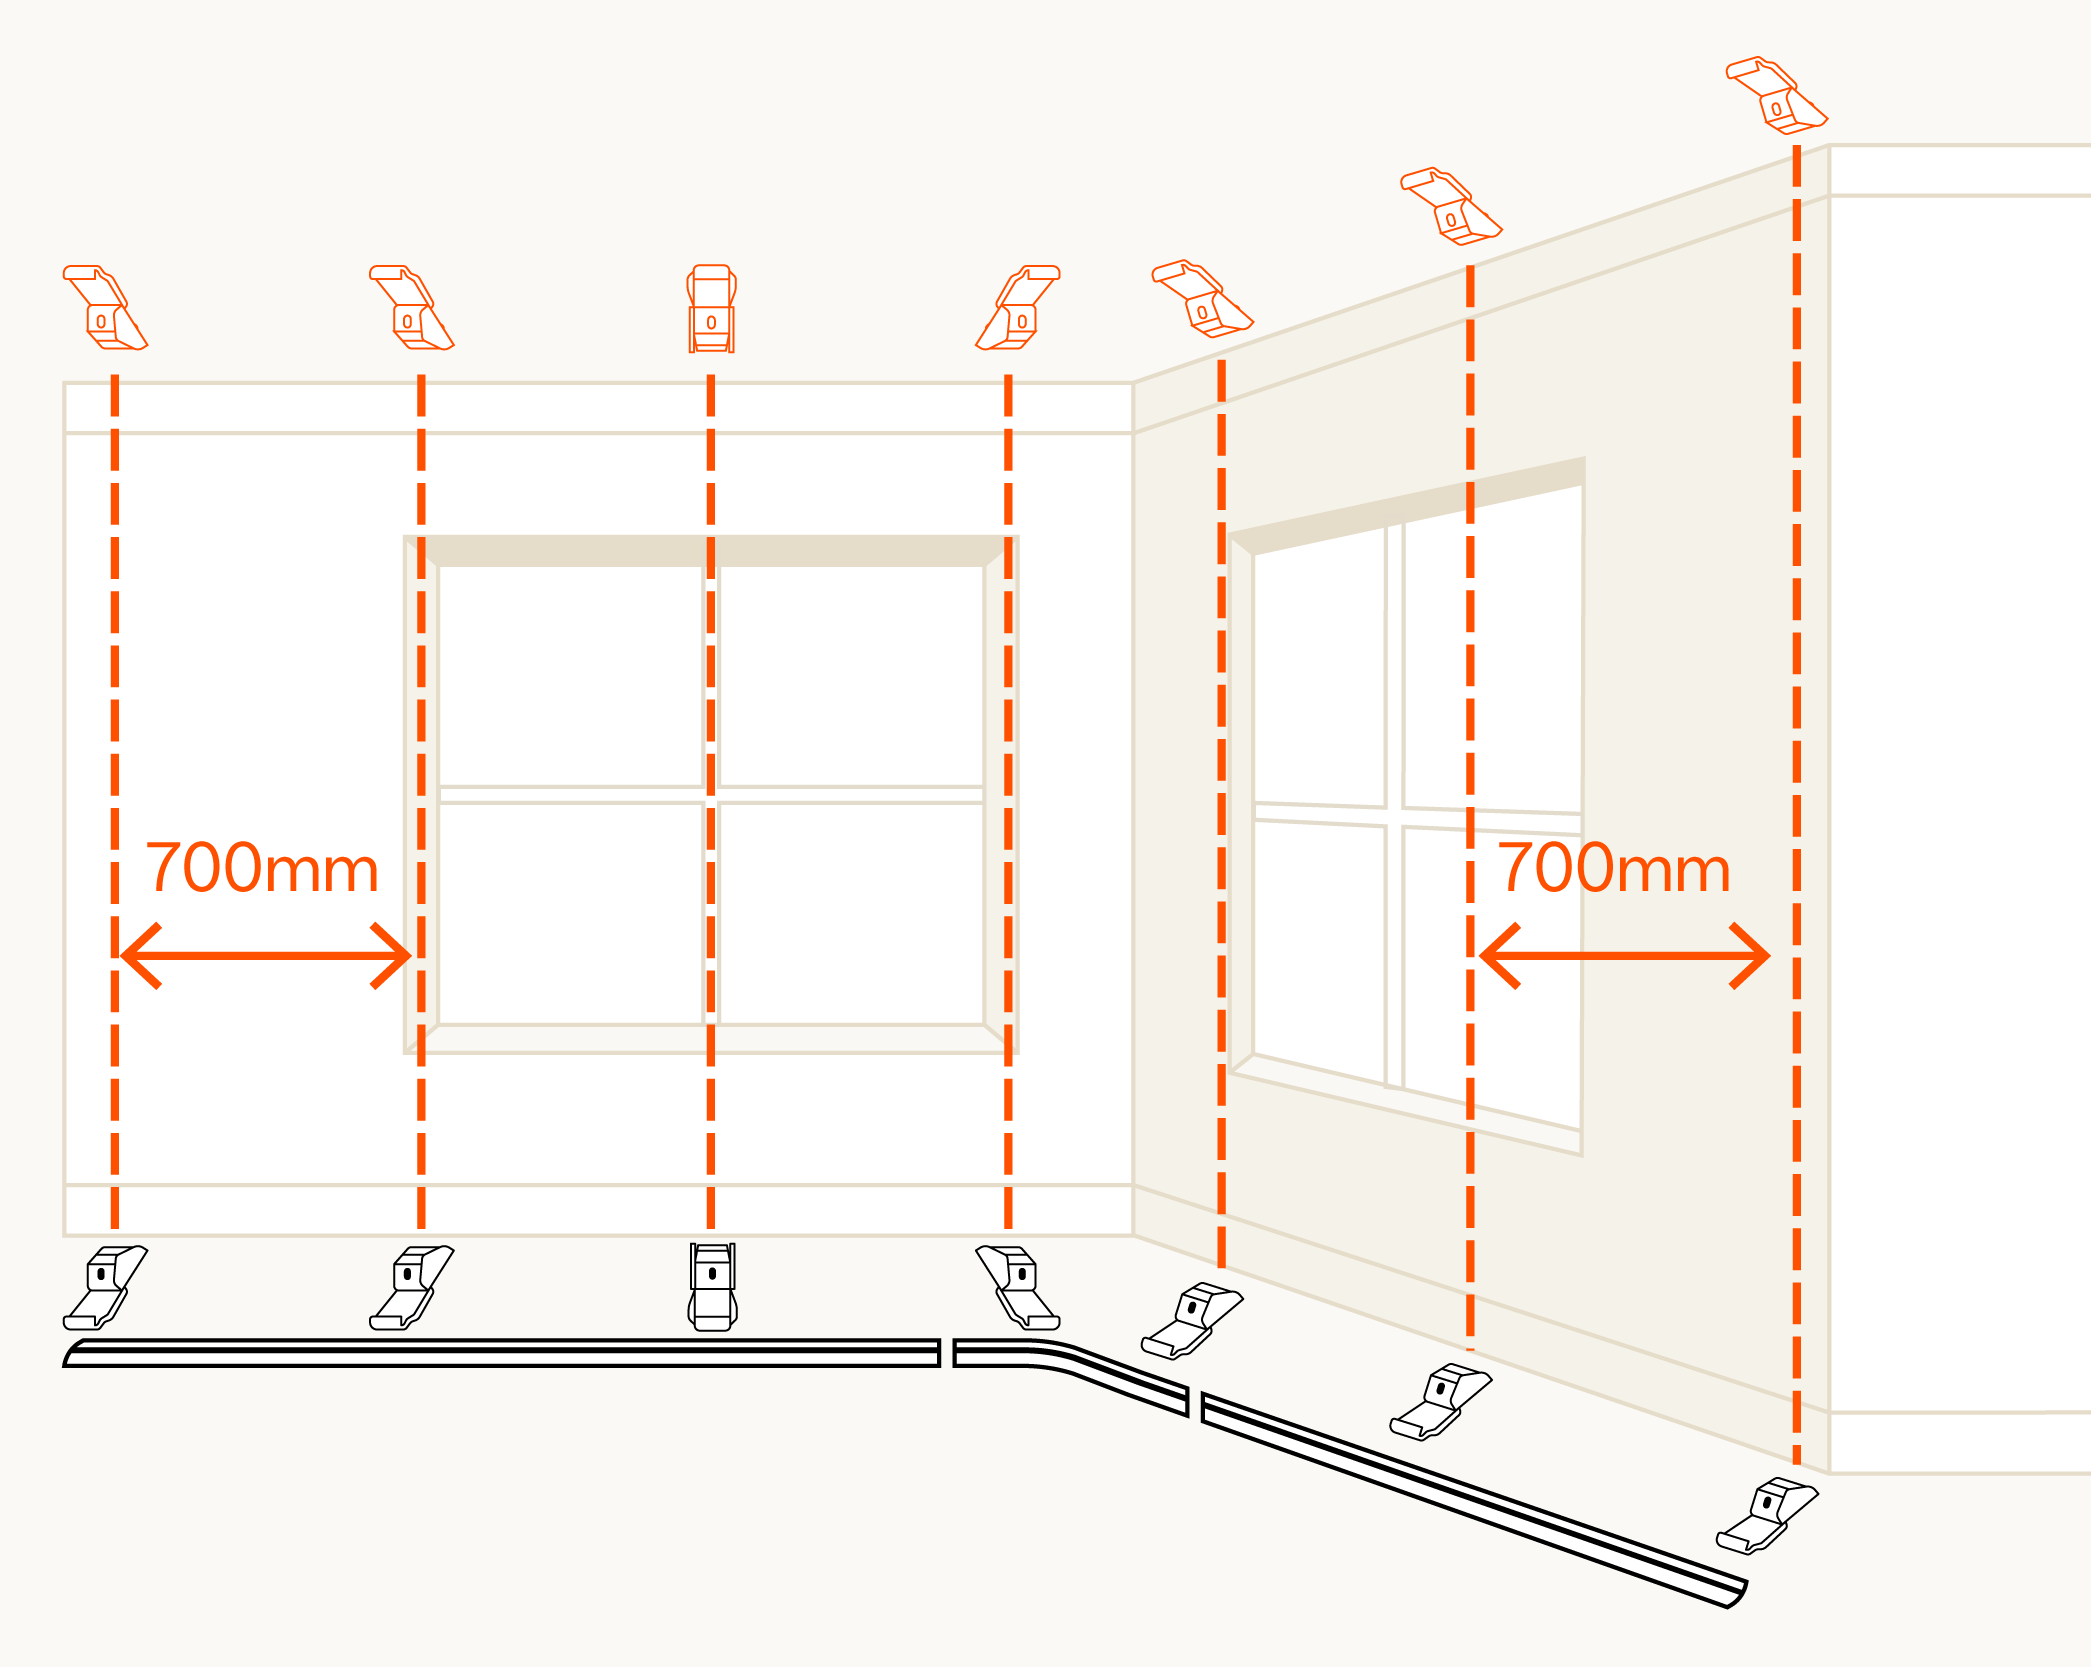
We're going to be marking up where your corner piece will be intalled.
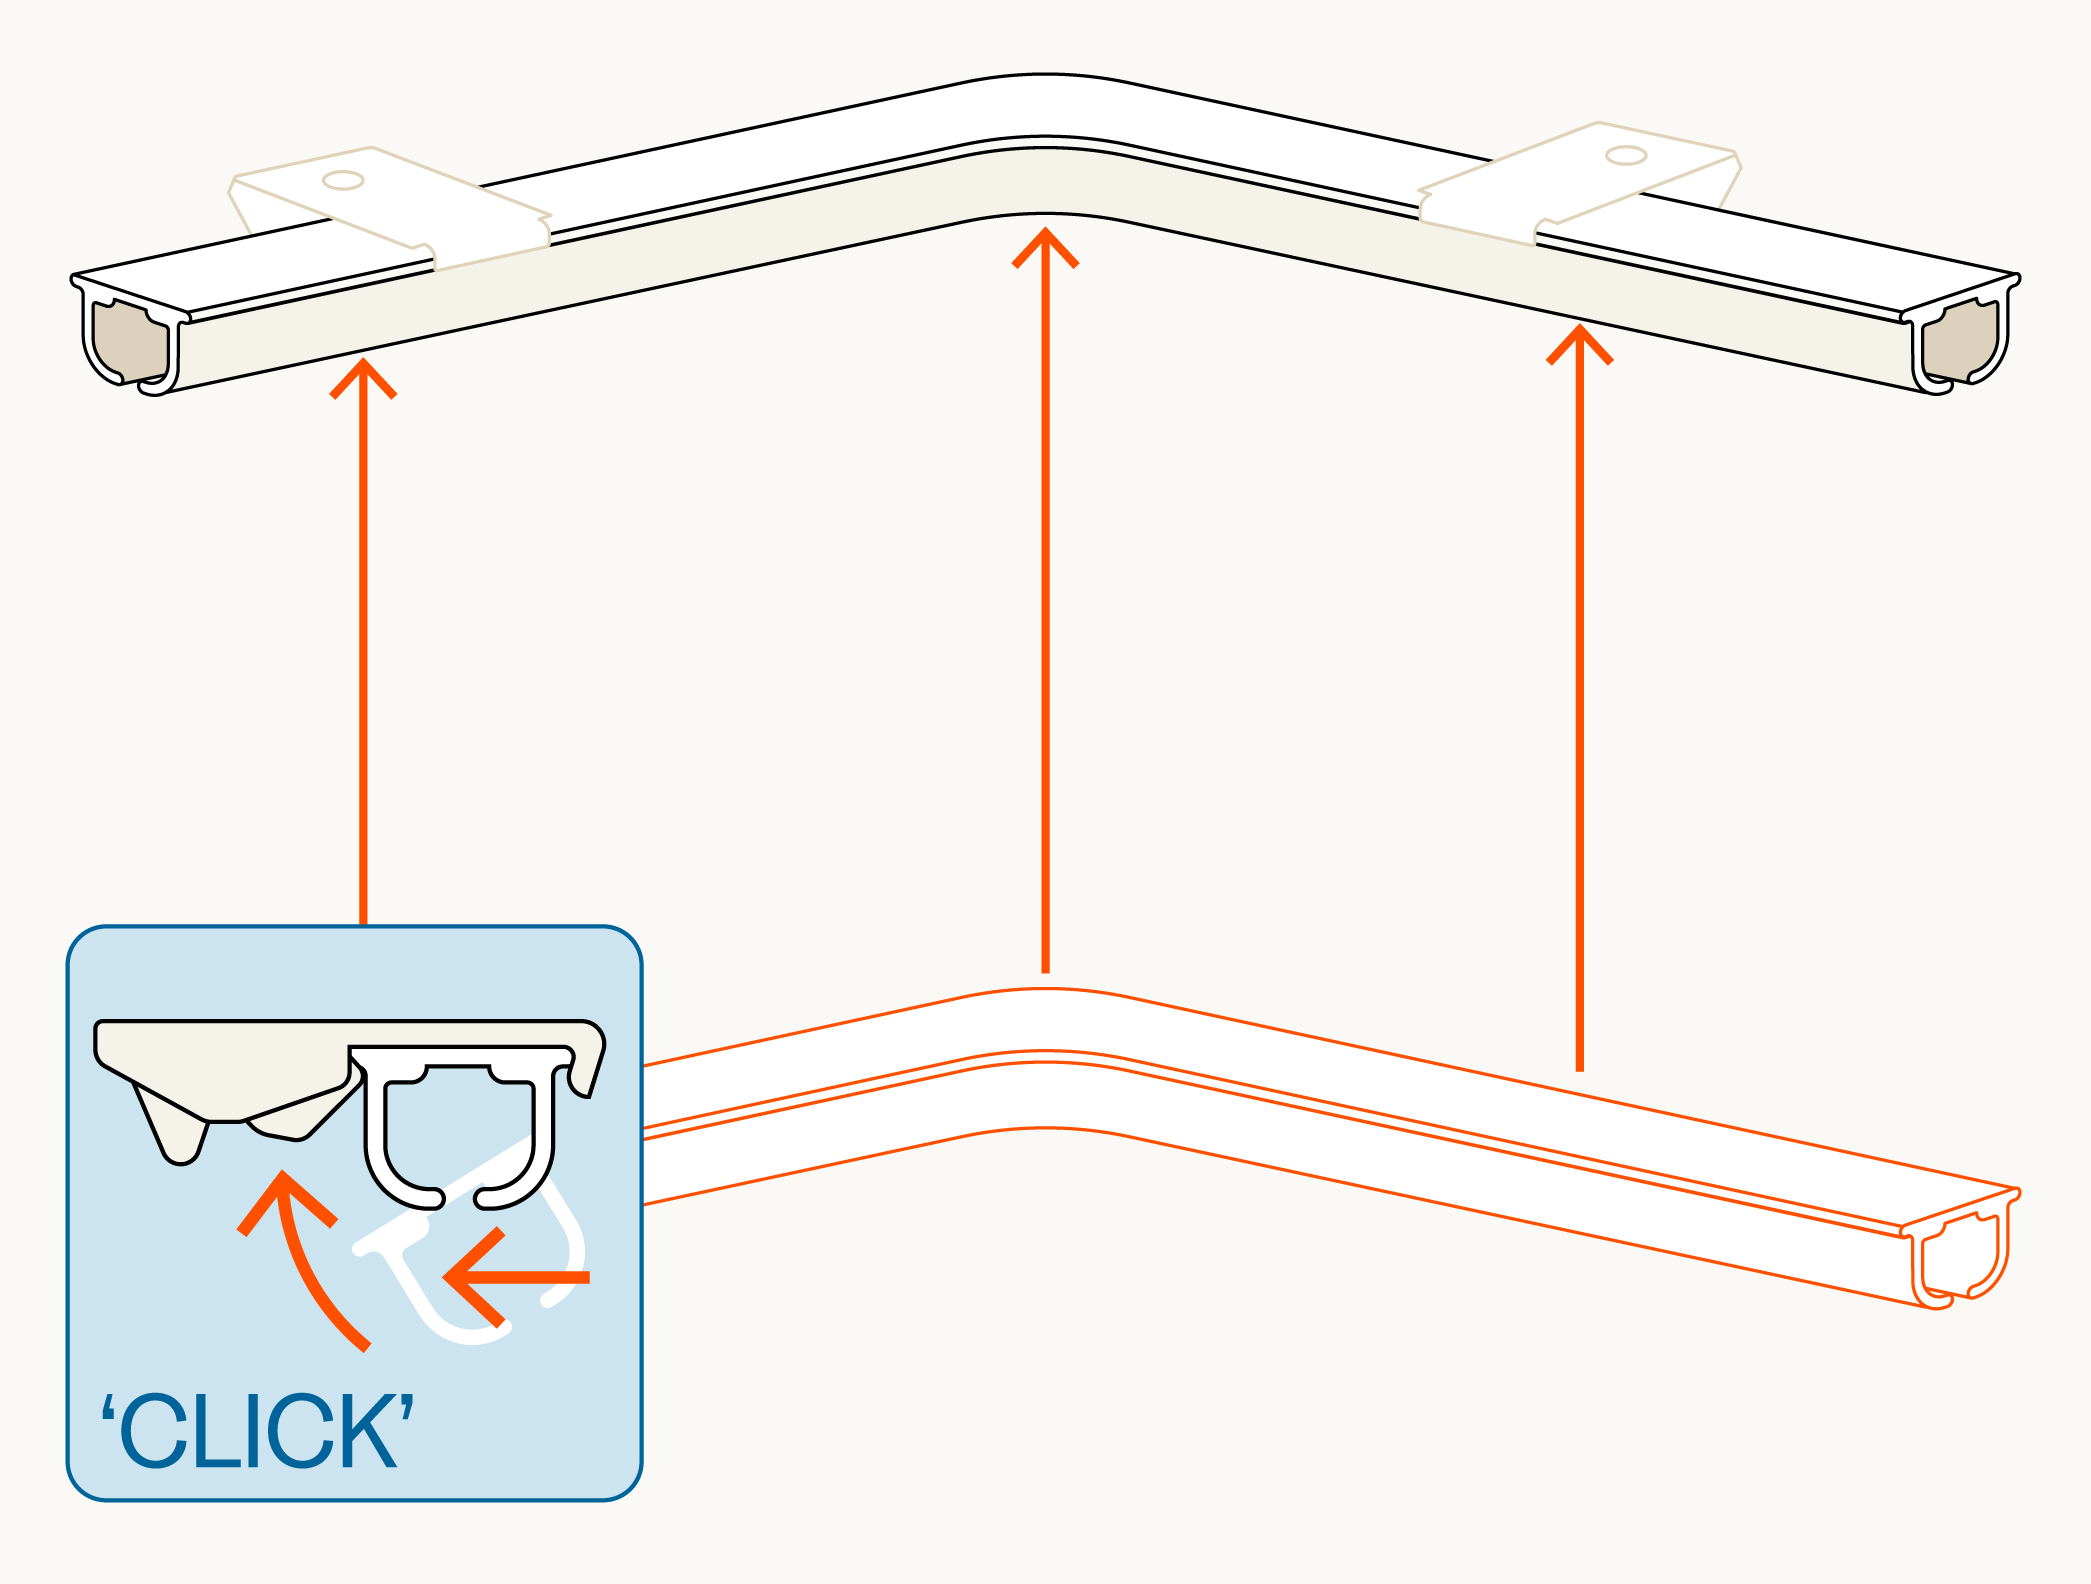
To get your curved curtain right, you want to first mark out where your brackets sit in the corner and then work your way out from there.
Connect a bracket to each arm of your corner piece by sliding them onto each end.
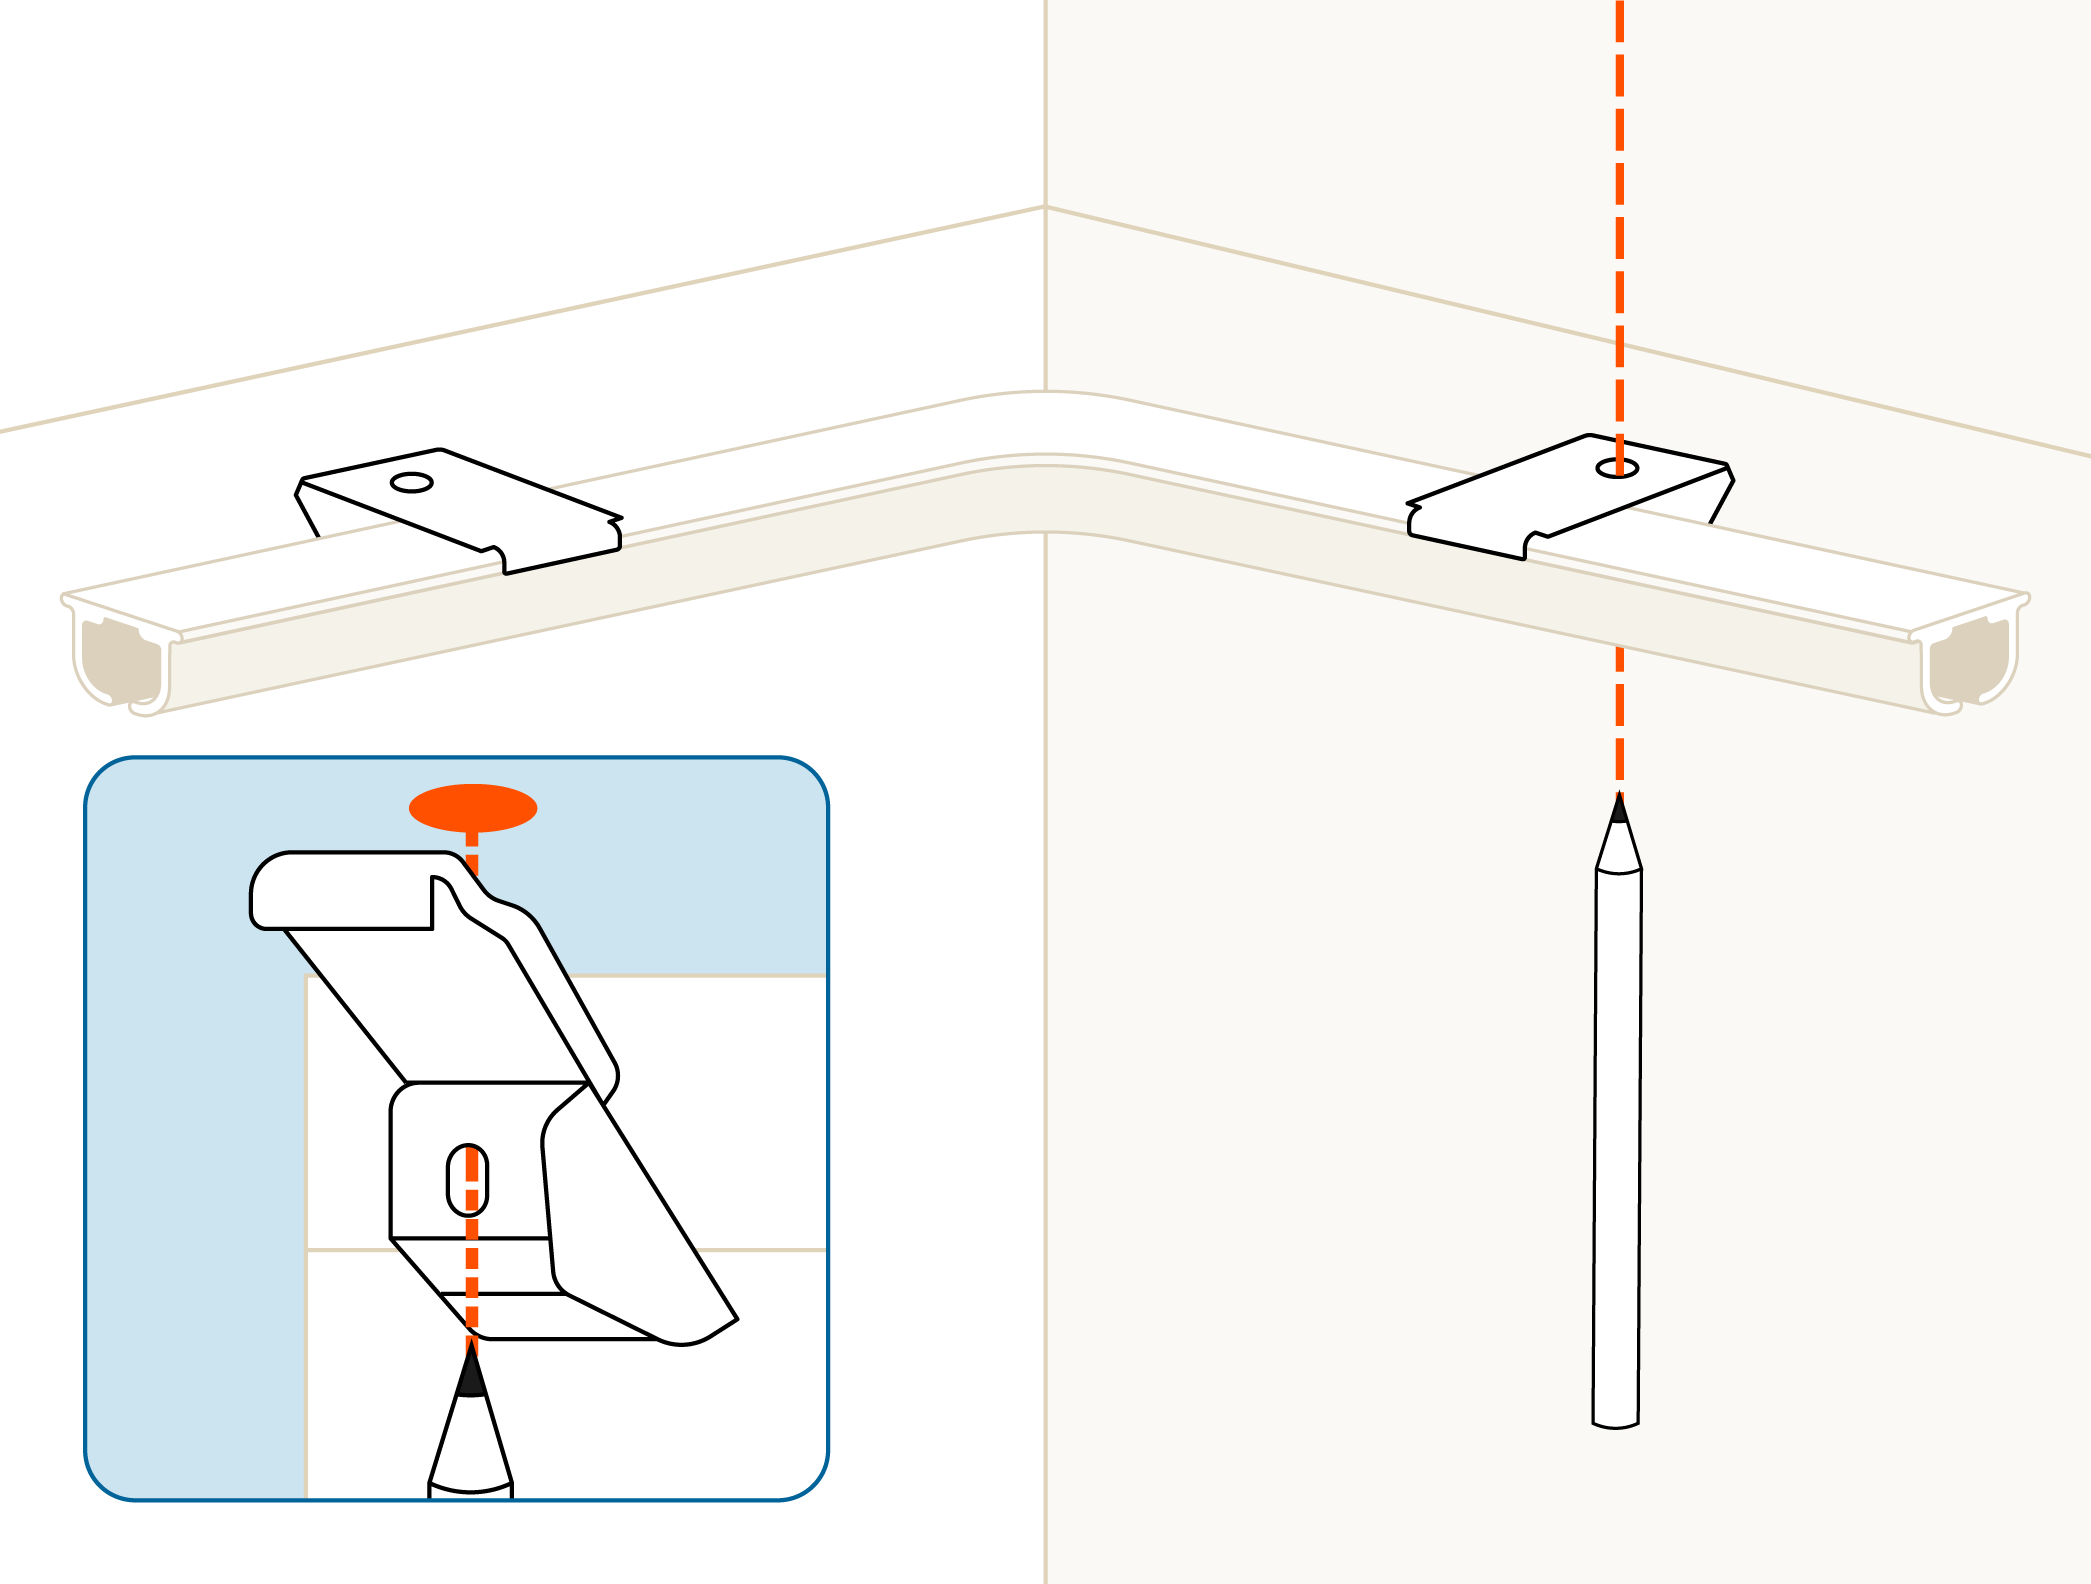
Lift yout corner piece and brackets to ceiling and line them up with the corner of the wall. Mark a dot through the hole in the bottom of the each bracket on the ceiling, about 40mm out from the wall or any obstructions.
7 - Mark up your brackets
We're going to be marking up where your brackets will be installed.
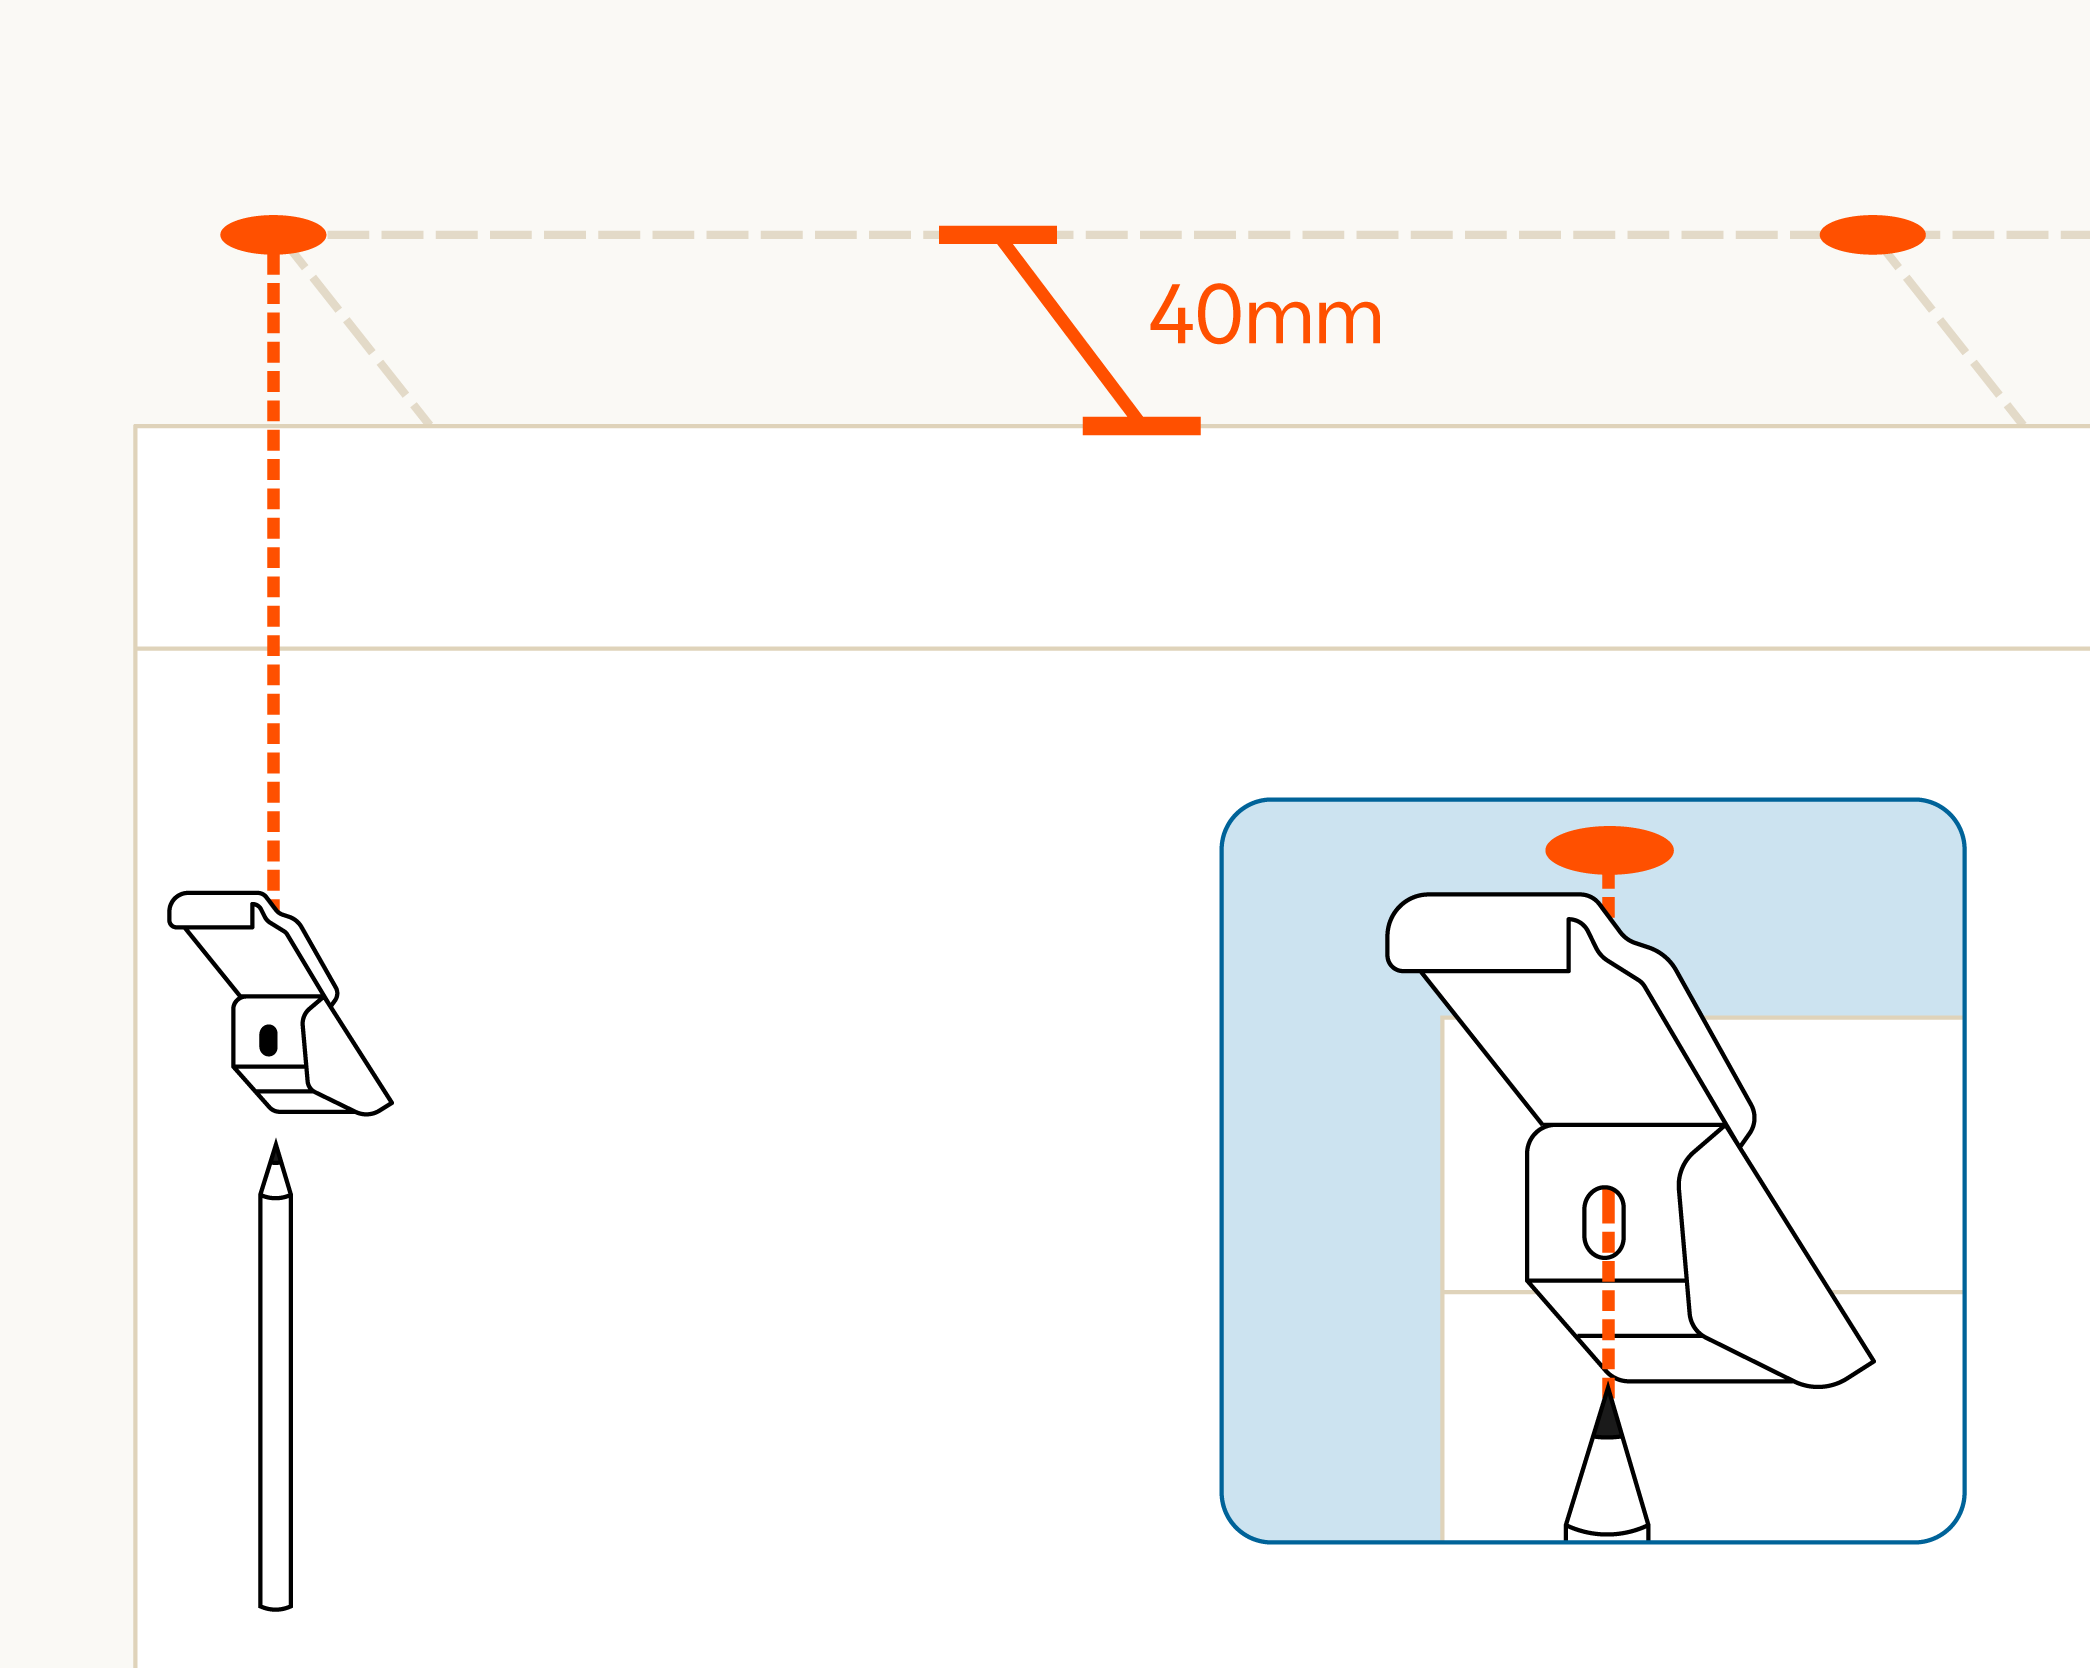
Lift each bracket to ceiling and line up the back of the bracket with the marks you made earlier on you ceiling battens.
Mark a dot through the hole in the bottom of the each bracket. It's impotant for track installation that your brackets are in a straight line.
8 - Install your brackets
Now you'll be drilling pilot holes for your brackets and then installing your brackets with the supplied screws.
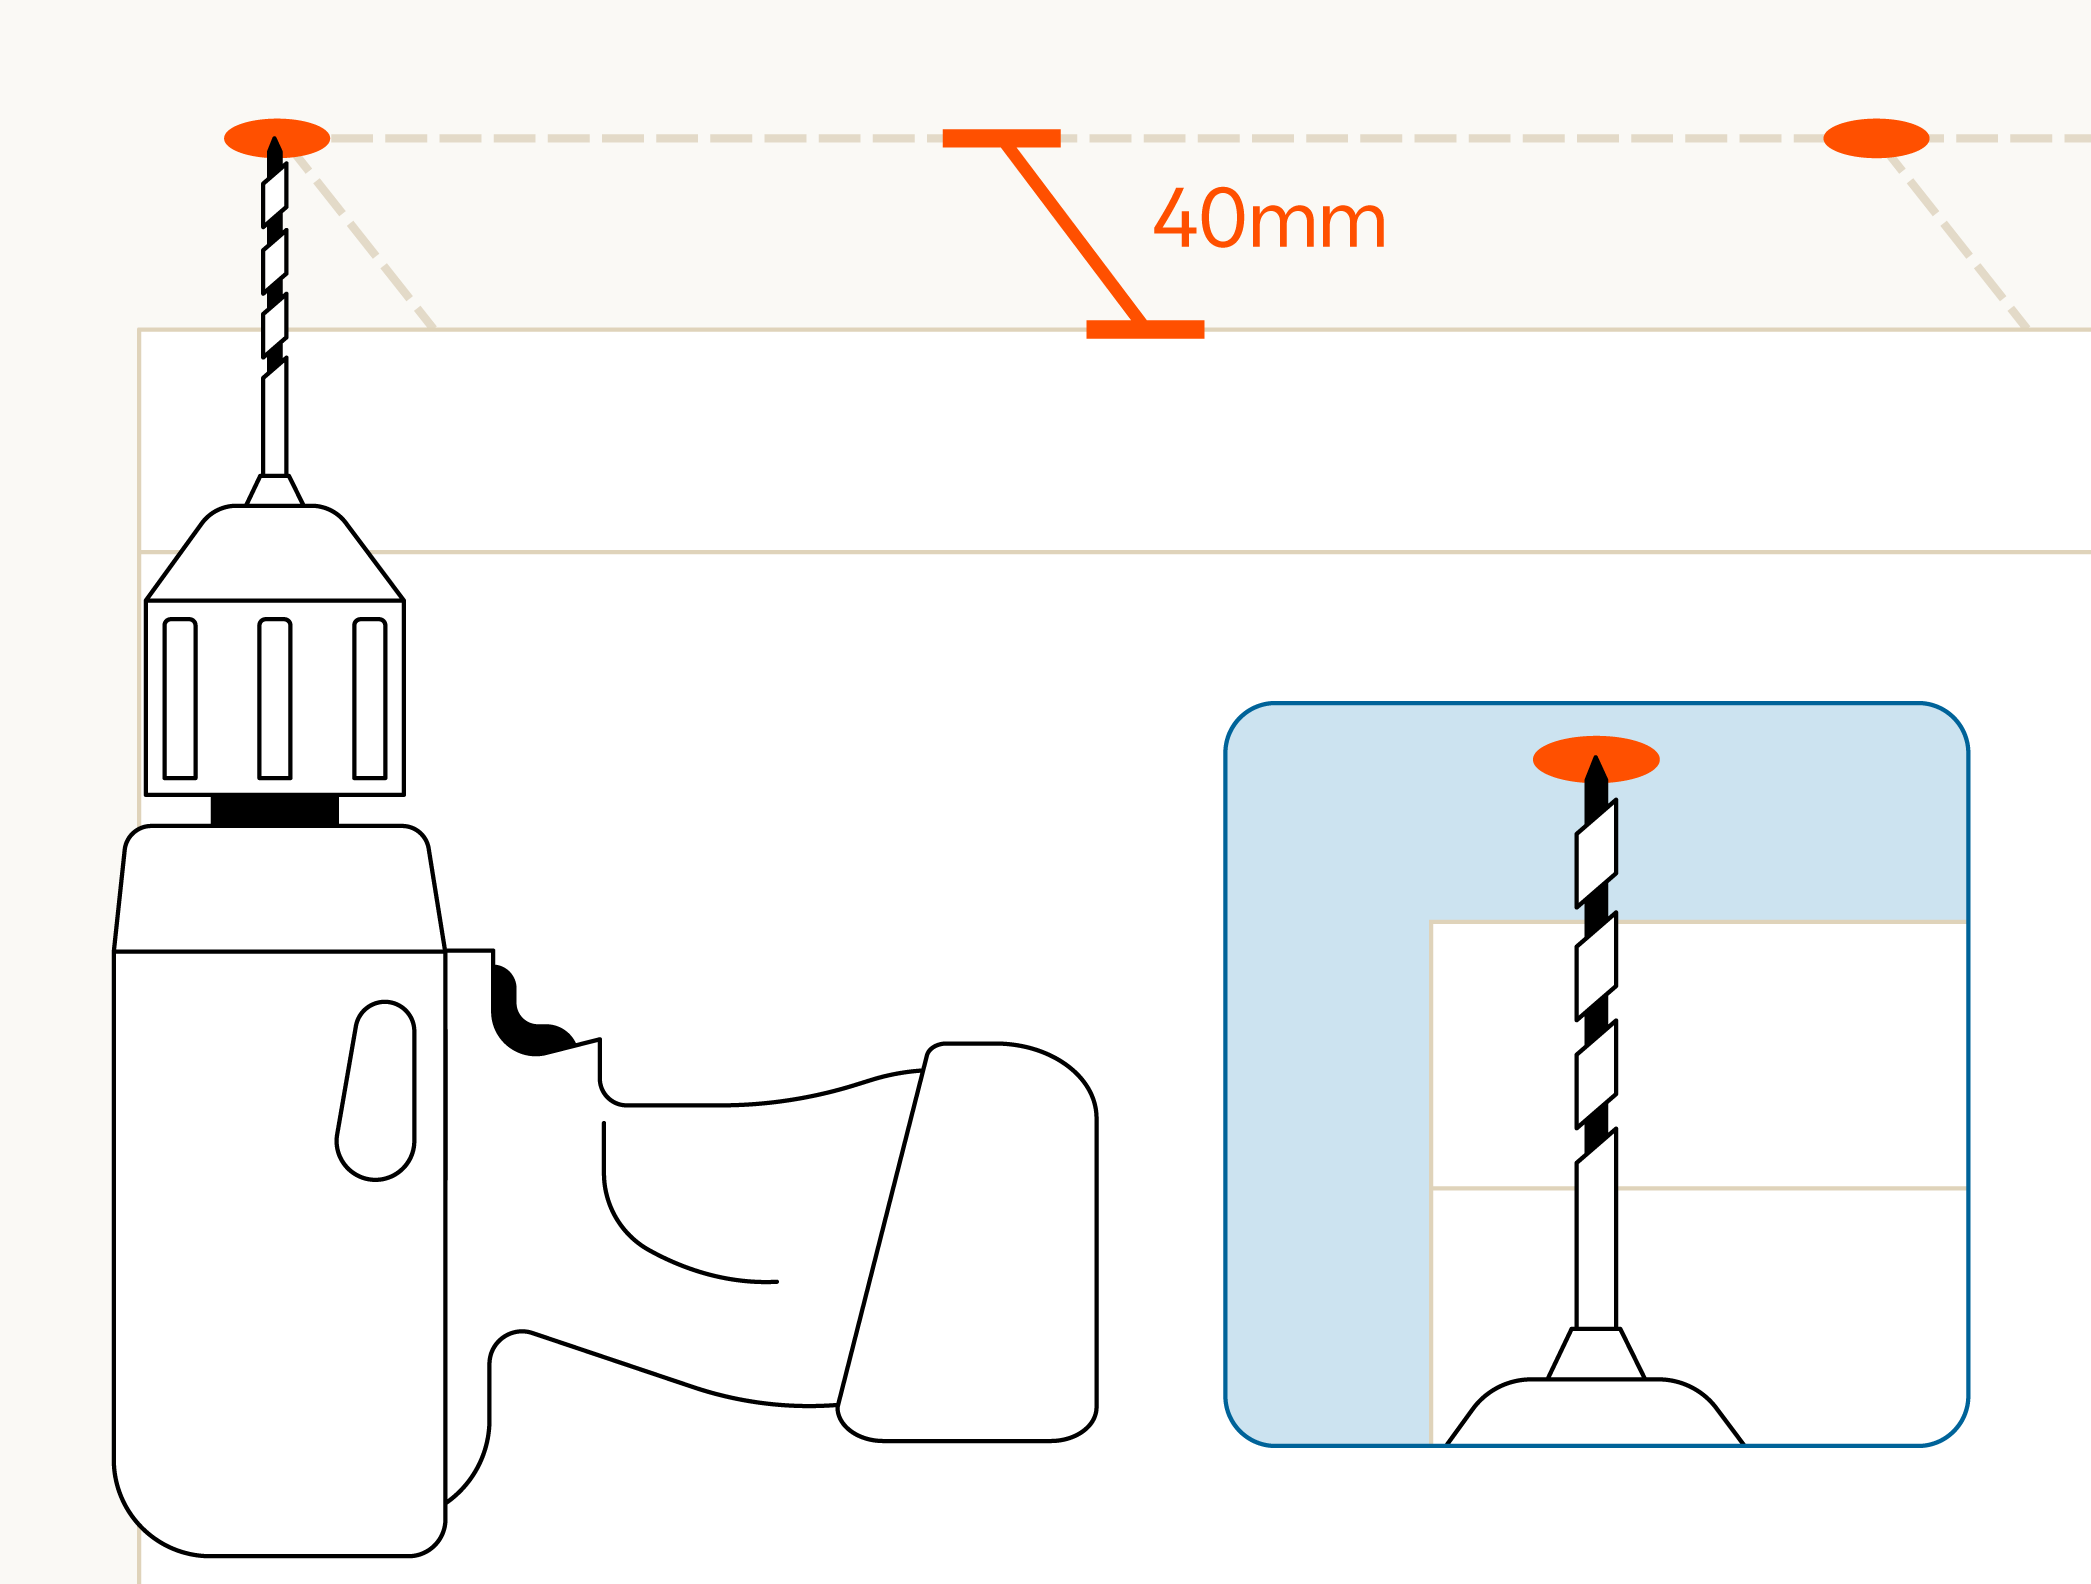
Pop the 3mm drill bit into your drill and pre-drill a hole for each of the brackets
Tip: Remeber to drill into the marks furthest from the wall.
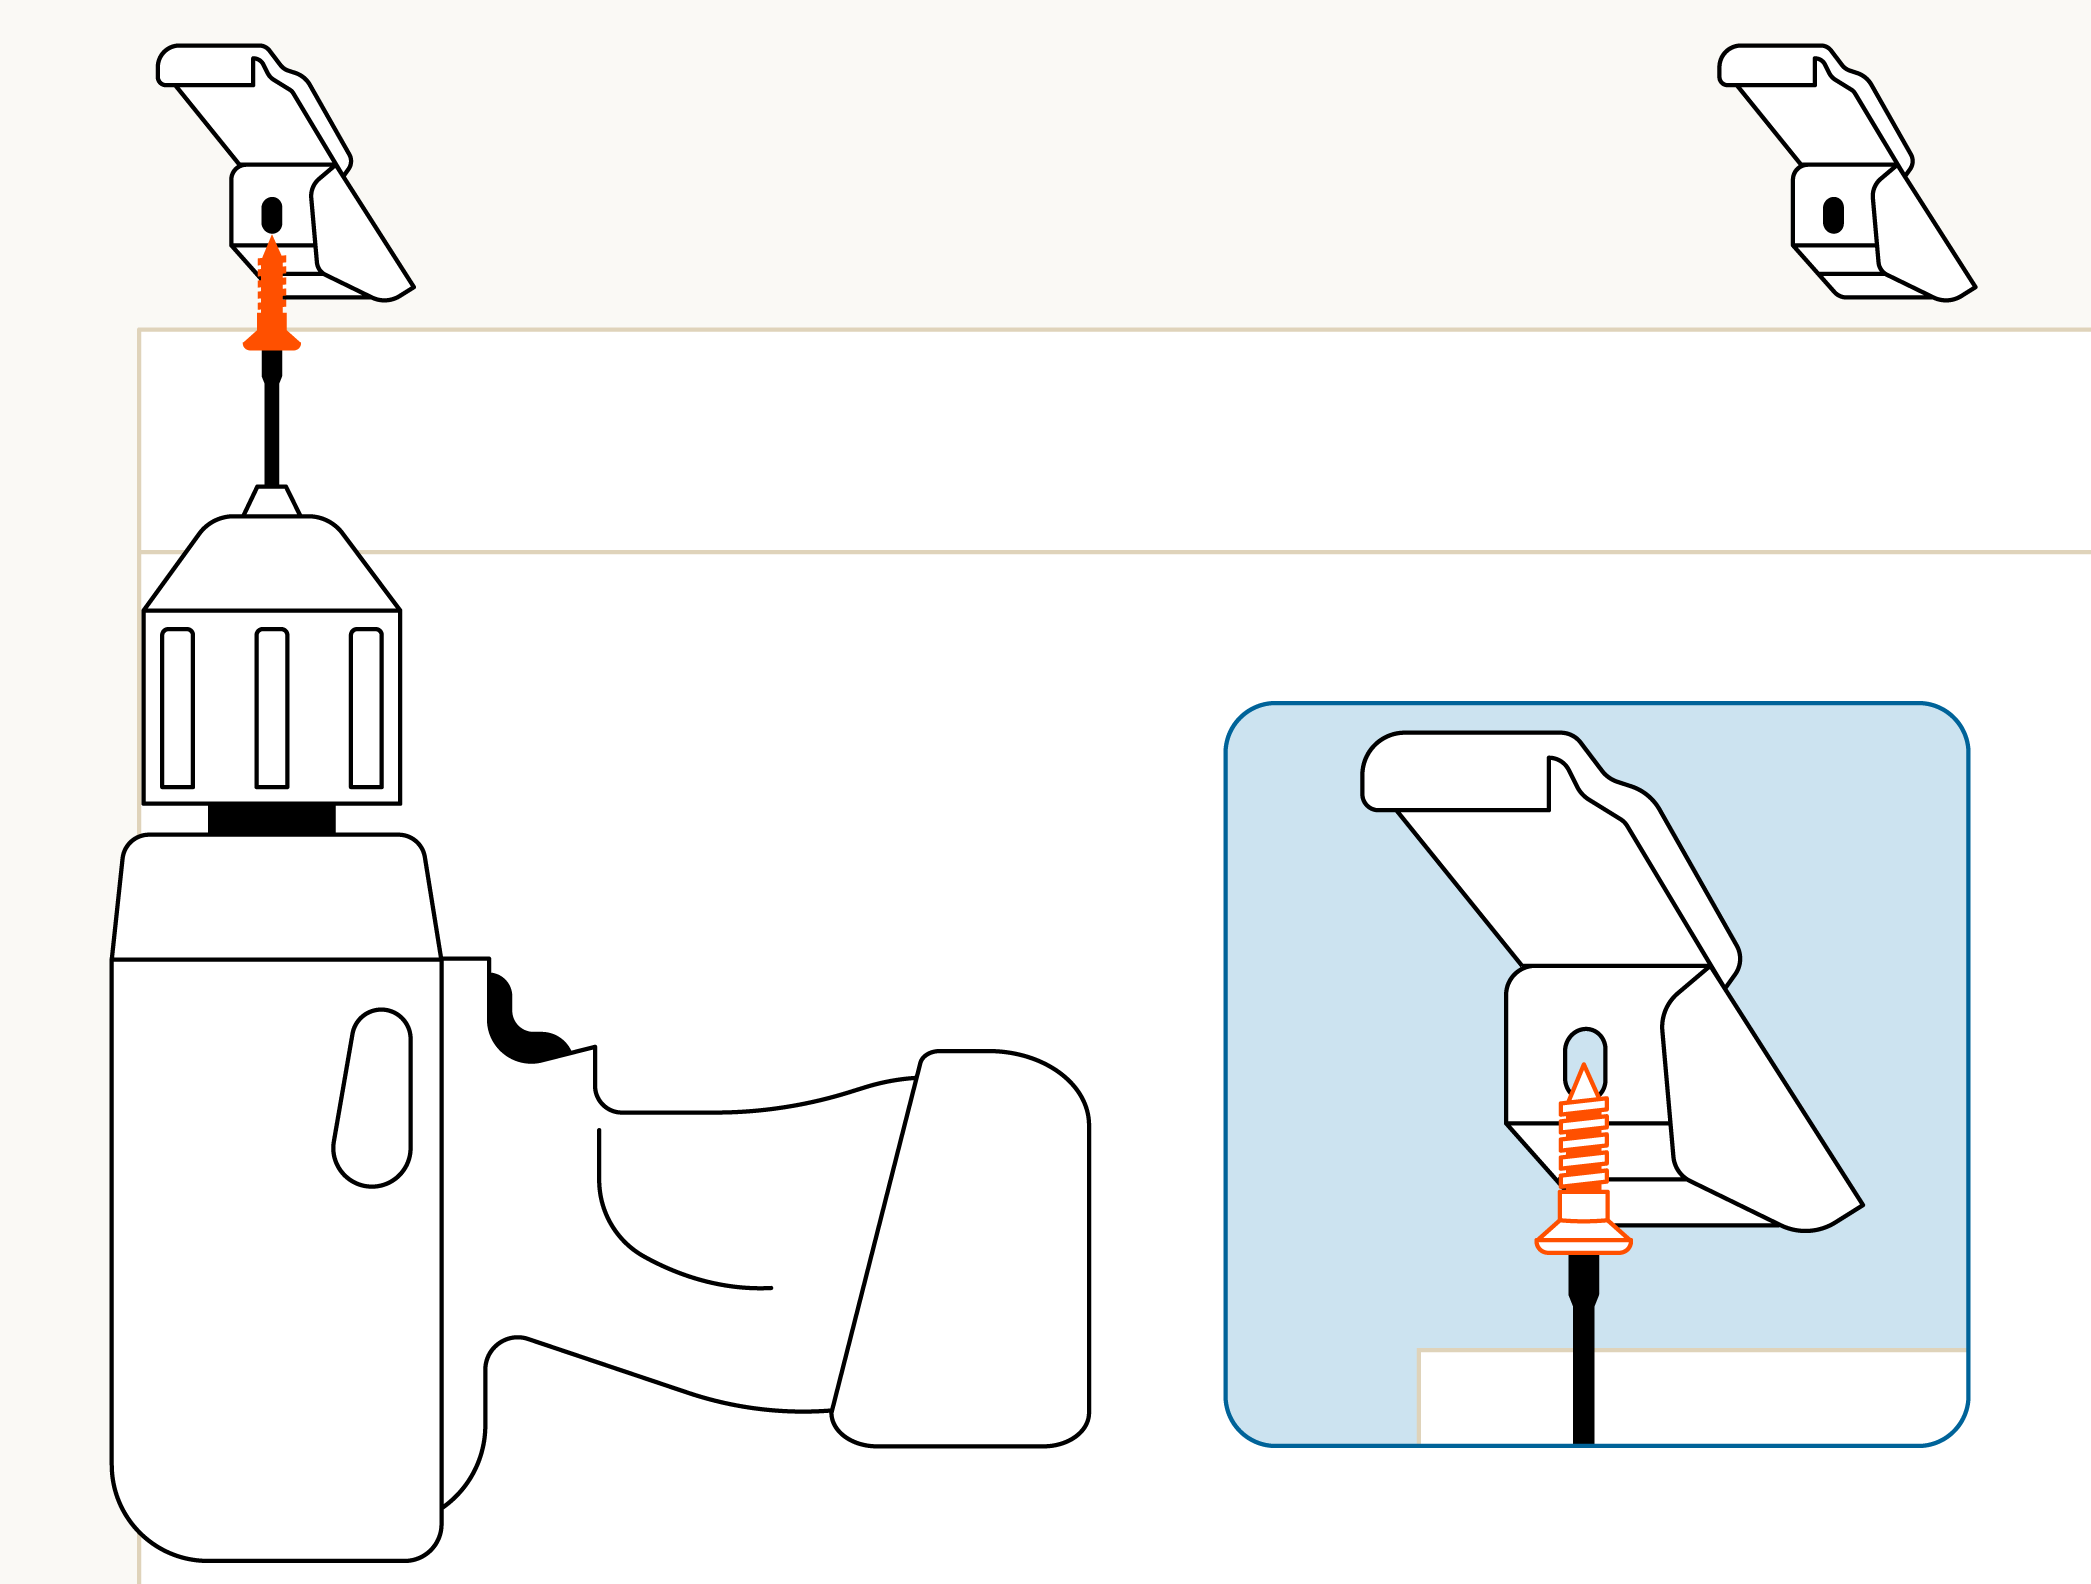
Install by drilling your supplied screws through each bracket and into the pilot holes. Only screw part way into your ceiling so your brackets are a little bit loose. Leaving your screw loose will make things way easier when you are installing your track in the next step.
Be sure check your brackets are all facing the correct way (as pictured).
Repeat for each bracket.
9 - Connect your track
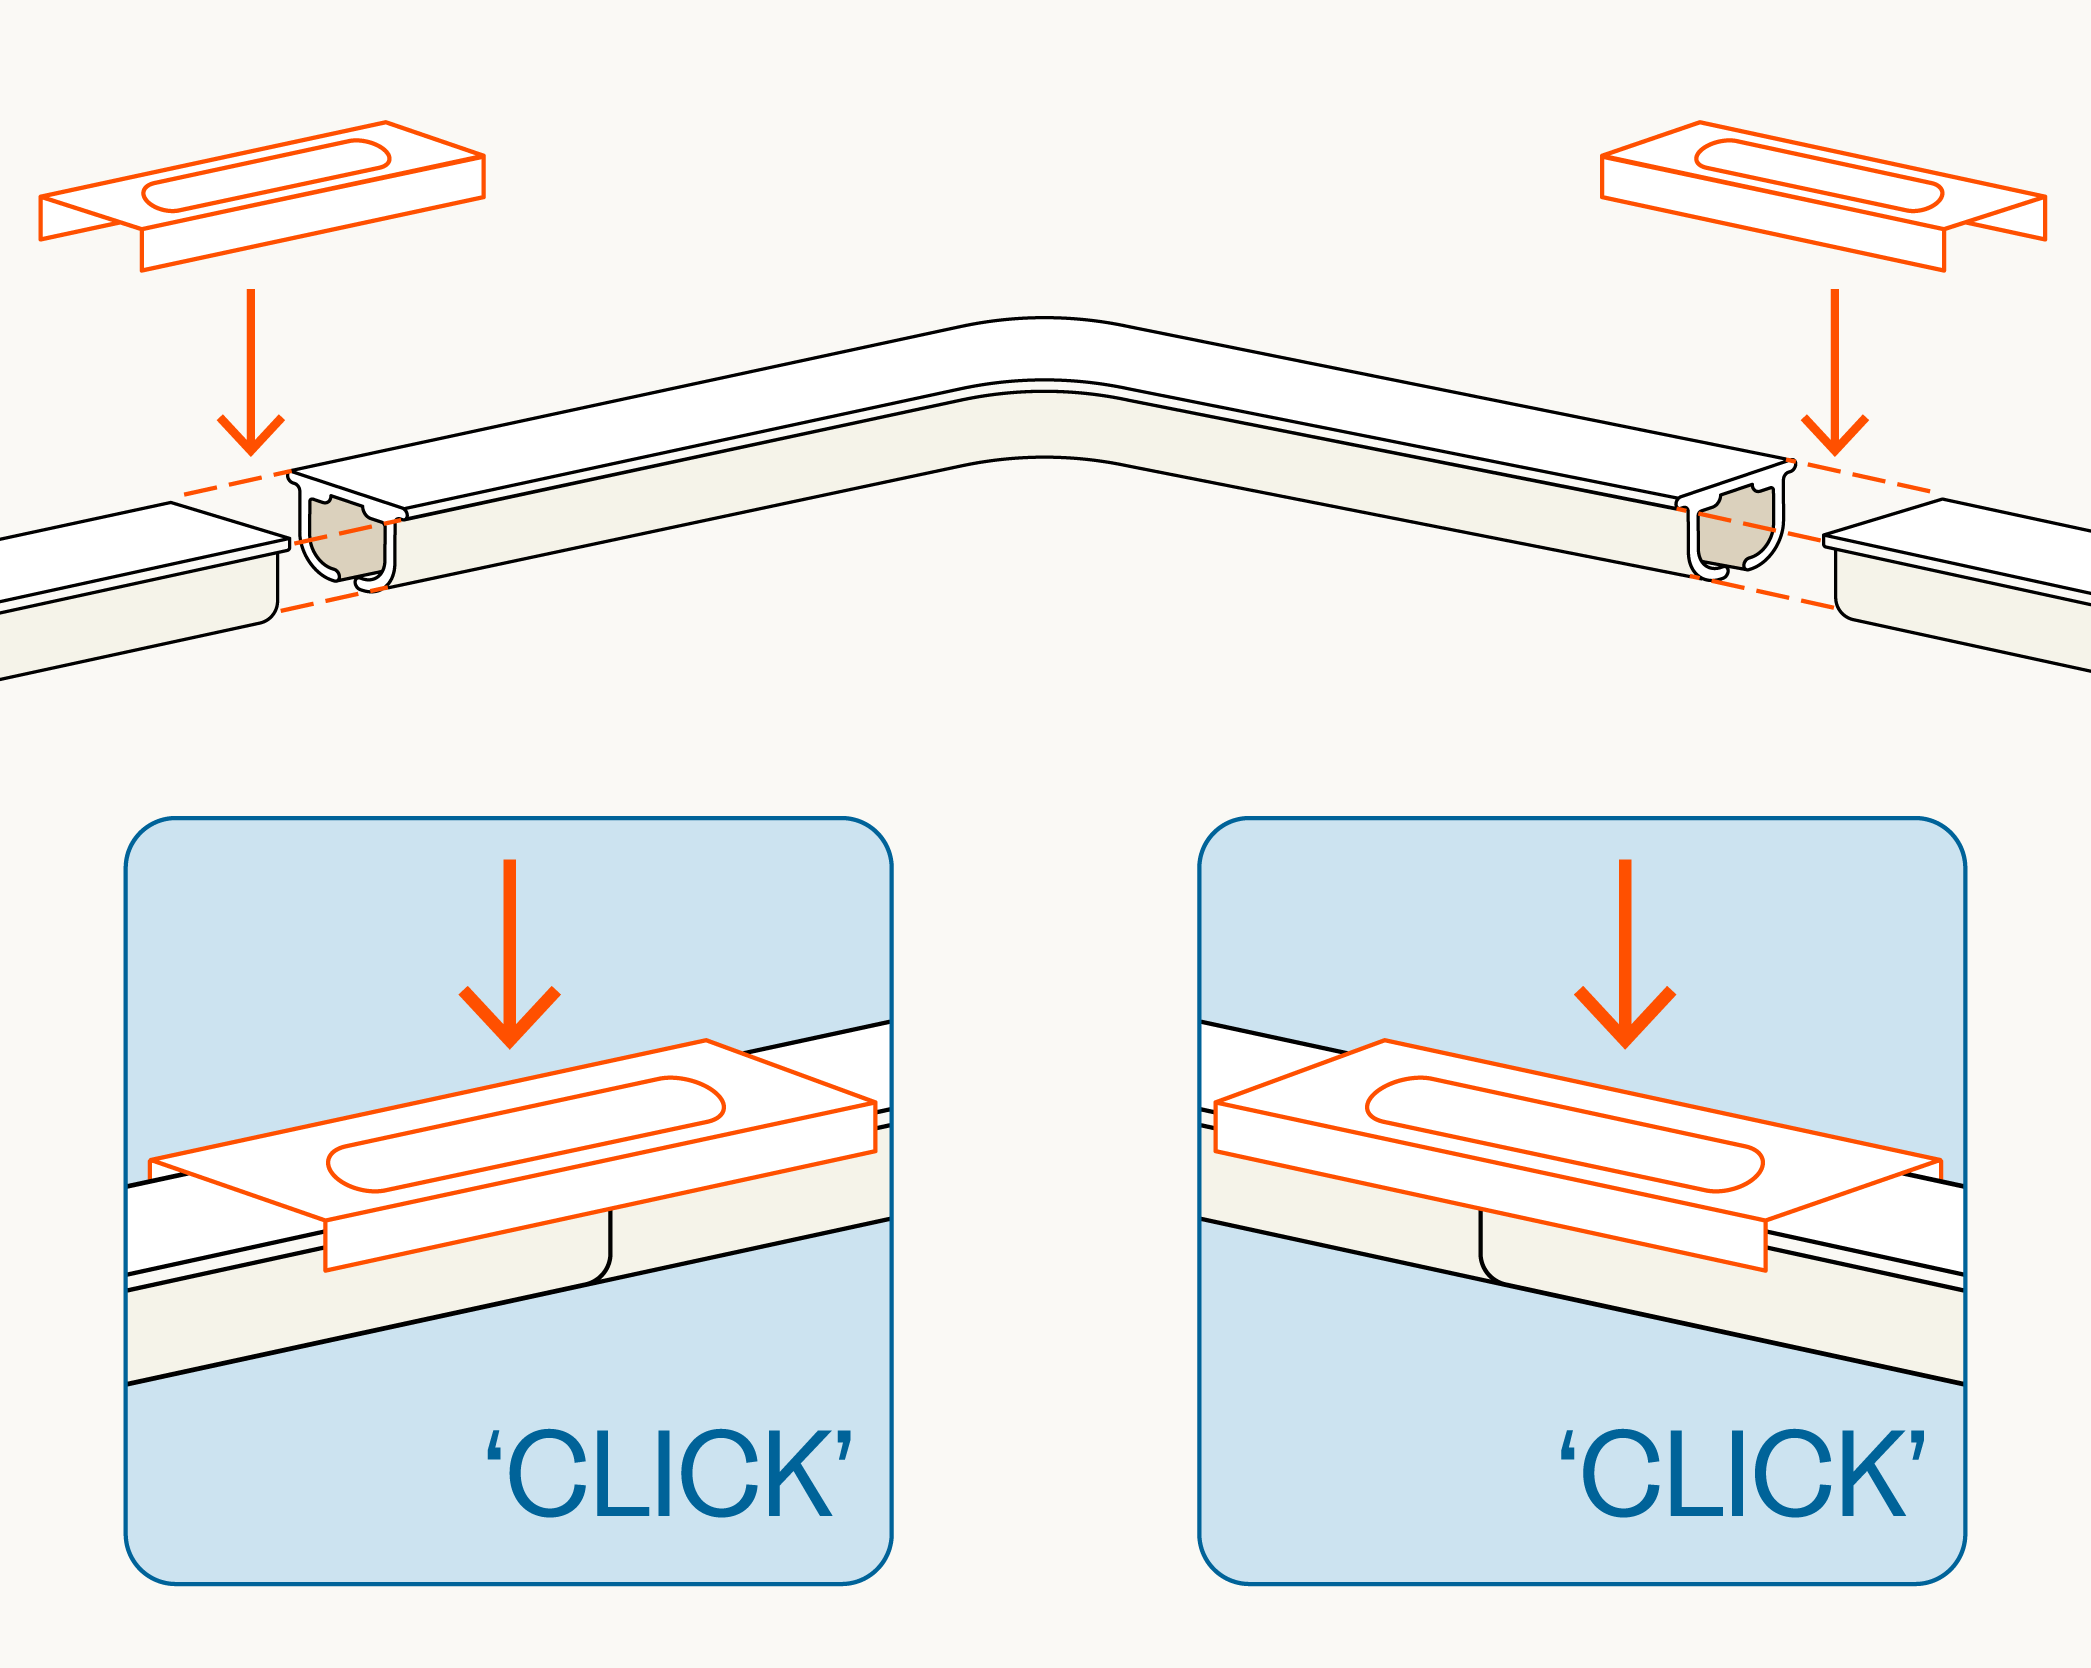
Your curved curtain will be deliverd in three pieces.
Don't worry, we've also given you a track joiner, which will lock the pieces together seamlessly. Simply line up the two long pieces of track with the ends of the corner piece and clip your track joiner to the top, where the pieces meet.
10 - Install your track
We're going to be clicking your curtain track into the brackets

Lift up your curtain track at an angle and line up the lip at the front of the track with the prong on the front of each bracket. Then hook the prongs into the underside of the lip.
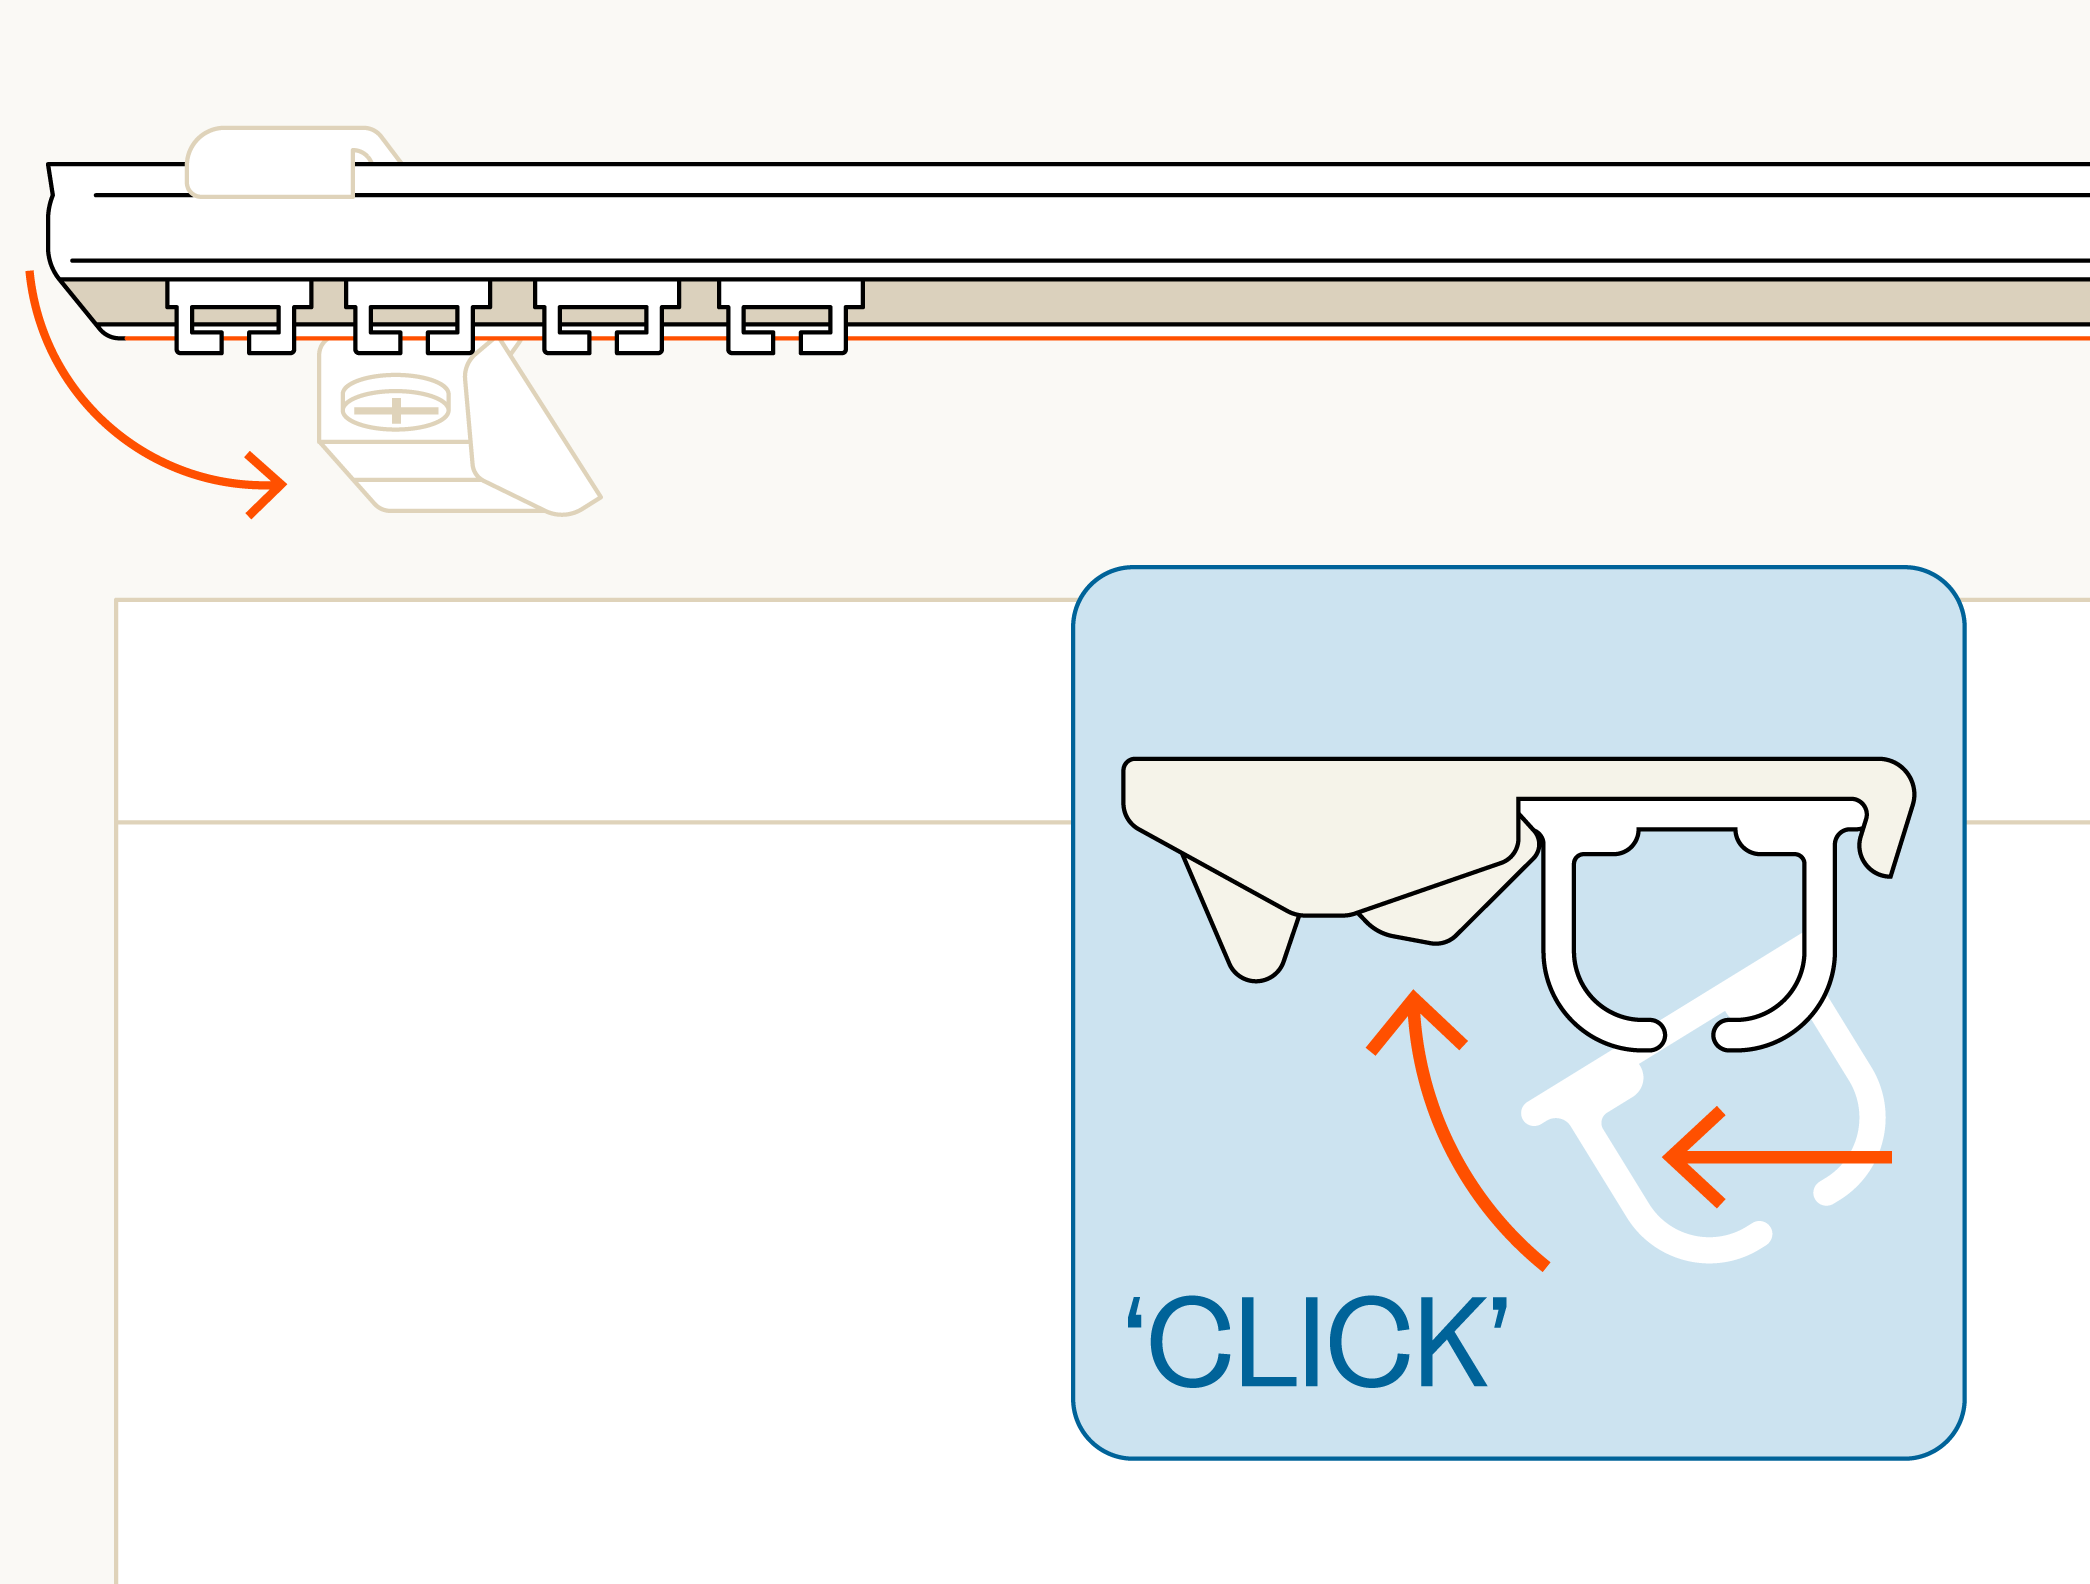
Keeping the front lip secure, line up your track with the back of the brackets, gently apply force until you hear a satisfying 'Click'. Repeat for each bracket.
Tip: If you're having trouble with this part, it's a easier to 'click' in your track one bracket at a time.
11 - Tighten your screws
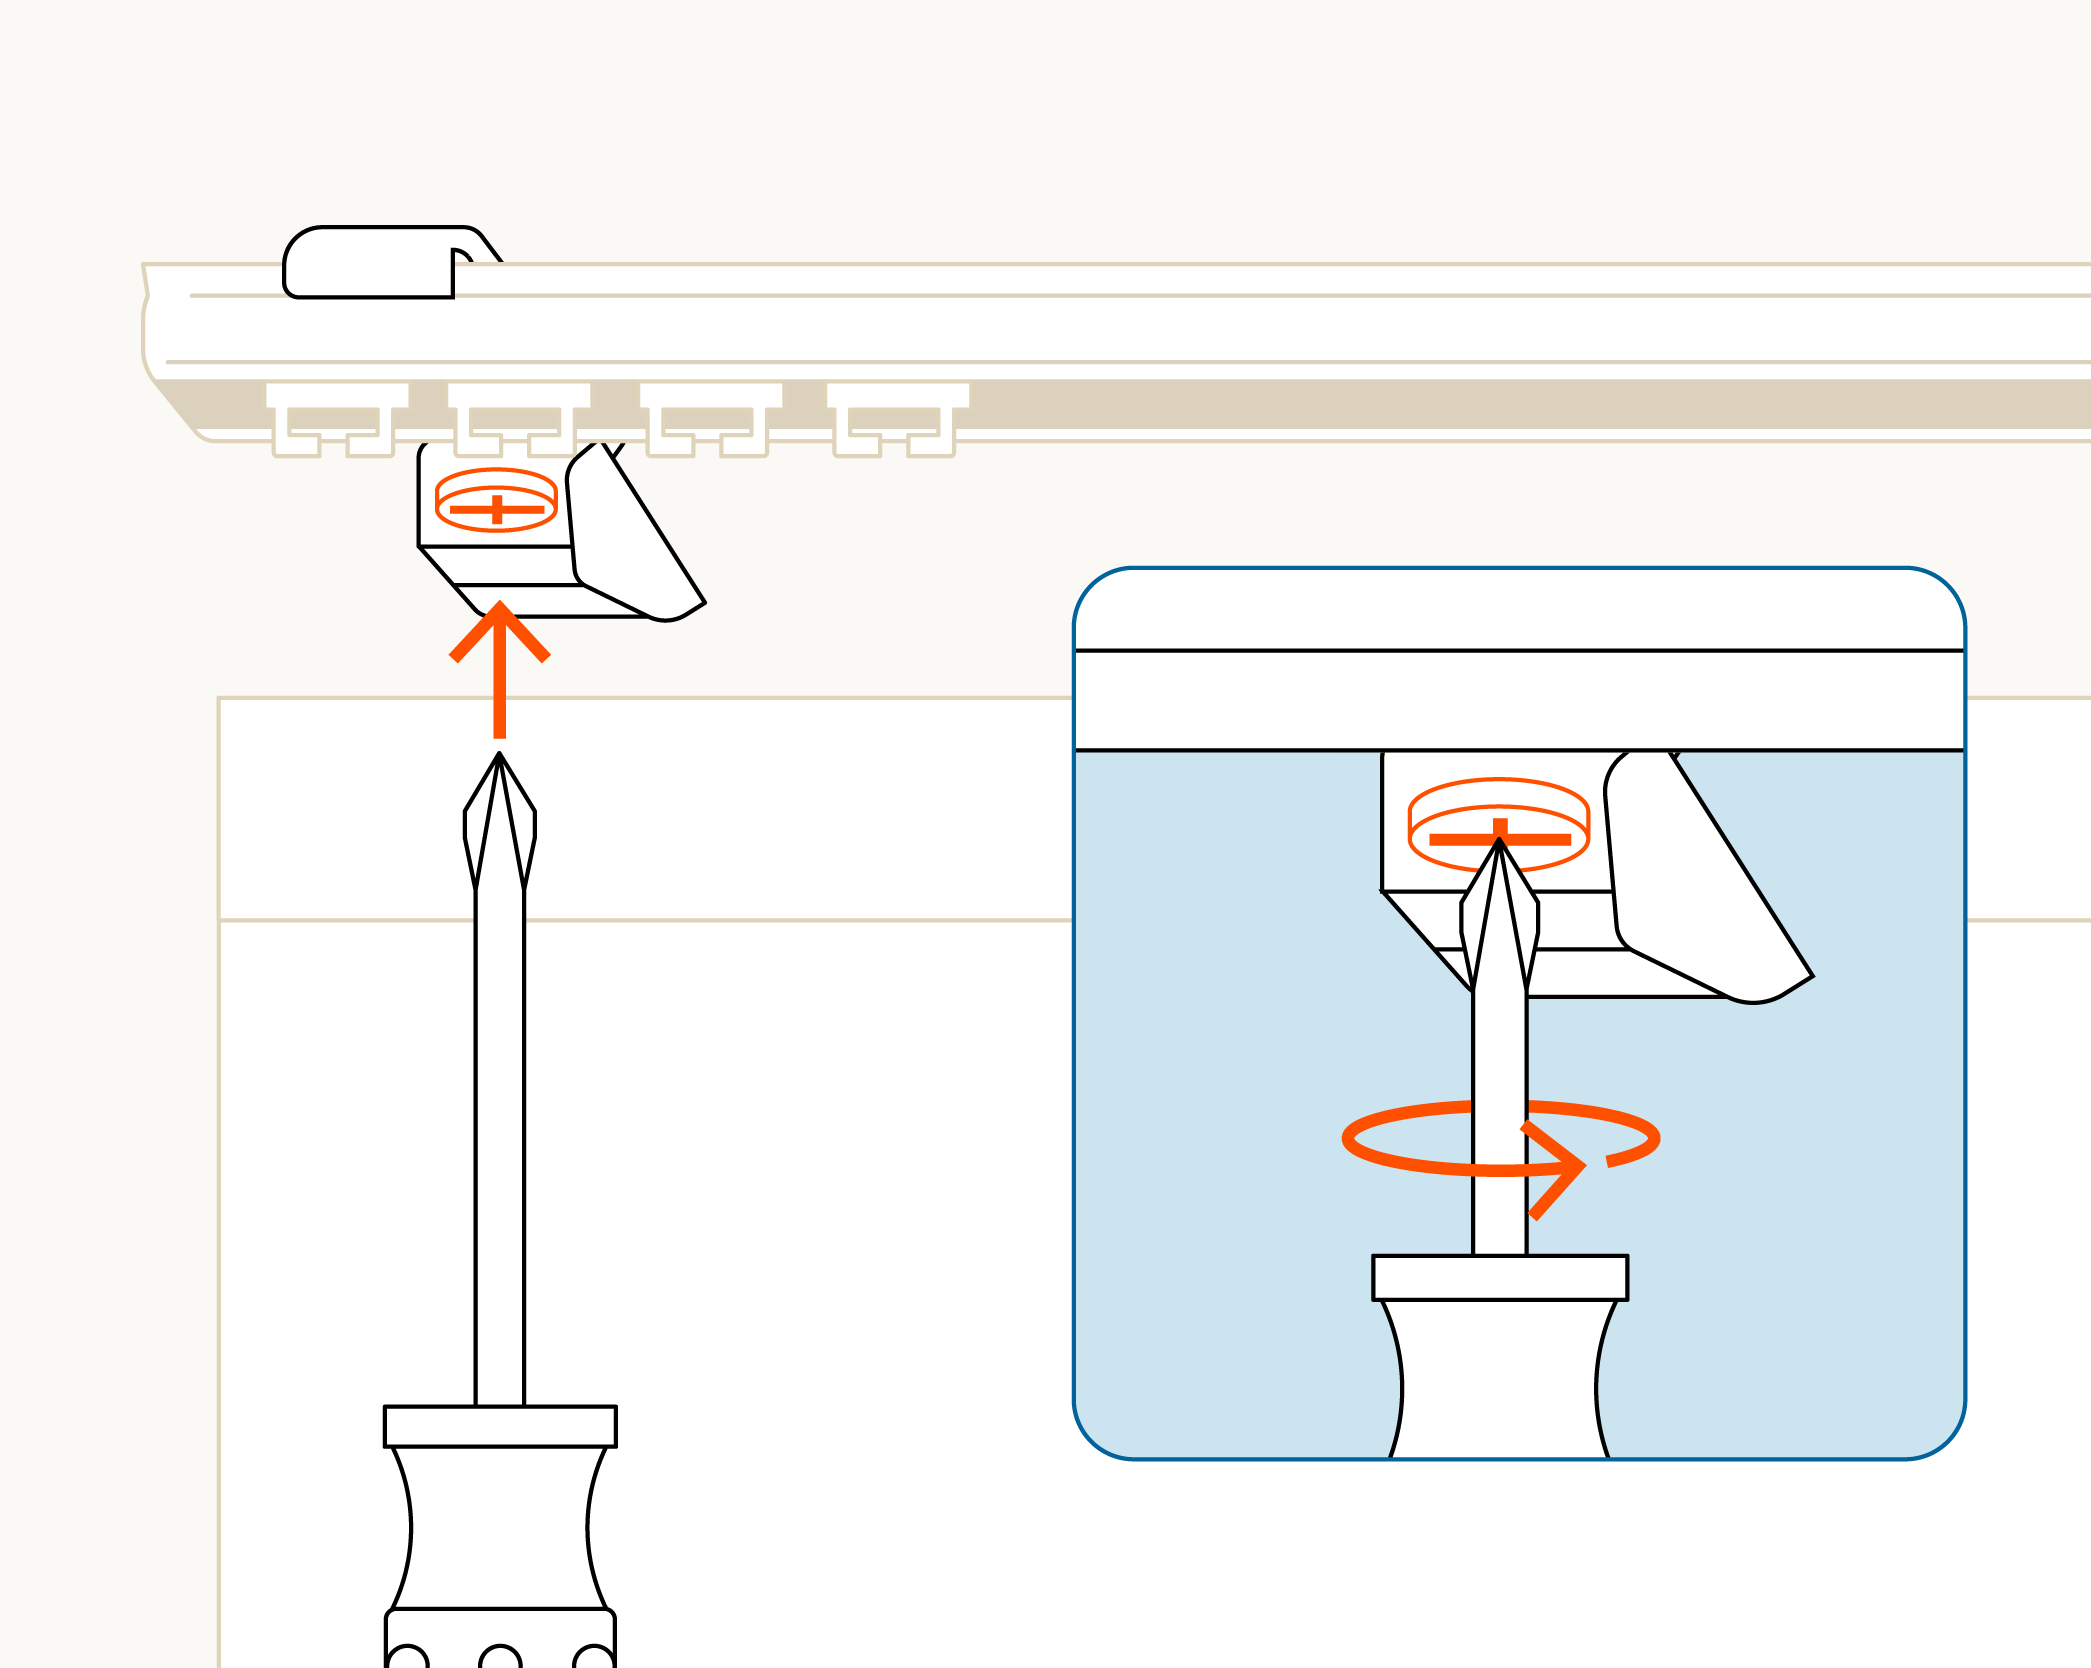
Now that your track is sitting snugly in the brackets, secure it into your ceiling by taking a screwdriver or a drill and tightening the screws on each one.
Nice, that's not going anywhere.
12 - Clip in your curtain
We're nearly there. Simply take your curtain and and 'click' it onto the track.
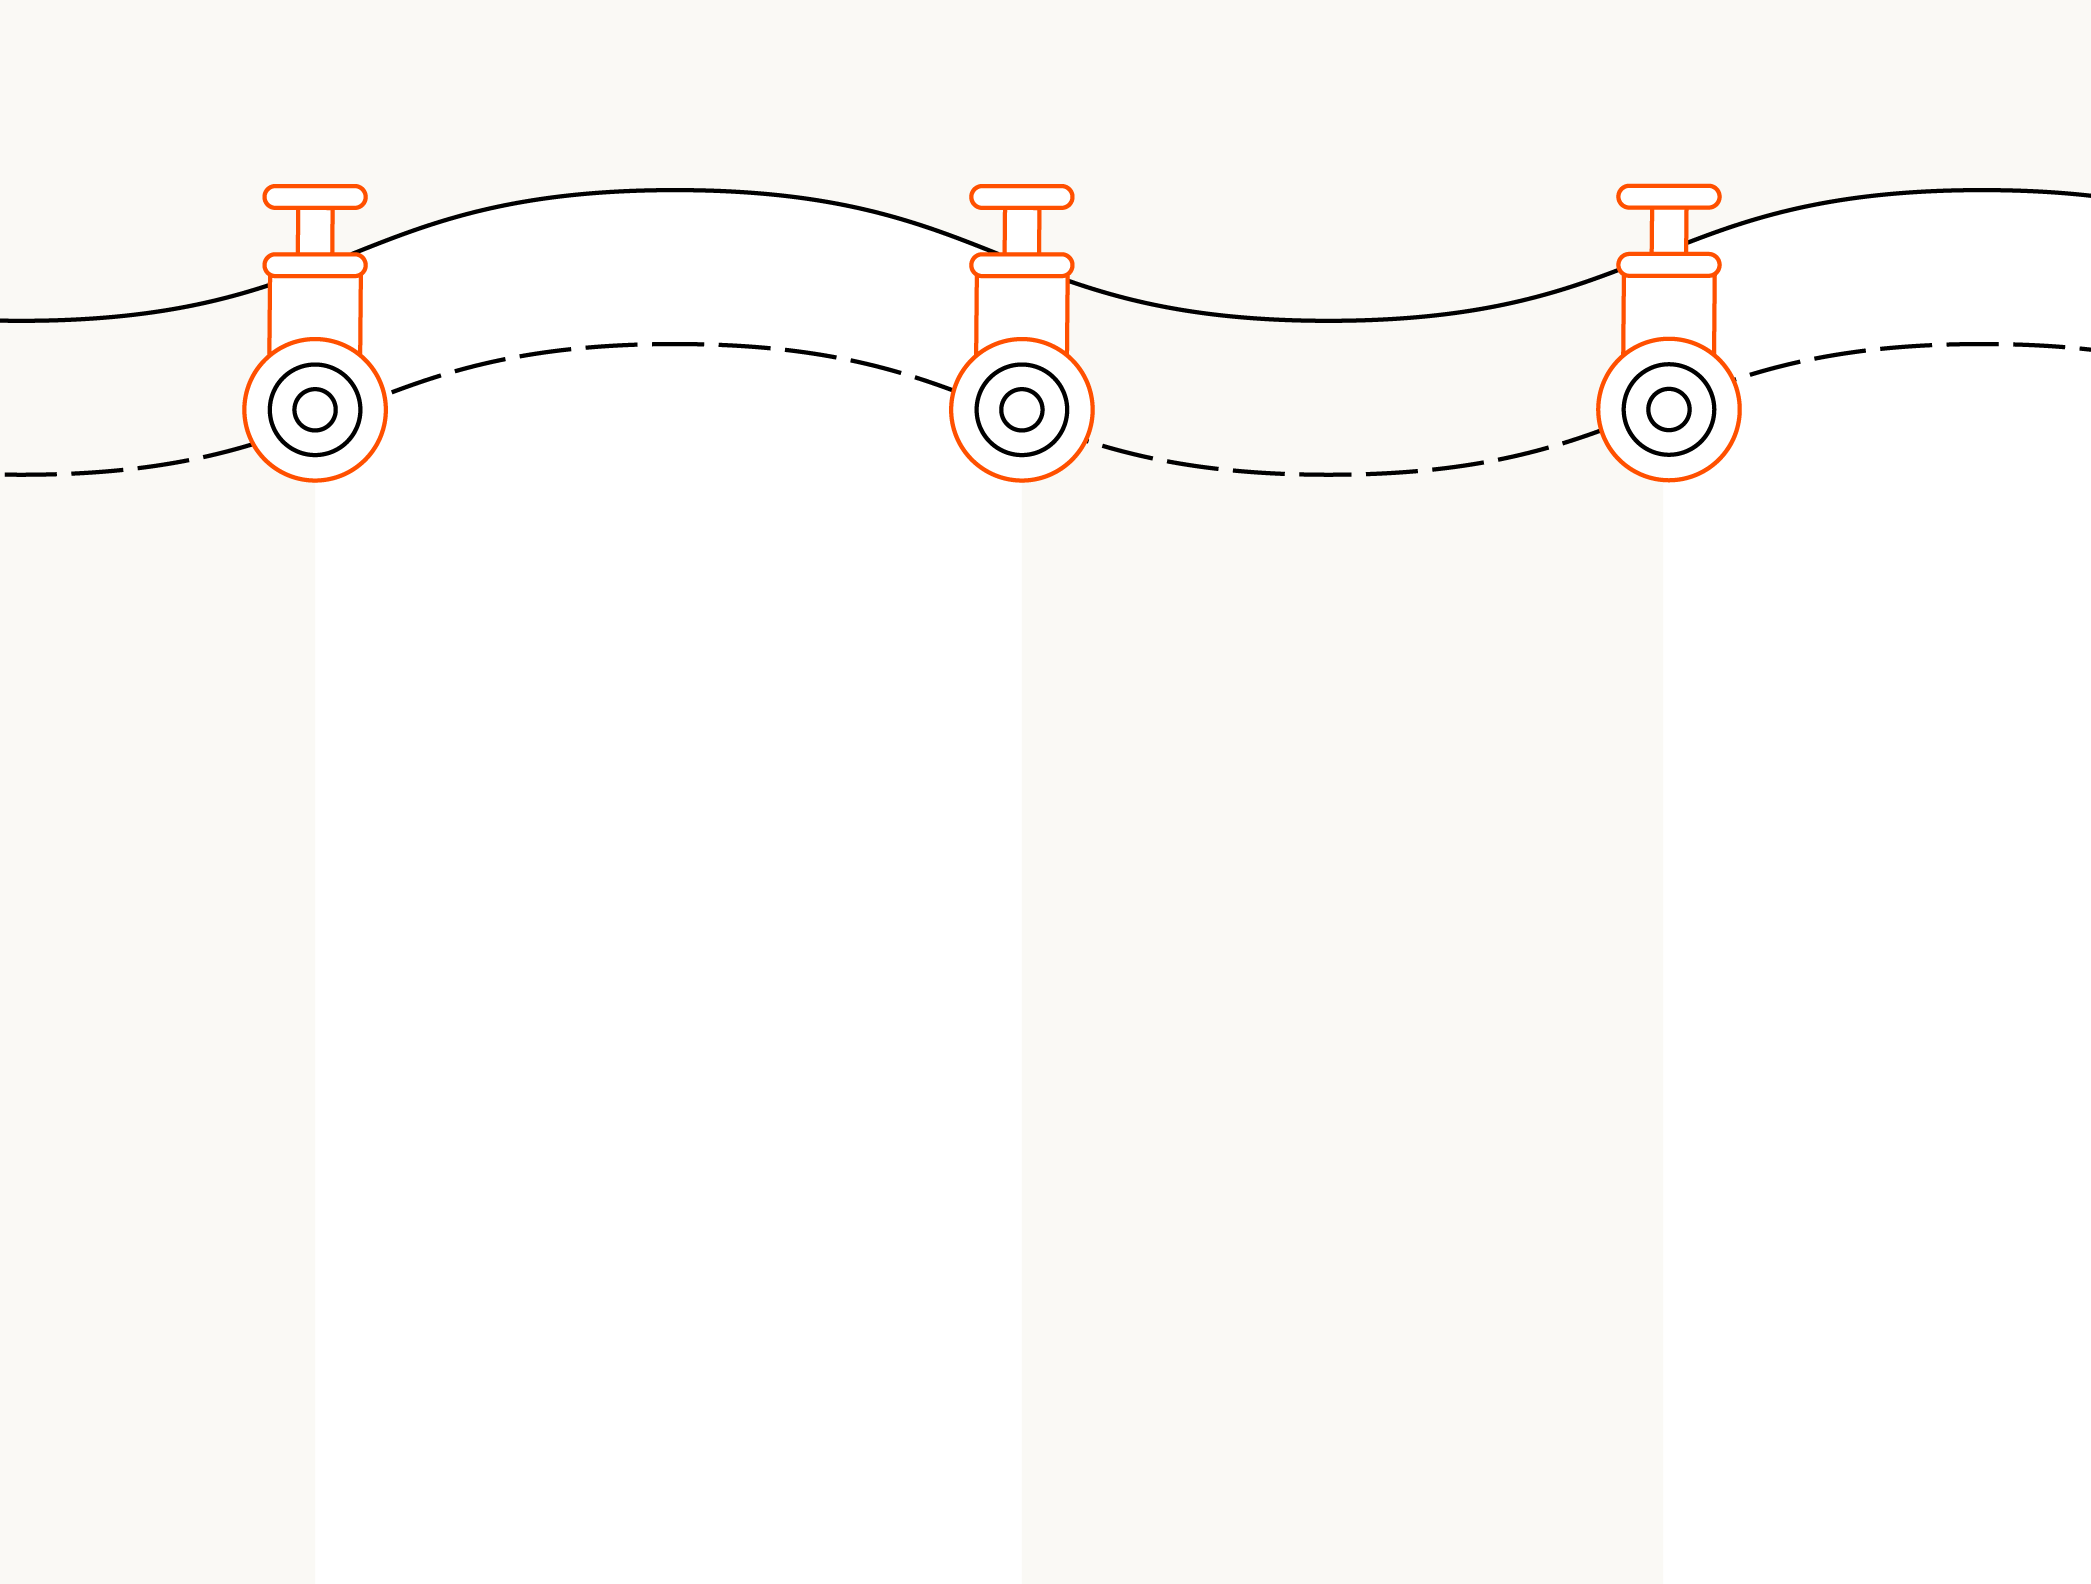
Take your curtain from it's box and observe the top edge. There will be a number of pendants clipped into the curtain's buttons. These have a corresponding carrier in the curtain track.
Tip: It's a good idea to wash your hands before handling your nice clean curtains.
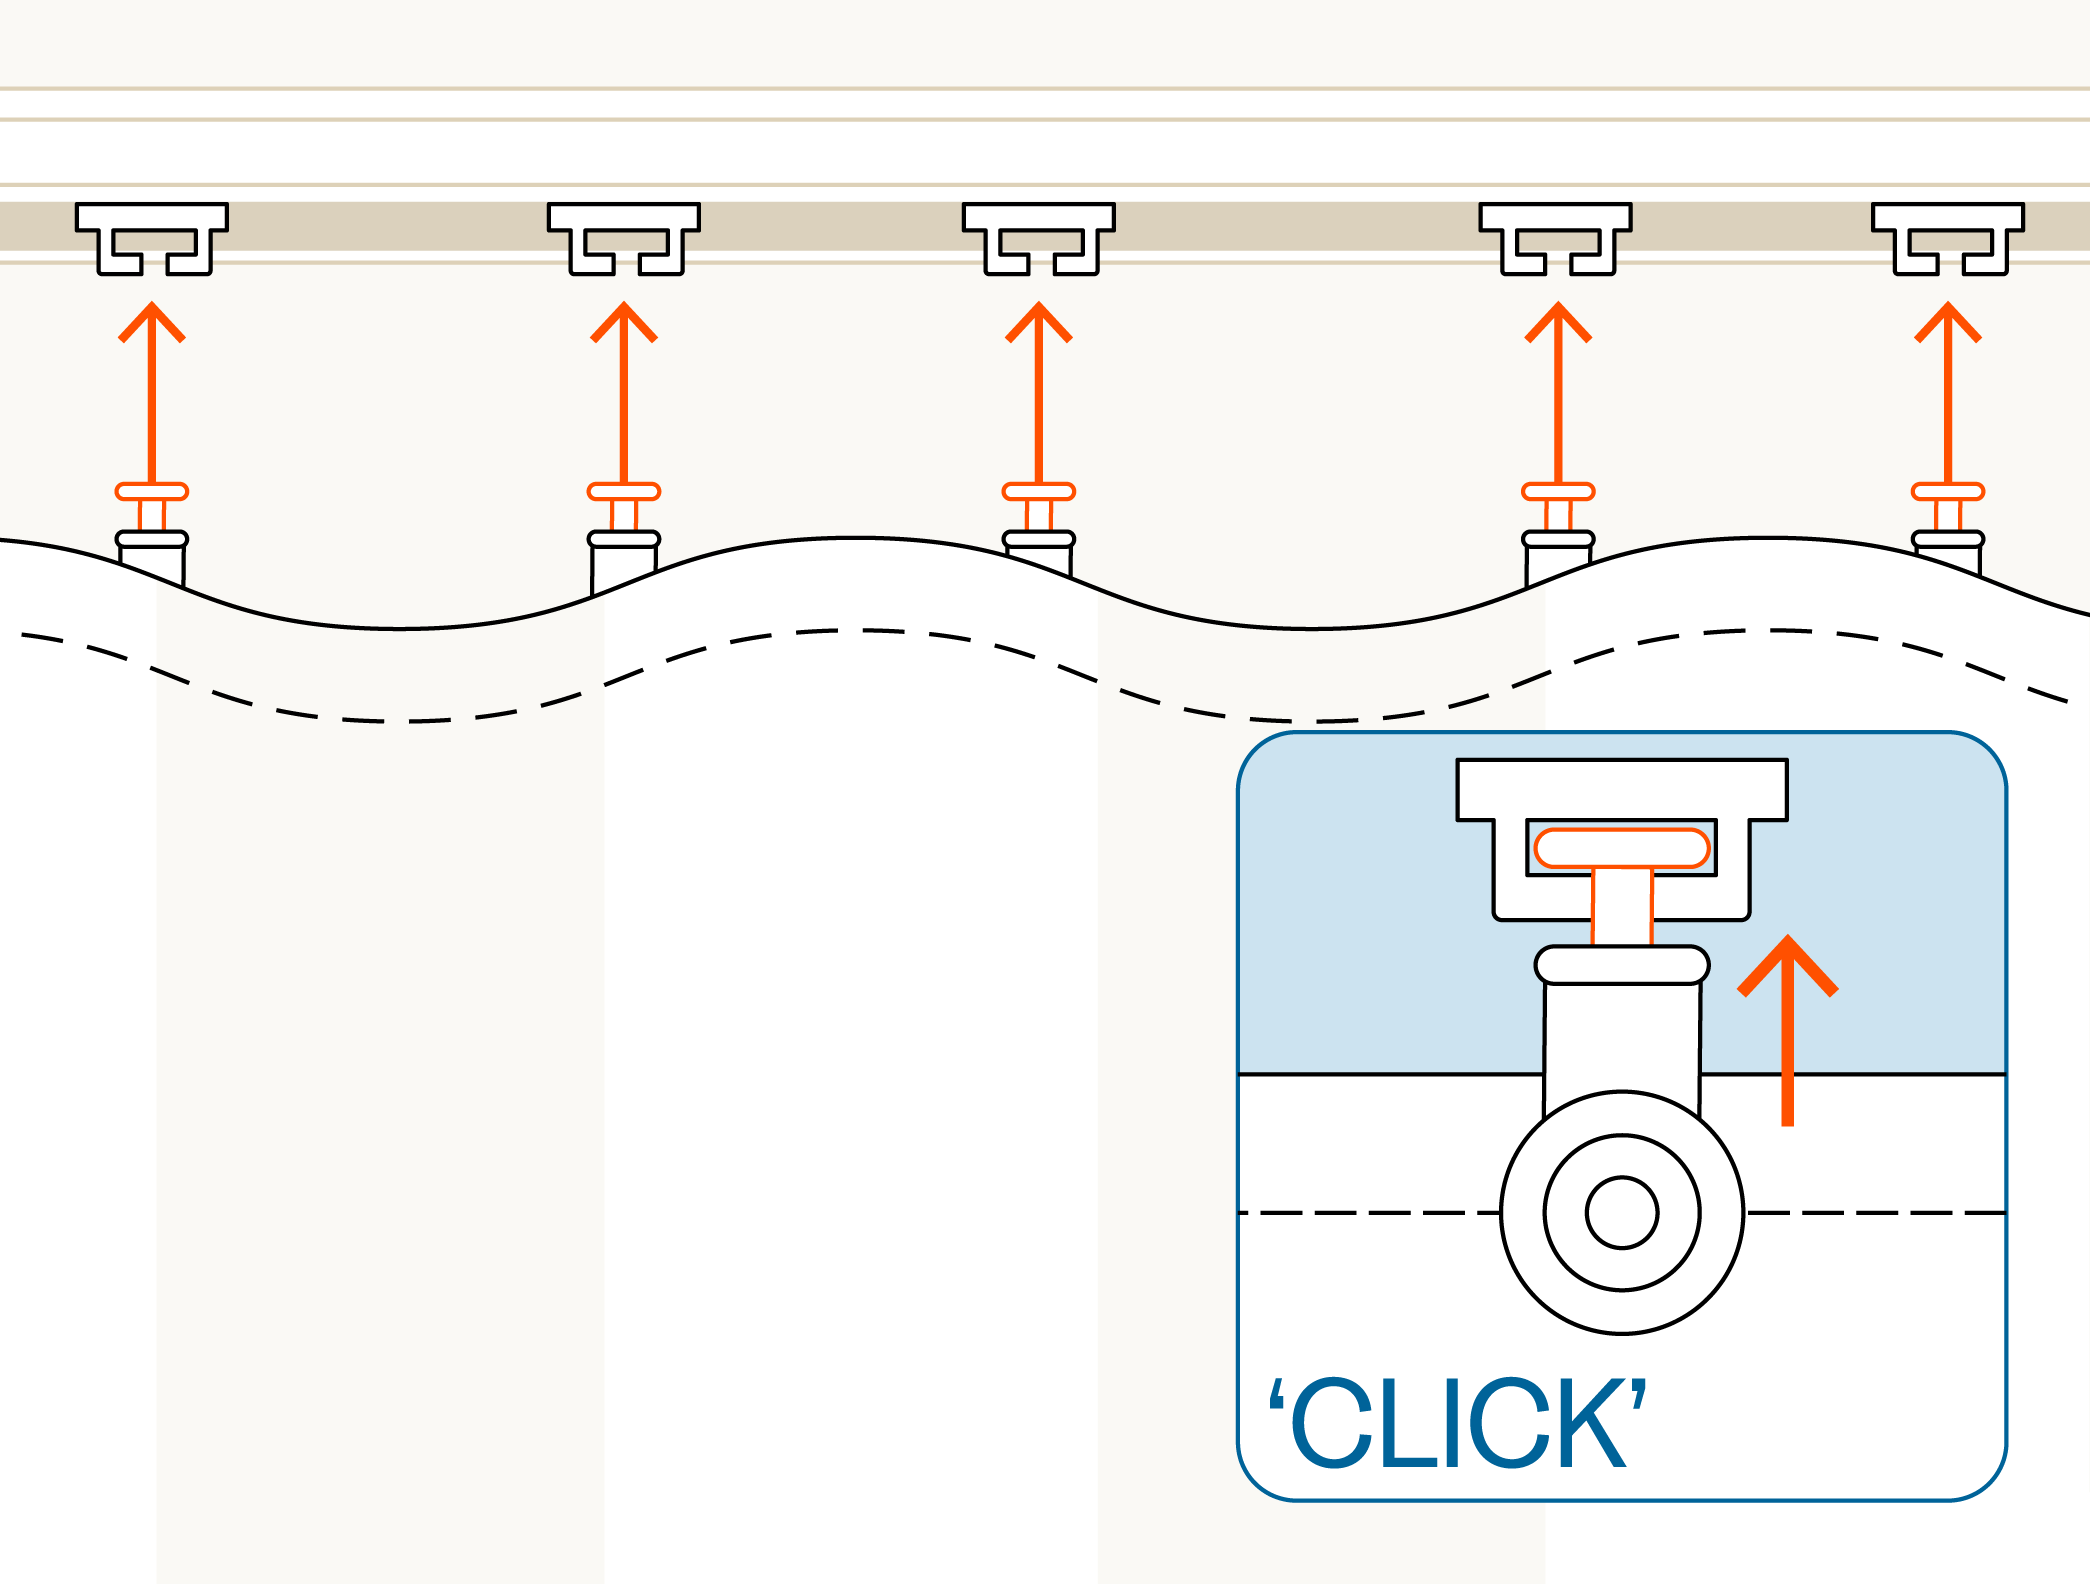
Guide each pendant into the corresponding carrier one at a time, you'll know when each one is secure when you hear our signature satisfying 'click'.
Repeat for each pendant.
Tip: Drape the curtain around your shoulders as you click in each pendant. This will keep it off the floor and make your curtain more manageable.
13 - Optional: Attach your wand
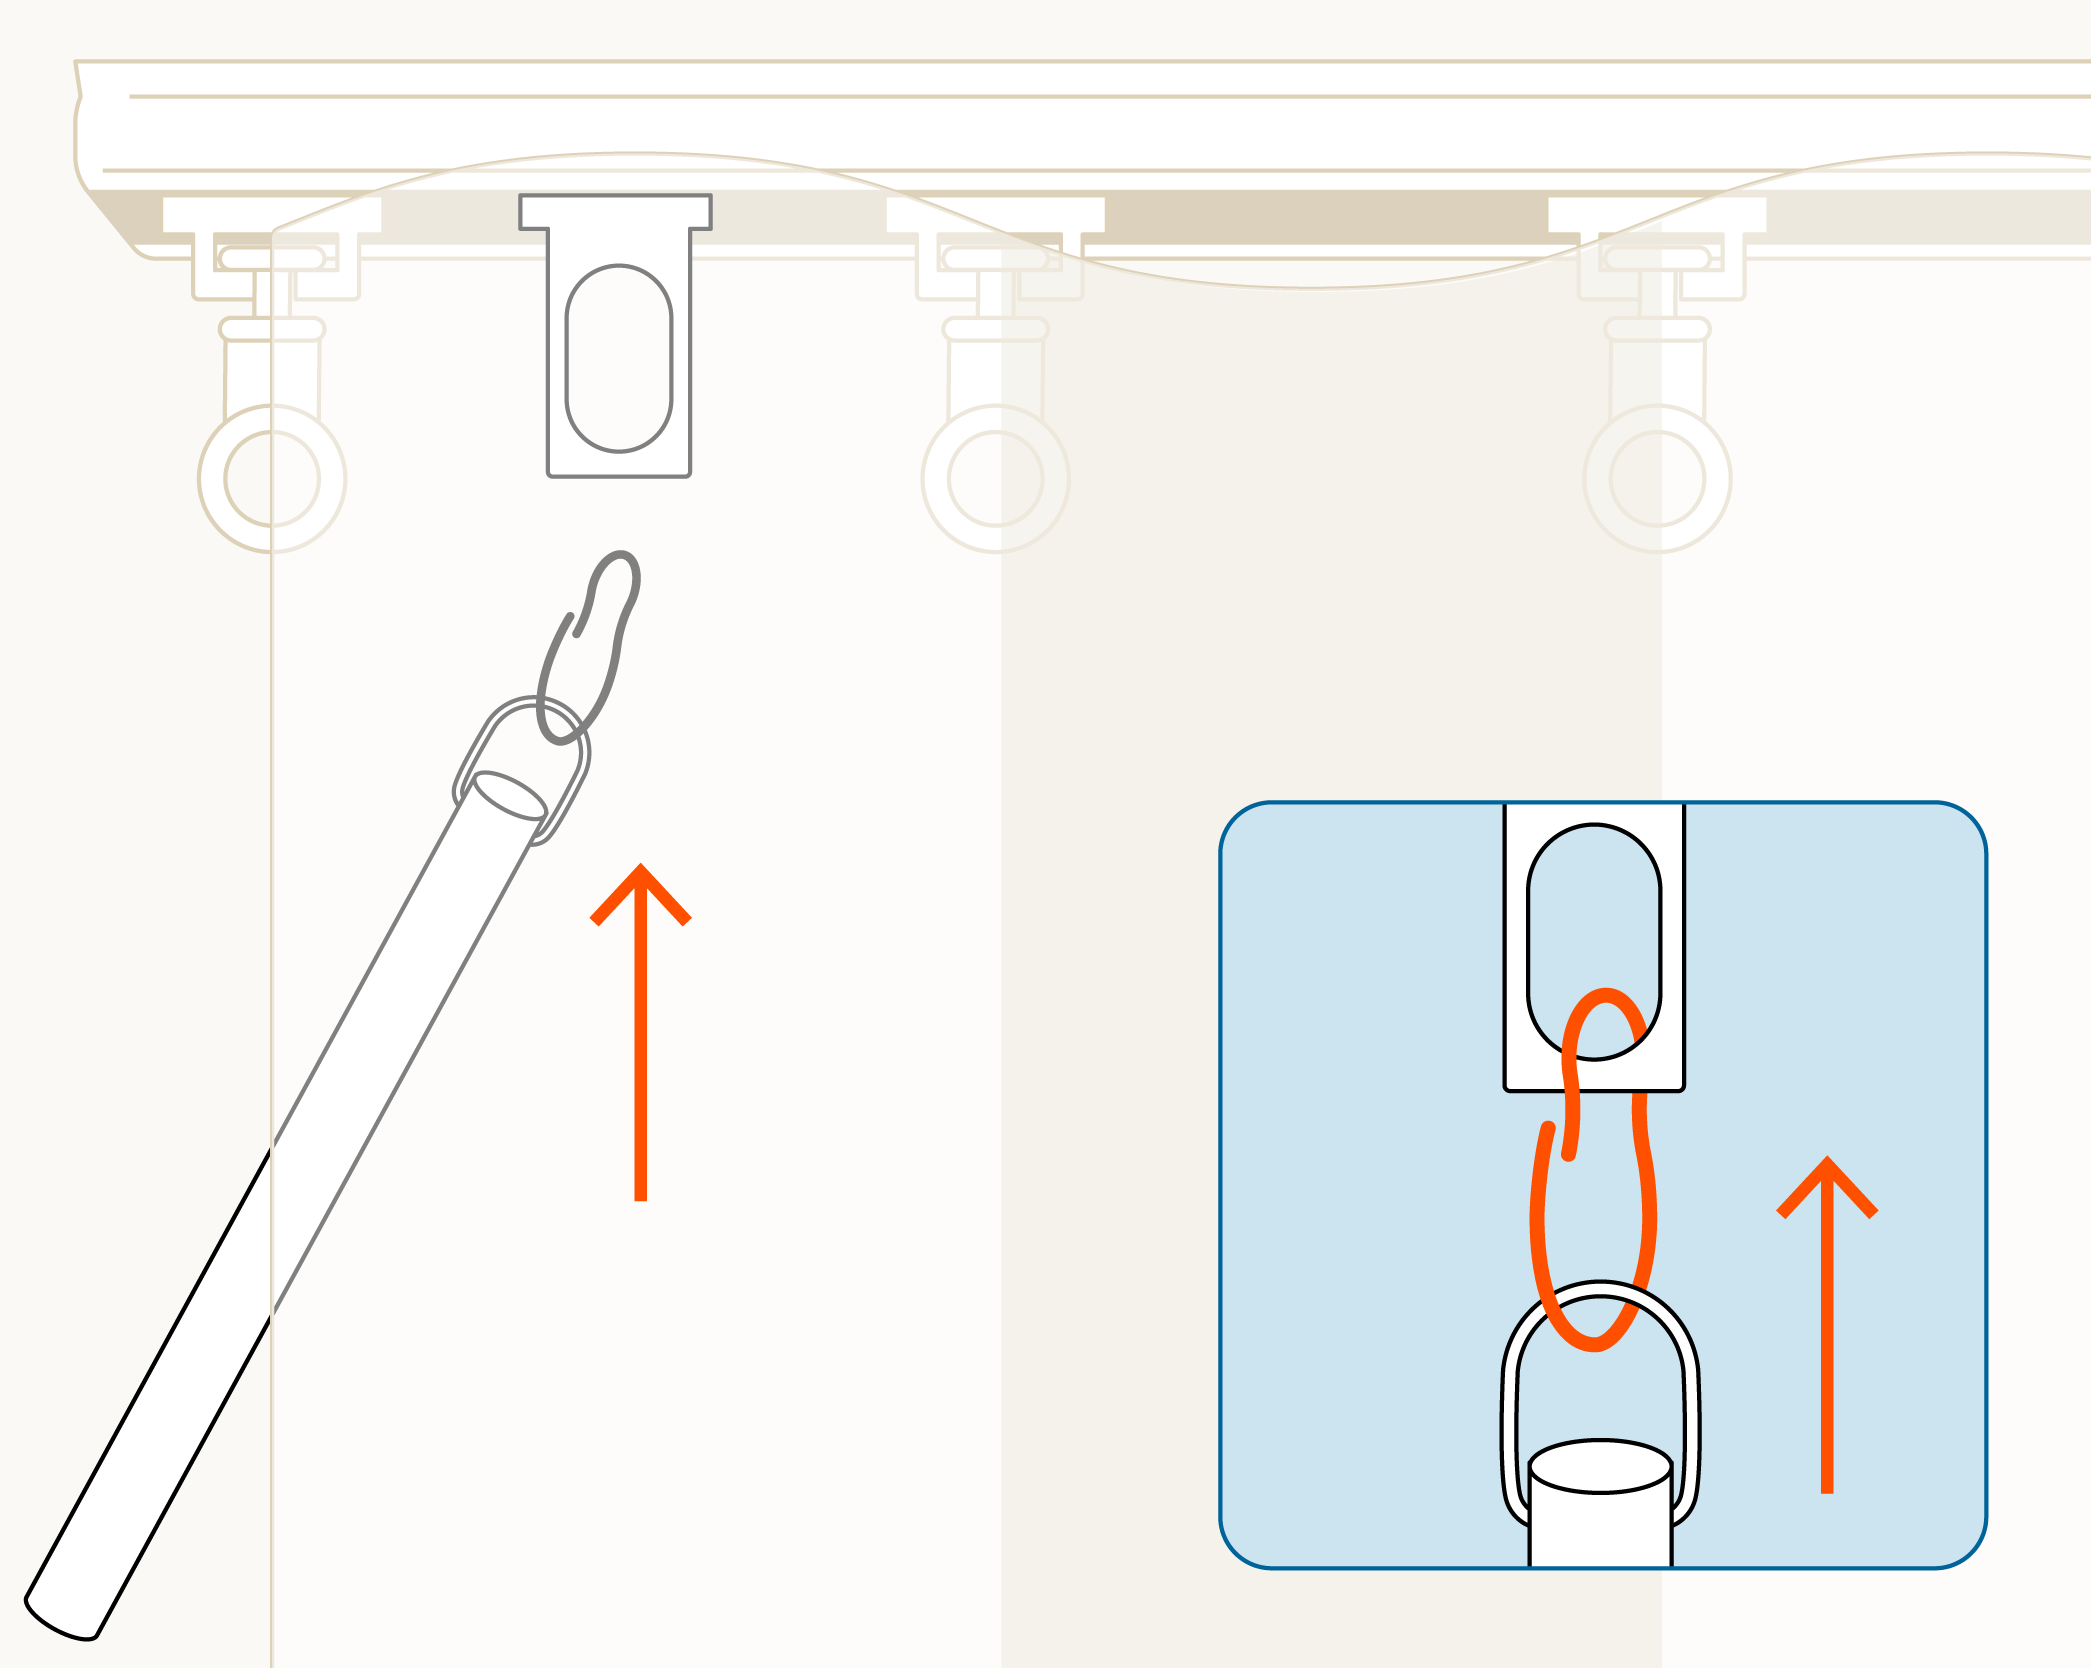
Optional (if you have a wand) - Pick up your wand and hook it onto the wand clasp, usually situated between the first two pendant hooks on your track.
Tip: Remember which way you chose for your curtain to open for a better indication of where the clasp is located.
14 - Add the finishing touch
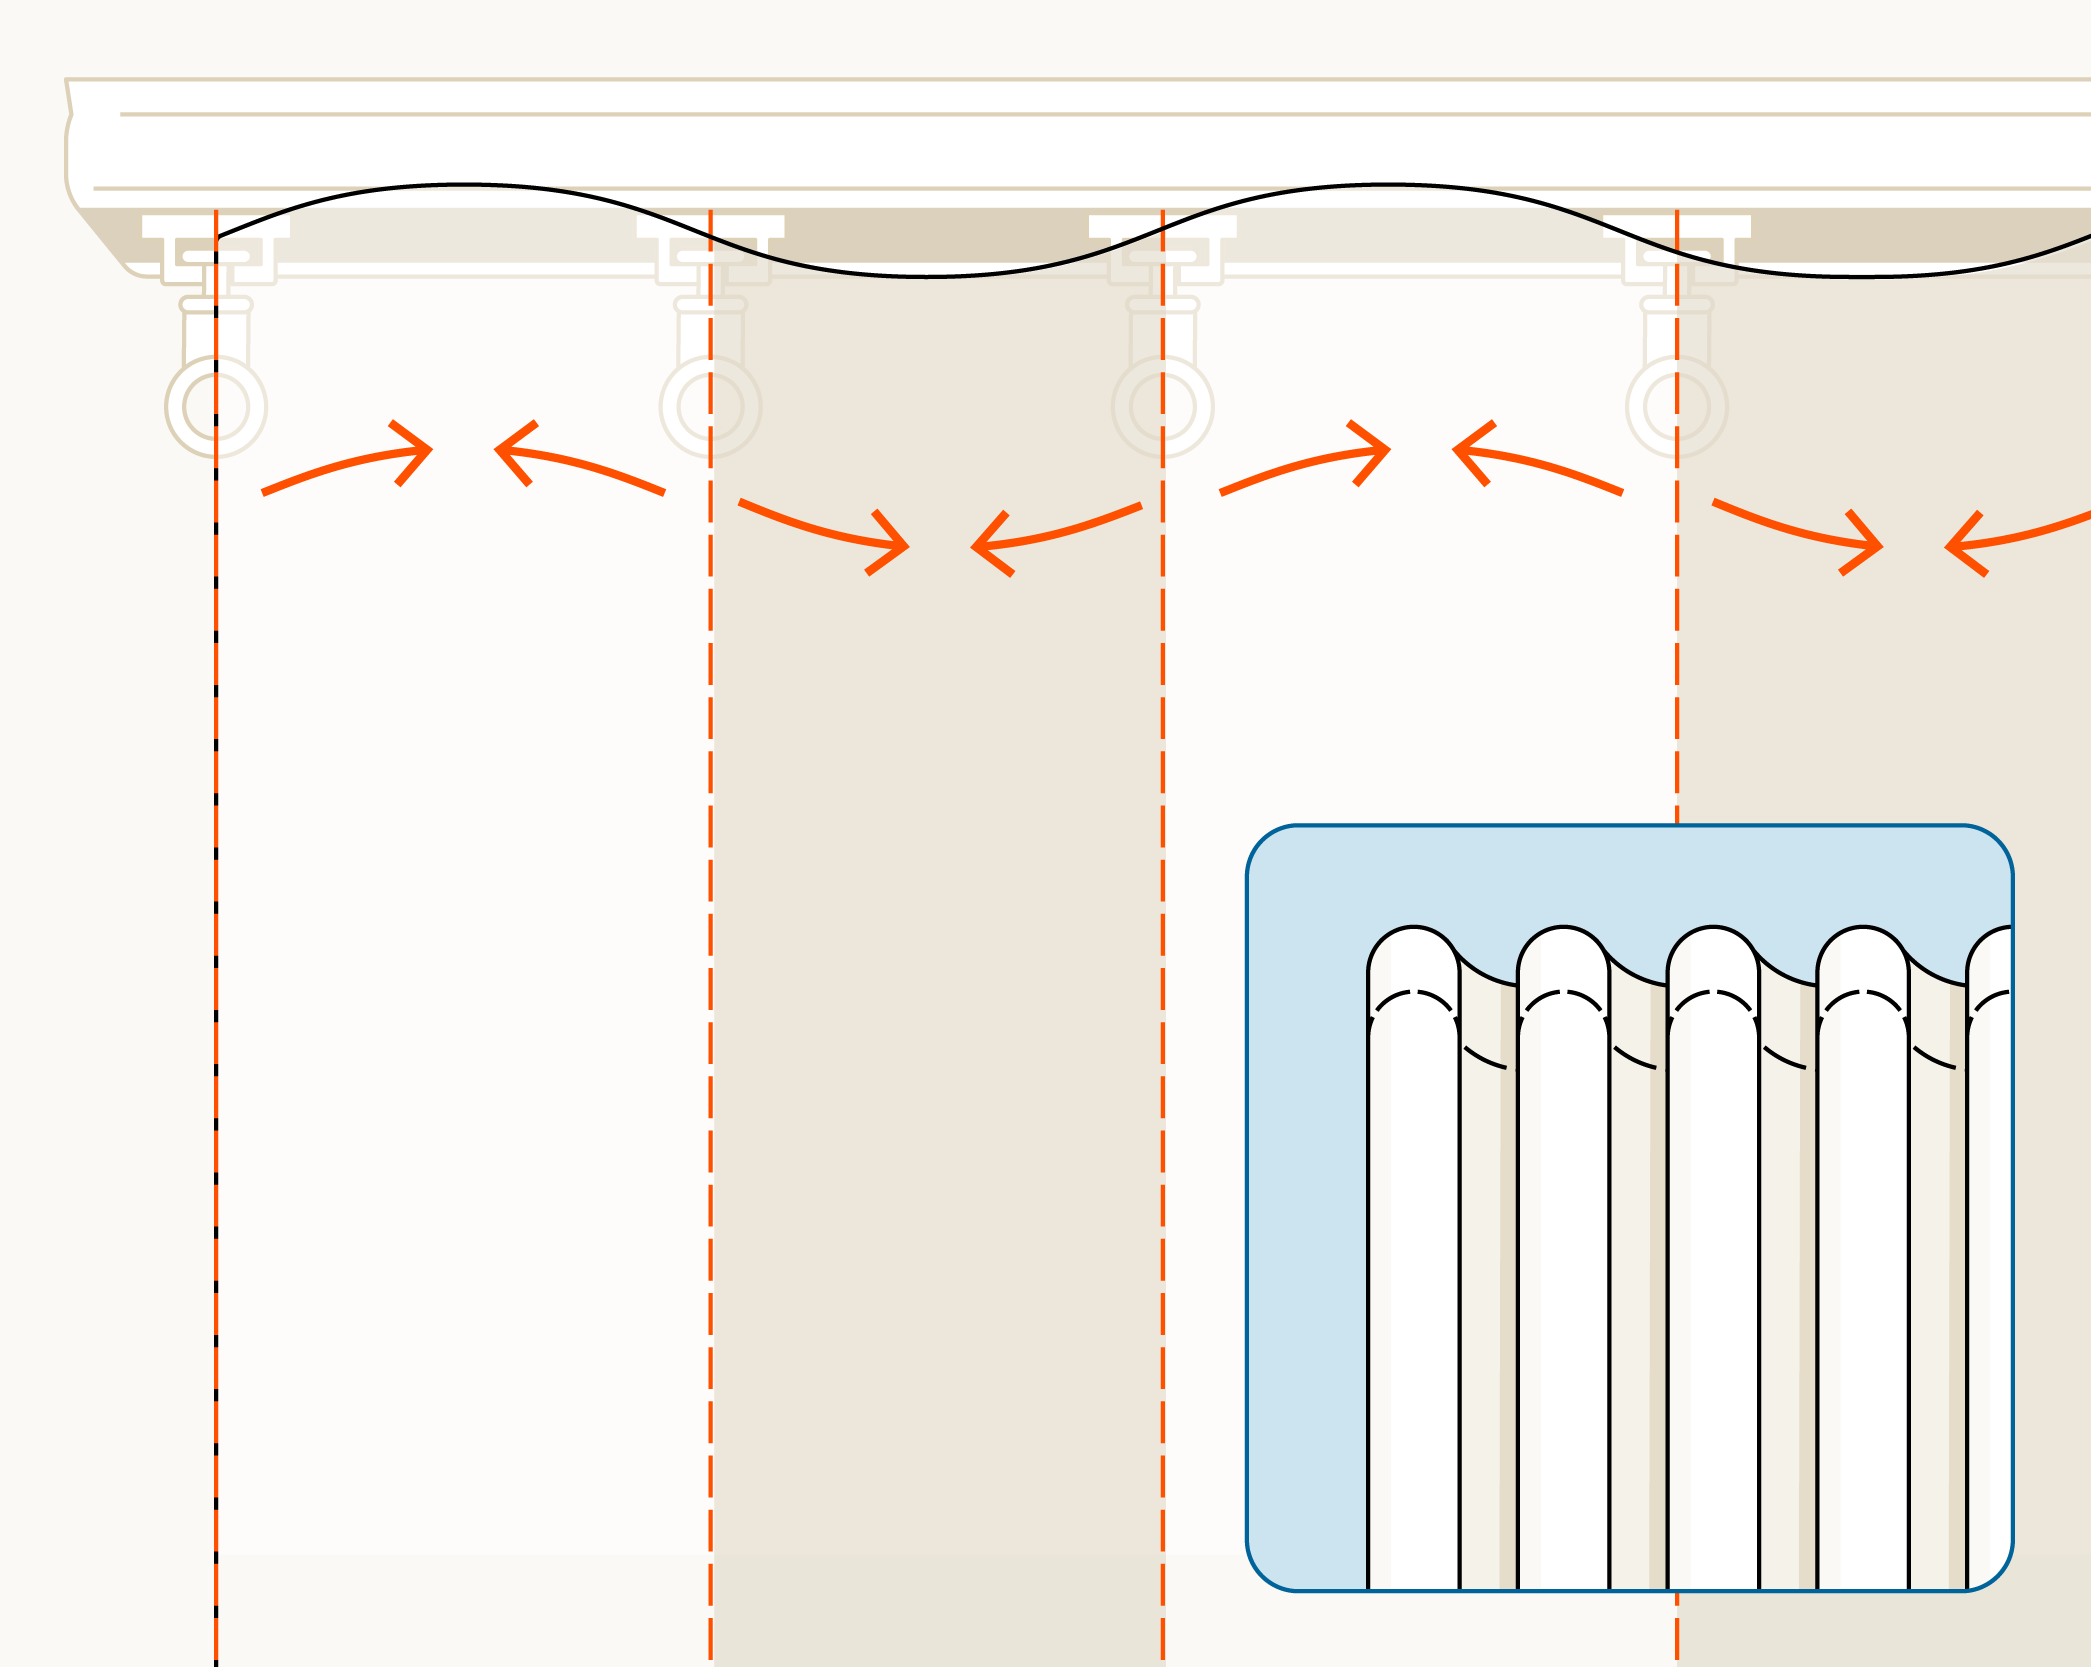
Our curtains are designed with a sleek S-fold design and yours will need a bit of love after it's been sitting in it's box.
Starting from one end and working your way across, take the first section of fabric between two pendants and gather it out towards you, creating an arc. Then take the next section of fabric and push it in away from you, your first two sections will resemble the shape of an 'S', woah! To tidy the folds simpy run your fingers through the channels of fabric created by your S-fold.
Continue this process alternating in and out, until your whole curtain looks absolutely divine.
15 - You've done it!
Well done on installing your new curtain - it's pretty easy right? If you have more curtains in your order, it'll be much easier the second time! Thanks for reading along and here at Shadey we hope you enjoy your new curtain.

We’ve got your windows covered.
We Measure Up
Rest assured at Shadey our products and support Measure Up. If you need extra support feel free to contact us here.
